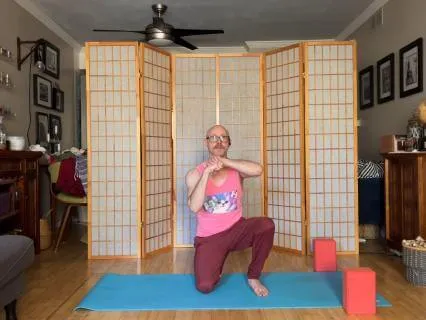
If your hips are tight or stressed or achy,
This is the class for you.
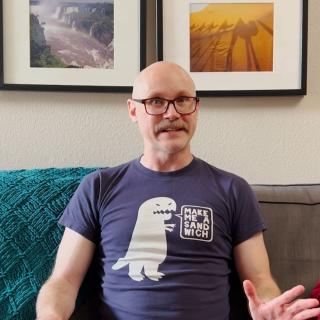
Hi,
I'm T-Bob.
I'm a yoga teacher that teaches a method of yoga created by a physical therapist,
And I'll teach my Buddhist-based mindfulness practice.
Today we'll work these hips out.
So happy hips are hips that are mobile and able to be stable.
So the hip joint is really simple construction.
The top of the femur a little neck and a ball the ball plugs into the big socket big deep socket that is in the bottom of your pelvis so the pelvis is this big structure in the middle of the body and the femurs plug into it like that.
So the different actions of the hip joint are this forward and backward motion,
Flexion extension.
It's got a side-to-side motion,
Abduction and adduction.
It also rotates,
So you can spin the whole leg out and in,
Out and in.
And then when you combine all these movements,
We get what we call circumduction.
So we'll do all that stuff.
Start out by grabbing a block and making your way onto your back.
Bend your knees.
Set your feet flat.
And set the block between the thighs,
Any setting that works for you.
We'll start with a glute bridge.
So if you're used to yoga bridge where the heels are in really close.
Walk the feet further forward.
And when you're ready,
We'll do our first action of the hip joint,
Which is.
.
.
Extension in this case.
So hips lift off the mat.
Glitz.
The muscles in the back and sides of the hips should be relatively firm.
How do you know if your glutes are working in a bridge?
You've got hands.
You can put the hands on the muscles to feel.
It's your body.
You're allowed to touch it.
All right,
So those muscles under the flesh here should be somewhat firm to hold you up.
All right,
From here we'll add on our wrist stretch.
So pretend like you're doing play.
Reach the palms up to the sky.
Pull down on the left fingers.
With the right hand to stretch the underside of the palm,
Underside of the forearm.
Underside of the fingers.
Take a few really big breaths here too.
Holding strong in the glute.
And stretching the rest.
Great,
And then switch the other side,
Right palm up.
Pull down on the right finger,
Stretch the right wrist.
Glutes still holding you up.
Maybe a couple more big breaths.
Great,
And then lower the hip.
Back down to the map.
Set the block aside for some abdominals.
So as we do the abdominals,
We'll also work the hip joints a little bit.
They'll be unweighted,
So it's not going to be hard work,
But we're still going to move.
So clasp the hands behind me.
I close the elbows in and out.
Take a big inhale on the ground.
And with your exhale,
Curl up off the shoulders,
Hold on empty,
And pick up the left foot.
Bring that knee just about right over your hip joint.
And try to do that without tilting the pelvis back and smashing the low back.
So keep the low back flat.
Or keep the low back off the map,
Curved.
Set the foot down,
Inhale a little.
Great.
Exhale.
Curl up without flattening the low back.
Pick up the right foot.
Knee about over hip.
Set the foot down,
Inhale as you lower.
Great,
Let's add on to that.
Exhale,
Curl up.
Pick up the left foot and then spin your shin to the right.
And then to the left.
To the right.
And to the left.
So this is rotation coming from the top of the femur.
Your hip joint is doing this action of rotation.
Good.
Set the foot down.
Inhale.
Lower.
Exhale,
Lift.
Pick up the right leg.
Spin the shin.
Left,
Right.
Left,
Right.
So as you watch the top of the thigh,
When the top of the thigh rolls out,
That's outward,
External rotation.
When the thigh rolls in,
That's inward,
Internal rotation.
Set the foot down.
Inhale.
Lower.
Great.
Do two more.
Exhale,
Lift,
Pick up the left leg.
Spin the shin.
Left,
Right.
Left,
Right.
And this time,
See if you can turn a little bit more in each direction from the top of that thigh.
Where the femur plugs in.
All right,
Set the foot down.
Inhale,
Laura.
Last one,
Exhale,
Lift.
Pick up the right leg.
Spin the shin right,
Left,
Maybe seeing if you can get a little more rotation.
Satisfitam.
Inhale,
Lower.
Big breath up.
Hug your knees in towards your chest,
So that's flexion of the hip joint.
Polymony is?
You might rock side to side if that feels nice,
A little back massage.
Or you could circle the knees around if that feels nice.
Great.
If you like to rock forward up to a seat and back,
You might do that a few times.
If that's not something you do.
Roll over to your side,
And then press yourself up.
All right,
Have a seat for a second while I demonstrate this next thing we're going to do.
We'll be in quadruped,
Quad meaning four,
Ped meaning feet,
Four feet.
Only.
.
.
Well,
The feet are technically on the ground.
I guess you could call this quadruped since the feet technically touch the ground.
But it's hands and knees.
It's the fan seating for hands and knees.
We're going to do some big knee circles,
But we'll do them in a really specific way.
So watch as I do this first round.
I'll move my right knee way over to the left as I internally rotate the leg.
So that means the top of the thigh rolls in,
Shin spins out.
I'll move the knees straight forward.
Bringing it back to no rotation.
Lift the knee out to the right like a dog peeing on a fire hydrant.
Without lifting up the right side of my pelvis.
So I keep my right hip point squared down.
And then spin and kick the sky with your right foot.
Alright,
So make your way to quadruped,
Or if you're already there,
Great job.
Alright,
And then we'll do these.
CAR's controlled articular rotation,
C-A-R.
Start by shifting a little more weight into that left knee.
You could also pad the knees here.
If you have some knee stuff going on,
You might have blankets under the knees or double or triple fold your mat for more cushion.
Alright,
Bring the knee to the left.
As you internally rotate the leg,
Circle the knee straight.
Open the knee,
Out to the right,
Fire hydrant.
And then spin and kick the sky with your right.
Foot.
Let's do two more circles in that direction.
Knee goes left.
Knee goes forward.
Fire hydrant.
Kick the sky.
Last round,
See if you can go a little further in these directions.
Over,
Left,
Straight forward.
Out to the right.
And then kick.
The sky.
All right,
Set the knee down and we'll reverse direction.
Start by kicking up and back to kick the sky.
Open the octal ring.
Me straightforward.
And then internally rotate as the knee comes over.
Let's repeat kick up and back.
Fire hydrant.
Last one.
Kicks go.
Open me.
Straightforward.
And over to the left.
Great,
Let's switch sides.
So when you're ready,
Bring that left knee forward to the right.
Straightforward.
Fire hydrant.
Kick this guy Good,
Do a couple more circles in that direction.
So some things you might watch for as you do this.
As the knee comes out,
Try not to lift up the left side of the pelvis.
Last circle in this direction.
And as you kick the sky,
Try not to dump the low back into the mat,
But keep the low back lifted and neutral.
Alright,
Let's go the other way through circles as well.
Kick the sky without dumping the low back down.
Open the knee without lifting the left hip.
Circle me forward.
And to the right.
Good.
Do two more circles in this direction.
Kick.
Fire hydrant straightforward.
Internal over to the right.
Last circle.
So these cars are great because they take your hip through all the directions of movement.
And they do it.
In a way,
These were created by Dr.
Andrea Ospina.
They do it in a way that preserves whatever mobility you have in your hip.
And as you keep doing them over time,
You can actually develop more mobility in these hip joints.
Alright,
Moving on from here,
Step your left foot forward.
For a low lunge,
So.
My right knee is stopped.
On top or my hip is stacked right on top of my knee my shoulders are stacked on top of the hip and my ear head stacked right on top Great,
Grab your blocks.
I forgot to say you're going to use some blocks,
But grab your blocks.
Three blocks right under your shoulders.
For some flexion,
Extension.
So tuck your back toes,
Lift your back knee.
Inhale to pull the hips back in space.
And exhale,
Return where you came from.
Tap the knee down.
Let's repeat.
Inhale,
Pull it back.
Exhale,
Knee down.
I call these runner's stretch.
Kind of like a runner getting ready to run.
And rocking them forward and backward.
So the dynamic movement for the front hamstrings.
Dynamic stretch of the hamstrings.
A moving stretch.
And we got both hips doing a little flexion and extension.
All right.
From here,
We'll get up.
And turn to face the right side of your map.
When you get there,
Bring your feet about parallel.
So goddess pose,
Temple pose is what we're going to explore here.
Explore a new way of getting into it.
So grab onto the sides of your pelvis.
Hold the bones still.
Hover the left heel.
As you spin that leg out,
External rotation,
And then set the heel down.
Only spin it as far as it feels comfortable in your hip and doesn't turn the pelvis to the back of the mat.
And then do the same thing with the other,
Like lift the right heel.
Spin the leg out.
Only as far as feels good,
On the hip,
And doesn't turn the top.
Then set the feet down so in this way you end up with knees pointing in the direction of toes You're not cranking the toes out.
Twisting the knee joint.
But this is a more hip and knee and ankle friendly shape of goddess.
Keep this in mind.
Maybe this is where your goddess usually is.
Or maybe you're one of the people that tries to crank the feet open.
Or maybe you're one of the people that doesn't know what goddess is.
That's fine.
All right,
From here,
Turn back to the front of your mat for a crescent lunge.
So feel free to really adjust the feet to get your crescent really stable.
You can bring the hands to the heart if you want.
The hands could also be on the pelvis if you'd like.
We'll take a big inhale here And with your exhale,
Stand and lift the right knee.
So you might do this in little steps and keep the toe down.
Inhale to step the foot back.
To Crescent.
And then stand and lift the knee.
So you can continue these little steps if that works for you.
Or you can set the foot down.
Inhale.
Pick the foot up.
Accent.
Great,
Do a few more rounds of this.
So this is also forward and backward,
Flexion,
Extension of the hip joints.
Trying to keep the pelvis.
Not a big arch and not a big tuck of the tailbone either,
But finding that in between position.
Neutral pelvis.
All right next time you're standing with the knee lifted pause hold breathe a little balance moment if you want to reach the arms up you could do that If you have the toes down,
That's great.
Great,
And then set the right foot down and grab onto the sides of the pelvis again.
I'll turn you stay where you are mature towards you so you can see what I'm doing here.
All right,
Lift the left leg.
Out to the left,
Straight out to the left.
And then the right leg straight out to the right.
So this is the abduction adduction movement that I talked about.
As you do this,
Try not to hike up Hike up the side of the pelvis.
It's not about how high you get the leg to go.
It's how much can you move the femur?
Without the pelvis moving.
So the pelvic bones should stay relatively level.
You might have a little shift side to side as you get your weight over that standing leg each time.
You might feel this in the outer hips here.
This is glute medius,
Outer hip muscle that stabilizes the pelvis and pulls the leg away from center.
Great.
I'm feeling it.
All right.
Next time,
Both feet are flat.
We'll come into chair.
So bend the knees,
Sit the hips back.
If you like reaching arms up,
You can.
If you want to have the arms by the sides though,
That's fine.
Or you could even have a little arm goalpost action here.
Just take two big breaths.
Great.
One more big inhale.
And on your exhale,
Forward fold.
And we'll do the second side of the sequence.
So step the left foot back.
Set the knee down,
Grab your blocks.
For runner's stretch rock.
When you're ready,
Rock it back.
Rock it forward.
Back,
Rock it forward.
Try not to jam that front knee super straight when you rock back.
Keep a little bend in the knee.
So that we don't We're pulling on the hamstrings,
But we're not cranking on them.
We're not jamming them out.
Trying to keep them active,
Not stressed out.
Alright,
And then get up turn to the left side of your map for goddess.
And maybe you come right into your.
.
.
New goddess or the regular goddess the way you always do it or you could start in again with the feet flap I mean,
With the feet parallel and one at a time,
Rotate the legs out.
Good.
If you want to hold completely still,
You could do that.
If you want to have the hands up the heart you can,
If you want to goal post the arms you can.
Also,
If you wanted to add some little baby glute pulses,
You could do that tiny little hugs of the hips.
As you partially straighten and bend the legs.
Alright,
Pivot right to face the front of your mat for crescent.
And then feel free to readjust the feet.
Get your crescent really stable to start with.
Hands on hips or heart.
And we inhale.
Exhale,
Stand,
Lift left knee.
Let's repeat.
Inhale.
Take it back.
Exhale stand and lift the knee try to keep the torso upright,
Shoulders stacked over hips,
Head back in space stacked on top of all that.
And watching for Especially as you step back not to let that low back arch a whole bunch but keep the tailbone down.
Oh,
Love.
Oh.
We got this.
I don't count things,
So maybe do one or two more.
Next time you're standing with the knee lifted,
Pause for balance.
You could lift the knee higher or you could set the toes down if you feel wobbly.
If you feel like it,
Maybe arms reach up for one more big breath,
Two more big breaths.
Great.
All right.
And then set the foot down.
Come into chair.
All right.
We've already done this side to side thing and we've already done chair.
So now let's combine them.
So let's come into chair.
Sit back.
Step the right foot out.
Step it in.
To the left foot up.
Bring it in.
Woo!
Let's do a couple more of these.
Step it out.
Step it in.
Step it up.
Step it in.
All right,
Let's try.
To go around the world.
All right,
So I'll turn towards you for this.
Shift all your weight into your left foot as you step the foot straight forward,
As you bring the leg straight out the way,
As you step the foot back.
Let's repeat that,
Step it forward.
Step it out.
Step it back one more direction or one more in this direction.
Step it forward.
Whoa,
Step it out.
That attack.
And then back to chair and we'll do the other leg.
So shift all your weight over into that right foot as you step left foot forward.
Oh boy.
Step it up.
Oh,
My God.
Left hip.
I mean,
Right hip is working so hard to stay strong.
Step back.
Good.
Two more circles in this direction.
Forward.
Outback.
Last one.
You got this.
Forward.
Great and then set the foot down.
Take one more big inhale in your chair.
And on your exhale,
Forward fold.
Bend the knees a bunch.
Sit the butt back in space.
You could even bring your hands onto blocks here and let the head hang.
Let the whole upper body lay onto your thighs as you release the neck,
Release the jaw.
Take a couple big breaths into your low back.
Great.
In whatever way that makes sense to you,
Make your way onto your back.
When you get there,
Bend the knees.
Set the feet flat.
And bring the feet outlined a little bit out to the edges of the net.
Open the arms out to the sides wide.
And let the knees fall to the left.
Oh,
A little gentle twist.
Really slow and gentle,
Follow the knees to the right.
Take a few more side to side.
Slowing down Letting go.
Letting go all around the hip joint.
Letting go in the pelvis.
Letting go in the low back.
Right,
Bring these back up.
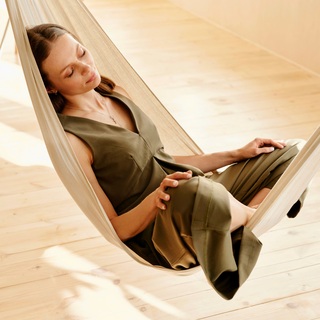
And if you'd like to take a short Shavasana,
You could always.
.
.
Set a timer and pause here.
Rest.
Or if you're ready to go on with your day,
Get up and up going.
I know you got really happy,
Balanced hips.
Thank you for practicing with me today.
Have a great day.