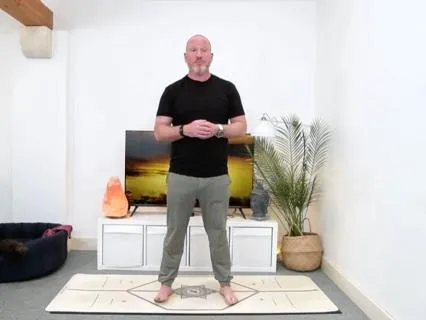
Welcome to the five Tibetan rights explained.
In this video,
I'm going to guide you through the five Tibetan rights,
Explain what they are.
The benefits and show you the variations that you can help adapt to suit your practice and your body.
So the aim is quite simple to help you understand the practice and then be able to move on perhaps to my second video where I will guide you through as a daily routine,
All five routine rights in one go.
But if you prefer to simply take the knowledge from this video and then Do the Five Tibetans as part of your own self-practice.
So what are these five rites?
They're five short sequences of movements,
Often described as a daily routine or a daily ritual to help increase energy,
Strength and vitality.
Sometimes known as the font of youth.
They originate from the book called The Eye of the Revelation,
Which shares the story of Tibetan monks using practices like these to support the health and longevity.
So what are the five movements?
So write one is rotations and or spinning.
Right to his leg raises.
Right.
Three is kneeling back bends,
Right.
Four is hip raises.
And then finally,
Right.
Five is downward dog,
Start upward dog.
Together,
They create a simple,
Repeatable sequence that works brilliantly as a daily practice or as part of a morning routine.
So what are the benefits of these?
If you practice this practice,
Or if you do this practice consistently,
Then you'll improve your strength and stability.
Increase mobility and flexibility.
It'll boost your energy and circulation.
It'll support your posture and breathing.
It'll help regulate your nervous system.
It stimulates your endocrine system.
And if you believe in your chakras,
Then it's going to help align your chakras.
So perhaps reasons not to do this.
Are a few situations which you should perhaps go gently or avoid or just modify So such as things as if you're pregnant.
If you are easily susceptible to getting dizzy,
Then perhaps do one of the variations or spin slowly.
We'll cover that in more detail in a moment.
If you have problems with your neck,
Your back or any of your joints,
If you're feeling unwell,
Fatigued or depleted.
Whenever you do any of this practice,
Just listen to your body.
This is a practice of awareness,
Not force.
But if in doubt,
Just ask your doctor.
Okay,
So the protocol.
Traditionally each movement is repeated up to 21 times.
21 isn't a magic number.
It's simply a rhythm that has been passed down because it works.
It's enough to create change without overwhelming the body.
So if you're new to this,
And perhaps start with just three to five reps for each of the rights,
Maybe building up to seven or nine to 11,
And then eventually progressing up to 21.
But only if you feel it's right.
You don't have to be able to do 21.
This is a practice of progression.
For the rotations though,
Traditionally we spin to the right.
But if you'd like to improve your balance,
I'd recommend alternating each day.
So perhaps today we would spin to the right and then tomorrow we'd spin to the left.
This is a great way of stimulating the fluid within the ears to improve your balance.
In terms of expectation management,
Be prepared that you will always feel dizzy,
But you'll perhaps over time lose that feeling of feeling a bit nauseous from motion sickness.
So just ease yourself into the rotation.
Okay so what i'm going to do now is i'm going to go through each of the five rights and i'll give you the variants i'm going to give you the full variant to start all the modifications and then finally finish with the rest posture So right number one,
Rotations.
If you're.
.
.
Particularly prone to becoming dizzy,
Then I'd recommend doing one of the modifications.
If you're a dancer or have a dancing background where you look to your hands and you keep snapping your head so that you're always looking one direction,
Try not to do that if you can,
Because we want to create the dizziness effect by following our hand round.
So for example,
If we're going to go around to the right,
I'm going to anchor my right foot.
I'm going to look to my right hand and I'm going to follow my right hand.
So one rotation would look like this.
Classed as one.
So we're going to do a number of rotations,
One after the other,
Spinning around our foot,
Following our hand.
Once we've done as many as we can do or our 21,
Then we go into the rest posture where we low central ground T.
Bend the knees,
Prayer posture hands and focus on the thumbs.
Breathe into it.
As we go through this,
If you get really dizzy,
Then just lower yourself to the floor and elevate your legs.
The key to this is not to go too fast,
Too quickly.
You may be surprised how quickly you do feel dizzy.
So always make sure that you're in a safe area where you're not going to fall over and hit yourself,
But preferably.
Listen to your body and stop yourself before getting to that point where you would get so dizzy you would fall over.
If you know that you're prone to becoming dizzy,
There's a gentler version where you anchor both feet.
And you just simply twist from side to side.
And I'm told if you have a medical condition which makes you prone to being dizzy,
Doing this is more than enough to give you that challenge into your balance.
So modifications.
Start slowly,
Don't do as many numbers and try not to go to the point where you're going to fall over.
Oral Tensley,
Just do the static twist from side to side.
So that's your rotations.
Just to remind you,
Traditionally we go to the right.
This helps spin up our chakras.
If you want to improve your balance and i personally find when i spin to the left i find this harder so you want to alternate from day to day So,
For example,
Today I went to the right.
So tomorrow,
If I came back to do this,
I'd go to the left and then to alternate.
You don't have to.
It's personal choice.
So that's right number one.
Just remind you the rest posture is nice and low focusing on the thumbs that will really help and really breathe deeply into it So right number two,
These leg raises.
I'll start with the full variant.
I'd recommend placing your hands underneath your buttocks.
This encourages the lower back to be pressed into the floor.
You can always use a cushion if you prefer.
Head and legs off the floor.
So you're going to inhale,
Lowering both down.
Head to the floor,
But legs staying off the deck.
Exhale,
Back up.
Inhale down.
Excellent.
Inhale down.
Excel up.
A variant to this,
Keep the head on the floor.
Maybe your neck doesn't like this so you can just simply support it with the legs going up and down.
That's one variant another variant to make this kinder on the back is to bend the knees inhale up Exhale down.
Or you can do single leg.
So there's enough there hopefully for you to come out with a leg raise variation.
The rest posture is a tight little ball.
Draw the knees to the chest,
Head to the knees.
This is nice for the lower back because you'll be arching the lower back unless you're pressing it into the floor.
This is a good way of countering it.
So your rest posture,
Which you can adopt any of these rest postures at any time should you need to.
So right number two,
Leg raises.
The next one is right number three,
Which is going to be kneeling back bends.
So with this,
We're going to be kneeling,
Knees hip width apart.
You're going to place the hands onto the lower back,
Draw the elbows and shoulder blades together.
So when we start this,
The full variant,
You're going to squeeze the buttocks,
Puff the chest.
Hanging the head off the back by squeezing the buttocks that helps protect the lower back.
So keep squeezing and then exhale down.
So inhale up,
Squeeze the buttocks,
Puff the chest.
Exhale down.
And head up.
Exhale then.
So variance for this,
If that's too much.
Do it slowly,
That always helps.
Not going fully down so you just do the kneeling back bend bits you squeeze the buttocks puff the chest and then exhale bring yourself back upright Then hold on.
So that's all you need to be able to do.
If neither of those work,
Let's say you can't kneel,
You can do the standing.
Exactly the same premise,
Feet tip to the width apart,
Knees bent this time,
Hands on the lower back,
Inhale up.
Exhale out.
Inhala exhale down you don't have to do the full forward fold you can just go to the finish point that i was in if you do do the full forward fold sorry full forward fold i'd recommend engaging the core as you go up and down to protect the back or bend the knees a bit more Now,
If none of those work for you for whatever reason,
You can still do this and get a little backbend as a bridge.
So you have your knees over your ankles.
You're gonna inhale up.
And exhale down.
If you lift beyond that sort of point where you would normally stop,
So you're getting a bit of an arch in the back,
If you have the range,
You'll still get a nice little backbend,
But in a much more controlled fashion.
So again,
If you're on your back,
Rest posture will be a tight little ball.
But if you're doing the kneeling,
Version the rest posture is a child's pose where you sit back into it like this either with your arms to your front or arms to your sides.
All we're trying to do is just take the pressure off the lower back.
You can adopt that rest posture at any stage or at the end.
So that's right number three,
Kneeling backbends.
Key teaching point,
Squeeze the buttocks when you're going into the backbend because it helps protect the lower back.
Good.
So right number four.
Is going to be hip raises.
So variants for this,
This is where you might want to have some other equipment.
I'll show you the full variant and then the variants to go with it.
You're going to start with the buttocks underneath the shoulders.
Now you can either have your hands flat or you can come off the heel of the hand to give you a bit of height.
Wherever you end up,
Try and have the knees over the ankles when we lift up.
So I always find having a little bend in my knees,
Starting on the heels helps me get into the right place.
So we're going to inhale up,
Squeeze the bollocks,
Hang the head.
Exhale back down.
And head up.
Exhale down.
And hello!
Exhale down.
So variants to this one you struggle with this let's say you this is where you say you realize that your torso is longer than your arms or vice versa you can use things like bars where you put your hands onto them to give you some height instantly.
Inhale up.
Exhale down.
And hello.
Exhale out.
You don't have bars and these are particularly good for the next one as well but i'll cover that later you can use blocks two same blocks it doesn't have to be a block it could be a book but two books what we're trying to do is create some height so exactly the same premise inhale up exhale down Now,
If you can't do the full variant,
Regardless if you're using blocks or these bars,
Then you can do a half lift.
So you literally bollocks off the deck if you can manage it.
Inhale up.
Exhale down if you can try not to sit down but if you need to sit down in between then do keep little bends in the elbows and every time we're on our hands splay the fingers and grip into the mat this will help protect the wrist So inhale up.
Exhale down.
The final variant is to lie on the back.
And inhale up Exhale down.
And hello!
Exhale down particularly good if you've got problems with your shoulders or your wrists at the moment then you can progress perhaps once you've got the strength into the other ones or your injuries pass So that's right number four.
Rest posture for this.
I find if you have diamond legs and just simply forward fold.
This feels quite nice across the hips and the back after what we've just done.
Good.
So the final one is now upward dogs.
Downward dogs.
So splay the fingers,
Grip into the mat.
Come into your down dog.
Lift the hips.
So the full variant,
We're going to inhale forward.
Excel back.
Inhale forward.
Exhale back.
So key teaching points on this as you come forward,
Squeeze the buttocks,
Puff the chest.
Sell it back.
Keep the core engaged throughout.
So your core's engaged,
Coming forward and coming back.
So you're not hanging off the spine at any stage.
Inhale,
Forward,
Squeeze.
X are back.
Variants to this.
You can come forward as far as just a plank.
And press back.
Inhale forward.
Exhale back if you have problems because of your wrist You can use bars.
Just as we did the other side brilliant for your any of your yoga practice in how forward exhale back the advantage of this it gives you more room on which to drop your hips if you want to go deeper into your back bend also helps support the wrists.
If you don't have those,
You can always do it on your forearms.
So a variant of it would be a baby plank.
Pressing out of the shoulders into a dolphin and back.
This is slightly different,
Puts more onus into the shoulder mobility,
But again,
It is a popular option.
And the option if you're not ready for any of those is to start meeting.
Have your hands in front of you.
As you would do before,
Squeeze the balance as you come forward,
Drop the hips,
Puff the chest.
And then press back.
Keep the core engaged throughout.
Inhale forward.
X are back.
Inhale fold Excel back.
So the rest posture for any of those variants.
Is what I'm in now,
Charles pose,
Either arms to your front.
Or down biocides.
So that's right number five.
Hopefully you found this video useful.
I look forward to seeing you hopefully every morning if you weave this into your morning routine.
But if not,
Hopefully you've got enough information now to weave this into your own personal practice.
If you have any questions outside of this video,
Then clearly just contact me on the platform and I'd be delighted to answer any inquiries that you may have.
But thank you so much.
I wish you all the very best with your five Tibetans and thank you for your time.
Namaste.