Welcome.
Today's practice is going to be for the low back.
And SI joint,
And this is great for anyone.
Whether you have any issues in your low back or not,
We'll also be getting into the core.
We'll be doing some poses that are really great to strengthen the low back as well as the core.
Which helps to protect our low back.
You'll want to have a couple blocks.
And a yoga strap.
I'm using the strap that has that buckle.
That you can slide to make a loop.
And if you have one of these straps,
Before we get started,
You might want to just make a loop in it so that when we get to the pose to use the loop,
It'll be ready.
Have a loop just about this size maybe about the length from your thumb to your shoulder.
It's just a guesstimate,
But then it'll be ready.
If not,
You can do it when we come to that point.
Pose.
And then just set your strap aside.
So find a comfortable position,
Maybe gently close your eyes.
And have your hips up a little bit higher than your knees.
So that you're not rounding your spine.
You want to have that natural curve in your low back.
Lengthen through your spine.
And lengthen the back of your neck.
So a slight lowering of your chin.
Soften your shoulders and arms,
Hands in whatever position feels comfortable to you.
And begin to tune in.
Tune into this moment.
Tune into your body.
Maybe sensations you're feeling in your body.
Even discomfort.
Just notice.
You and then soften your lower belly and allow your next inhale.
To let your lower belly expand.
Take a nice inhale through your nose.
And sigh out your exhale.
Let it go.
And then just begin.
To breathe in and out through your nose with a longer exhale.
So if your inhale is about five seconds,
Allow your exhale to be about seven seconds,
But without straining to lengthen that exhale.
Inhale through your nose.
Longer exhale.
Also through your nose or if you prefer through your mouth.
Option to have that soft jayi,
That ocean breath.
If that's comfortable for you.
Making your breath audible with that slight constriction in the back of your throat.
Take a few more breaths here.
And on your next inhale,
Really think of growing taller.
So as you inhale,
Invite space between all your vertebrae.
Top back of your head reaching up to the scalp.
And then engage.
Sort of like if you were wearing a corset.
Engage around your lower belly.
To sort of hold yourself nice and tall.
Without over constricting the lower belly.
So just like you have a little support there.
Keep your shoulders soft.
And notice how that feels in your lower belly,
Just this ever so slight constriction.
Lots of different abdominals at play here but you're not over engaging them,
Just a slight engagement so you know.
That you have some abdominals there.
And then soften.
And notice the difference.
Maybe you slouch a little bit.
Maybe your belly just relaxes a little bit.
Notice that difference.
So come off of whatever you're sitting on.
And make your way into table pose.
Hands and knees.
Wrists are under your shoulders.
Make sure your knees are just about under your hips and move through three rounds of cat cow.
Inhale cow.
Exhale,
Cat.
Move with your breath.
Notice your spine.
Start the movement from your tailbone.
Without string.
Notice how your spine is moving today.
Light Ujjayi,
Breathe in and out through your nose.
And then return to table.
So let's come all the way down onto our math.
Onto our belly and let's come into sphinx.
So to start.
Widen your legs.
Your sacrum will be happier if you keep your legs wide and sphincter.
Elbows just about under your shoulders.
Forearms are parallel.
Toes towards your mouth.
Press into your hands and forearms slightly.
Sort of an isometric action of pulling yourself forward on the mat.
Engage your upper back and shoulder girdles.
Like you're drawing your heart forward and your shoulder blades are towards each other a little bit.
Gaze towards the front of your mat or in between your thumbs.
Lengthen through your neck,
Lengthen through your whole spine.
And then draw your lower ribs.
Slightly in.
Activate your legs.
Pressing into the tops of your feet.
Or toes.
And that isometric action like you're trying to pull yourself forward slightly.
Notice how you can.
.
.
Encourage space between your vertebrae.
This is an active pose,
Unlike the Yin Sphinx,
Where we relax.
So breathe here.
Keep your gaze soft.
One more breath.
And then relax.
Elbows out wide.
Stack your hands and rest your head on the back of your hands in Makrasana.
Find your variation and relax completely.
Take a few more breaths here in Makrasan.
On your next inhale,
Lift your head.
Push into your hands.
Bring yourself back up to table.
Move your hands slightly forward and back.
Send your hips back.
Keep your head lifted but look just straight down.
So there's a nice line from the crown of your head.
All the way down your spine so you're not dropping your head here.
Keep your arms and hands active.
Think of lengthening,
This should feel pretty good in your low back.
And then relax.
Soften your arms.
You might bring your arms a little closer.
You might widen your knees a little bit and find your variation for child's pose.
So now you can relax your head to the mat.
Or rest your head on the block.
So find what feels best to you.
If your hips are up a little high,
You might want to use a block for your head.
Arms might be soft here.
Soften your belly.
Find your variation.
Slowly on your next inhale,
Lift your head.
Bring yourself back up into table.
Bring your knees back underneath your hips.
Move your hand a few more inches,
Maybe two inches further forward.
Tuck your toes and come into your downward facing dog.
Lift those hips up and back.
Knees can be bent a little bit.
Think of lifting your tail up to the sky and slightly back.
Press into your hands.
Drop those heels towards the earth.
Notice how this feels.
Think of lengthening through your spine.
Ears in between your upper arms.
Notice your breath.
If you need to come out early,
Come out.
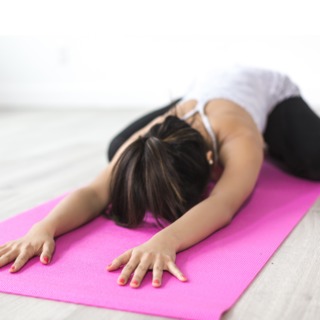
And make your way into a child's pose when you're ready.
If you haven't already done so.
Thoughtfully lower your knee.
Widen them slightly,
And come into your Balasana,
Child's Pose.
Relax.
Soften and breathe here.
Take one more breath.
On your next inhale,
Thoughtfully bring yourself back up and bring yourself to a seat.
Notice how you feel.
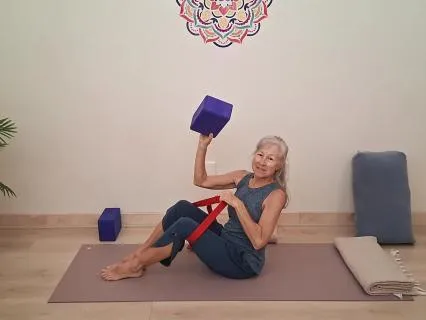
We'll be using a block.
And our strap.
So if you haven't already done so.
.
.
You want to create a loop in the strap that's something like this.
Which is.
.
.
Just about the length of your arm.
And have the buckle in such a way so that if you pull on that loop it's not going to slide.
If you have a TheraBand,
You can use that and you can tie it around.
When we come to that position.
So that you know it's tight enough.
And If you need to,
You can have a blanket for your head.
So come to a C.
With your knees bent.
And your feet wide.
Take your block.
I have a dark color block,
Which might be hard to see.
I'm just gonna bring my narrower block so you can see the position of the block a little easier.
And then I'm gonna use my four inch block.
If you only have a three inch block,
It can work as well.
You're going to place the block.
Sort of at an angle long ways.
Right in between your knees.
So if you can see how I place the block.
If I squeeze my knees.
It's on the block.
You don't want the block lower than your knees,
Just on your inner thighs.
The knees need to be on the block.
If you have a cork block,
It might be a little hard.
In which case don't squeeze as hard or put some sort of padding on the block.
But usually any foam block can work.
So come to.
.
.
Constructive rest.
Knees are bent.
Feet about hip distance apart,
And place your block in between your knees.
So there should be a little bit of block beyond your knees.
And the length of the block is sort of parallel to your thighs.
So you don't have it.
At an opposite angle.
It'll feel a little better.
The block is served.
In line with the thighs.
So bring your feet a little closer together if you need to.
And before we do anything.
Notice your low back.
Notice your sacrum.
Notice if there is any sensation there.
And we're going to do a very slight action.
On a scale of 1 to 10.
As far as effort.
We're going to do an effort at about a three.
So as you inhale,
It's just natural.
You're relaxed.
As you exhale,
Effort of about a three.
Gently squeeze the block.
With your knees.
You might find you need to move your feet a little closer.
So that feels comfortable to you.
Inhale,
Relax.
Exhale,
Gently squeeze the blood.
Inhale,
Relax.
On your exhale,
Squeeze the block.
Continue to do this and notice your sacrum.
What is going on?
That part of your sacrum around the SI joint.
Exhale,
Gently squeeze the block.
And now relax.
What do you notice?
Maybe you notice nothing.
Maybe you just notice like there's something going on.
So if you have any out of alignment in your SI joint,
Sometimes this can sort of help realign it.
The second part of this is another way to sort of realign the sacrum.
And some people like the second part more.
More we're going to do We're gonna add on with the strap and do another part along with this in a moment.
So a few more breaths here.
Inhale,
Relax.
Exhale,
Squeeze.
Remember,
Just a very slight effort.
You don't wanna really squeeze hard,
Especially if you have anything going on in your SI joint.
So now we're going to come to part two,
And you might need to sit up and watch.
How I'm going to put the strap on.
So we're going to put the block in the same position,
But first Take it out of that position between your knees.
And take your strap and take that loop around your legs.
So that the straw is on your lower thigh.
And there's no twists in it.
A lot bigger strap than I need to,
So you can.
.
.
Tighten it down as you need to.
Now we're going to place the block in the same position that we just did.
So the block goes between your knees.
One side of the block is on that bottom strap.
I'm going to turn this way so you can see a little bit better.
I don't know if you can see this strap.
But one part of the block is on the bottom strap.
And then I'm gonna bring my knees together just like I did before.
And then I'm gonna tighten it.
So move your buckle so that when you tighten it,
The buckle is gonna be at the top of the block.
Sort of like that.
So tighten the strap.
As tight as you can.
So that it's not gonna slide.
And if you don't have a strap with a buckle,
You can tie a TheraBand or just tie a knot in your strap.
So that it feels like if you push.
Your legs out against the strap.
It's not gonna move,
It's not gonna slip.
If your buckle is slipping,
Just sort of tie a knot in your straw so that it doesn't slip out.
So once you get that in position,
Then you're going to lay down again.
Option for that blanket under your head.
So again,
It should feel like your legs.
And the block are held securely.
Feet flat on the mat.
Constructive rest.
So we're going to start with the same thing we did earlier.
Take an inhale.
And exhale,
Squeeze your blood.
NOW!
Now we're going to do Inhale,
Push out against the strap.
And exhale,
Relapse.
So we're not going to squeeze the block.
Inhale,
Legs on a level 1 to 10,
Just about a 3 for effort.
And he'll push out against the straw.
Exhale,
Relax.
And he'll push out.
Exhale,
Relax.
Inhale,
Legs push out against the strap.
Exhale,
Relax.
Notice anything that's going on in your sacrum area.
And notice if.
It feels different.
Maybe better,
Maybe not,
Than the first one we were doing when we were squeezing the block.
Inhale,
Push out against the strap.
Exhale,
Roll up.
This time option,
Inhale,
Push out against the strap.
Exhale,
Squeeze the block.
Inhale,
Gently push out against the strap.
Exhale,
Squeeze the wall.
Relax your arms.
Inhale,
Pushing out.
Exhale,
Squeeze the block.
Notice if one feels better than the other.
Or maybe one just feels different.
So now lift your feet up.
Undo or loosen your strap.
Sometimes it's easier to do laying down.
If you want to come back up to a seat and do it,
That's fine.
So loosening it so you can take the block off.
Take your strap off your legs.
And come back into constructive rest.
And pause.
Notice your low back.
And then draw one knee in towards your chest.
Let's draw the right knee into the chest and straighten your left leg out on your mat.
Relax your left leg.
And rotate your right ankle.
Reverse direction.
And let's get a little more into the hamstrings too.
Bend your left knee,
Left foot flat on the mat.
Straighten your right leg up.
So you can either hold behind your calf or your thigh.
Or if you have your strap handy.
Place your strap around the ball of your foot,
Maybe using that loop.
And keep your right leg as straight as is comfortable for you.
As you begin to draw that leg towards your head.
Getting into the hamstrings.
If your hamstrings are real tight,
Definitely keep that lift going.
Knee bent.
Otherwise,
If you're more flexible,
You can straighten that left leg out.
Just a few more breaths here.
And then thoughtfully remove that strap if you were using it.
Straighten both legs out.
On your mat and notice any difference between left and right.
Maybe notice if one leg or hip seems higher or lower.
And then bend both knees again.
Feet flat on your mat,
Draw your left knee in towards your chest.
Straighten your right leg out.
Maybe both hands or just your left hand on that left knee.
Rotate your left ankle.
Reverse direction.
And release that movement.
Rebend your right knee,
Straighten your left leg.
Again,
Option for your strap or just to hold the leg where it makes sense to you.
Draw that leg in the direction of your head to get into your hamstrings.
If you need to,
You might have a slight bend in that left knee.
But try to keep that leg as straight as you can to get the benefit of the hamstring stretch.
And then thoughtfully release.
Straighten both legs again.
Come back to that.
Sort of Shavasana position and notice hopefully now both sides are about the same.
Rebend one knee and then the other.
So now we're going to get a little bit more into the core.
From constructive rest,
Lift your knees up.
So you have about a 90 degree angle.
Knees over hips.
Engage your core,
Like you're wearing that corset again.
Arms by yourself.
So you can either flex your feet or point through the feet,
Whichever you prefer.
As we move the legs,
We'll do one leg at a time.
So that the toes or the heels touch the mat.
And then we'll bring that leg back up.
And exhale we'll do the other leg.
So one of the common mistakes doing this is people bend the knee more to touch the mat.
And come back up.
That's sort of cheating.
So we wanna keep that 90 degree angle to start with the legs.
So think of the movement from your hip and not the knee.
So take an inhale.
And exhale,
Slowly lower your right heel.
To the mat or your right toes.
And then inhale,
Bring the knee back up.
And exhale,
Left heel or left toes touch.
And he'll come up.
Core is active.
Think of the action coming from your core.
Exhale to lower,
Inhale to bring the knee back up.
Alternating legs.
So if this is too difficult for you,
Reduce.
The angle of your legs so that your feet are lower than your knees and point through your toes.
Keep that angle,
Maybe it's a 45 degree angle.
Lower the foot to the mat.
Movement is from the hips.
Alternating side.
Conversely,
If this is too easy,
Increase the angle of your legs and flex your feet so maybe now you have a 120 degree angle.
Lowering the heel to the mat.
Inhale,
Back up.
Alternating legs.
Of that bent leg and maintaining it.
So you find the angle that works best for you.
More challenging to have the angle bigger so your knees are slightly bent.
Easier to bend the knees more and touch the toes.
Middle of the way about 90 degrees.
Move slowly.
It'll feel a bunch easier if you go fast,
But you're not getting the benefits.
Slow motion.
Exhale.
Heel or foot touches.
Inhale slowly come back up.
If you think it's too easy,
Slow it down,
Like slow motion.
Slower than you were doing.
And notice.
The area.
Of the abdominals that is working.
And then relax.
Relax your lower legs.
Draw your knees in towards your chest.
Or knees towards each.
Armpit or shoulder,
Stretching out your lower back.
Or you can come into happy baby,
Whatever you prefer.
And then thoughtfully.
Roll over to one side.
And press yourself up to a seat.
Pause.
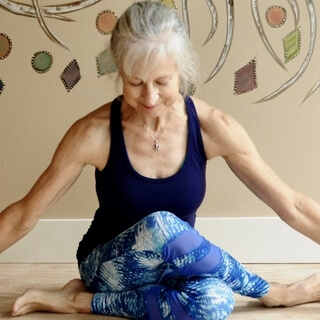
So we'll move into some seated twists.
Bring your legs out in front of you.
Bend your right knee.
And cross your right foot over your left leg.
Done with that.
So have your right foot crossed over your left leg,
Keep your left leg active.
Toes to the sky.
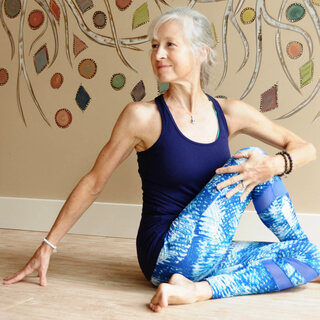
Bring your right hand behind you for support and left hand to the outer right knee.
Lengthen through your spine and as you exhale,
Gently twist to your right.
Imagine your left ribs are going towards your right inner thigh.
And as you exhale,
Draw your navel slightly towards your spine.
So you're engaging the core slightly as you twist.
Inhale to lengthen.
Exhale to twist.
Keep that left leg active.
Remember never to force any twists.
Inhale slowly unlock.
Come back to center.
And other side.
Bend your left knee.
Cross that left foot over your right leg.
Keep that right leg active.
Ankle is active,
Toes to the sky.
Left hand behind you for support either on the palm or fingertips.
Right hand to the outer left leg.
Inhale,
Lengthen.
Exhale,
Right ribs go in the direction of your left inner thigh.
And as you exhale,
Draw that navel towards your spine.
Notice your abdominals activating slightly here.
Notice your breath.
Gaze is slightly down so you're lengthening through your nose.
Inhale,
Unlock.
Straighten that leg.
So our next pose is going to be bridge and supported bridge.
So you might want to block,
You can use a 4 inch or a 3 inch block if you prefer.
To demonstrate,
I'm going to use my four-inch block.
Or rather my three-inch block,
Because it's colorful and you can see it better.
So come to constructive rest.
Have your block handy.
Feet are about hip distance apart.
Press into your feet,
Lift your hips and place that block under your sacrum.
So we're just going to pause for a moment here.
And notice how that feels.
Maybe you stay here in a relaxed,
Supported bridge pose.
This can be really nice for the low back.
If you want more.
Make sure your feet are about hip distance apart.
Bring your arms a little closer.
In towards your body.
Bend your elbows.
So your forearms might be touching your side body.
Fingers point up to the sky.
Press into your feet.
Lift your hips off that block.
Gaze straight up to the ceiling.
Lengthen through your spine as you press into your feet.
And isometrically draw your heels in the direction of your shoulders.
Lengthen your tailbone towards your lower legs.
If this is too much,
Lower your hips.
Stay here in an active bridge pose for a few breaths.
Or if you feel you've had enough,
Lower the hips back to the block at any time.
Keep lengthening through your spine.
And if you haven't already done so,
Thoughtfully lower your hips,
Relax your arms.
Pause here in supported bridge.
Relax,
Notice your breath.
Press into your feet,
Lift your hips,
Remove the blocks.
Lower your hips.
To the mat.
Draw your knees in,
Give yourself a little hug.
And then thoughtfully roll over when you're ready,
Come up to a seat.
And we'll prepare for our final pose.
Which I'm going to show a few variations that you might do,
Which is really great.
To relax your low back.
If you have a bolster.
You're going to place your blocks on the medium setting.
And then place your bolster on top of the blocks.
So you're making like a table.
The blocks under the ends of the bolster for support.
If you need to make it higher,
You can use one of your blankets.
On top of the bolster.
Or if you have a chair or a stool.
That's handy,
You can just use that.
If it's something you can put your legs over.
Place one leg than the other.
Over the bolster.
And we want to have our hips close enough to it.
So the knees feel comfortable right about the edge of the blanket or the bolster.
And then lower yourself down.
And if you're using a chair or a bench that's a little higher,
You'll have another blanket.
Like if it was too high,
I'd have this other blanket nearby.
Pressing my legs into the top of the chair or bench,
And then slide that other blanket under your hips.
So you might move your hips forward or back until you feel comfortable.
You can also just have your legs up on a couch.
Again,
You might need a blanket under your hips if it's too high.
And then relax here.
So you can let your legs be in whatever position,
Maybe the knees go out a little wider.
Let your legs be heavy.
This should feel comfortable.
If you want you can stay here for just a few breaths and then come into a regular shavasana.
Or just make this your shavasan.
This is a great pose to hold maybe even 10 to 20 minutes.
If you're experiencing any low back issues.
So you really can't hold it too long.
Relax your whole body.
Legs are heavy.
Hips soft and relaxed.
Notice your low back.
Invite your low back and sacrum to relax.
Envision space between all your vertebrae.
Relax your upper back and shoulders.
Soften your arms.
Let your head be heavy.
Soften all the muscles in your face.
And let go.
.
Notice your body.
Notice your breath.
And observe your mind.
You might start to make small movements.
Thoughtfully bend one knee and then the other coming off of that support and then rolling over to one side.
Support your head with a bottom arm or a prop.
Pause there.
Press into one hand and then the other and bring yourself slowly and thoughtfully up to a seat and pause.
And with appreciation for your awareness and your focus.
And your efforts.
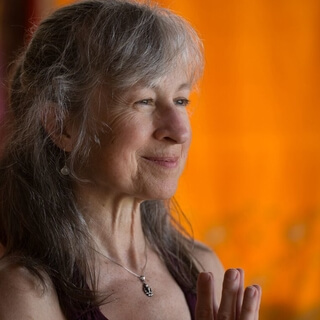
Bring your hands together at your heart in Anjali Mutra.
The light in me sees and honors the light in you.
Namaste.
Thanks for joining me for this yoga practice for the low back.