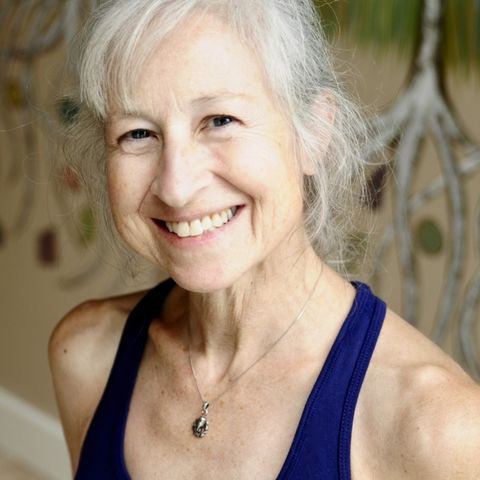
My name is Pamela and I will be guiding you today through a myofascial release yoga practice where our focus will be primarily into the shoulders,
Neck,
And upper back.
The props you'll want today will be two blocks,
A blanket,
If you have a foam roller that might be useful,
And also a tennis ball or a similar therapy ball.
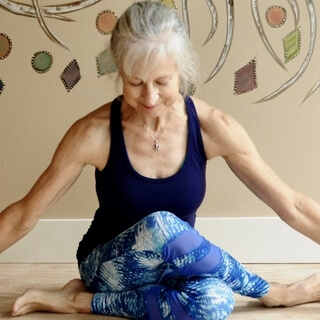
So we're going to come to a comfortable seat to begin.
And just begin to notice how your body feels.
Notice if there's any areas of tightness or tension being held in the body.
Many of us hold tension and tightness in the shoulders,
The upper back,
And a lot of us if we're working at a computer many hours of the day,
We can just get really tight in that area.
And just begin to notice how your body feels right now.
And see if you can just allow whatever sensation you're experiencing to just be.
Whatever sensation or emotion or feeling that you're experiencing right now,
See if you can just allow it to be as it is without resistance.
And then begin to notice your breath.
Notice where you feel the breath in the body.
Notice how it feels.
Do your best to keep a nice,
Long,
Tall spine.
Whether you're seated or standing,
Just keeping that nice,
Long spine.
Begin to gently deepen your breath,
Softening the belly as you inhale,
And maybe elongating the exhale.
Take a few more breaths like that.
And then when you're ready,
If your eyes are closed,
You can gently open the eyes.
And let's take an inhale,
Reaching the arms out and up.
And as you exhale,
Bring your hands down to the heart.
Again,
Inhale,
Reach the arms out and up.
Exhale,
Hands come down to your heart in Anjali Mudra.
Once more,
Inhale,
Reaching out and up.
And exhale,
Bringing the hands to the heart.
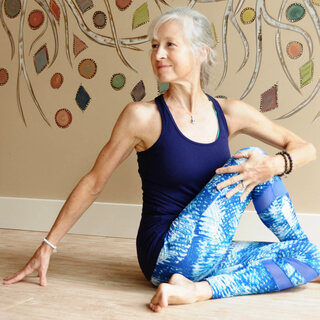
And we're going to begin with a simple release for the neck.
So sit up nice and tall.
You might be sitting on a blanket or other cushion.
Spine is long.
Open your hands out on either side of you,
Maybe fingertips touching the floor.
Take a nice inhale.
And as you exhale,
Slowly turn your head to the right.
Notice how the neck feels.
And bring your hands slightly in front of your nose,
Moving it away so that you know where your nose is pointing.
Remember that spot.
And inhale the head back to neutral.
Exhale,
Turn your head to the left.
Notice how the neck feels.
And again,
Bring your hands slightly in front of your nose,
Move it away.
And notice where your nose is pointing on this side.
Remember that spot or object.
And inhale back to center.
Relax your hands and arms.
And bring your right hand up in a loose fist so the knuckles come right up behind the right ear,
The mastoid process.
We're going to use our knuckles as our massage tool.
And use the pressure that feels best to you,
Bringing your knuckles up behind the ear.
With the pressure that feels best to you,
Slowly start to slide those knuckles down the side of the neck.
Notice how that feels.
You might feel tender areas,
Maybe even a sense of like,
Rope-iness.
Getting into the fascia,
Ironing out the fascia.
So we're going to take about maybe 10 seconds or more to slide the knuckles down the side of the neck.
When the knuckles go all the way down to the base of the neck,
Release the hand and arm down,
Shake it out.
Release any tension that might have built up.
And we'll do it again.
Try to keep the left arm relaxed.
And again,
Those knuckles are right up behind the ear,
Slowly sliding the knuckles down the side of the neck.
This is one of my favorite ways to release tension in the neck.
You can do it daily,
Even multiple times a day,
As much as you need.
And again,
When you reach the base of the neck,
Relax that arm,
Shake it out.
And then we'll do one more on the side with a little variation.
So as you bring the knuckles up in the same position right behind the ear,
We'll still slide the knuckles down the side of the neck.
But then start to turn your head in the opposite direction.
So slowly looking to your left,
Getting a little bit more with the knuckles back into the upper trapezius.
They usually don't go quite as long on this side as far as time-wise.
So when you're done,
Shake it out.
Come back to center,
Head looking straight ahead.
Notice sensation between left and right.
Notice any differences.
And then bring your left hand up behind the left ear.
Again,
You decide on the pressure.
Slowly sliding those knuckles down the side of the neck.
Notice if this side feels any different than the right side.
And when you go all the way down to the base of the neck,
Again,
Release that arm and hand.
Shake it out.
Keep the other arm relaxed.
And when you're ready,
Bring that hand,
Those left knuckles up behind the left ear again.
Same thing,
Slide the knuckles down the side of the neck.
You decide on the amount of pressure.
It's going to go about 10 seconds or more.
Today we're just going to do about 10 seconds.
Sometimes I like to go longer.
Do whatever feels best to you.
And again,
When you get down to the base of the neck,
Release that arm and hand.
Shake it out.
And we'll do one more on this side.
Again,
Start in the same position,
Right up behind that left ear.
Slowly slide the knuckles down the side of the neck.
And then start to turn your head in the opposite direction.
And when you're done,
Again,
Shake that arm and hand out.
Notice how the head and neck feel.
Hands again on either side of you.
Sit up nice and tall.
Take an inhale.
And as you exhale,
Slowly turn your head to the right.
Bring that right hand up in front of your nose,
Moving it away.
And notice where your nose is pointing now.
Notice if it's different.
Do you have more range of motion in your neck now?
Notice how the neck feels.
Release the arm down.
Inhale back to center.
And exhale,
Turn your head to the left.
Again,
Bring your left hand up in front of your nose.
Move it away.
And notice where your nose is pointing now.
If you've gone further on this side,
How does the neck feel?
And then inhale back to center.
Release the hands down.
I always feel a little bit more like an owl with much more range of motion in my neck.
Feel free to do this any time that you need to release tension and tightness in the neck.
It's really great.
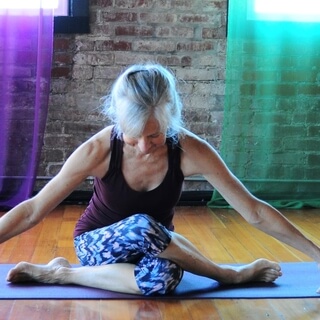
So next we're going to get into the shoulders a little bit.
So before we get into the shoulders,
We're going to do a little test just to see how the shoulders feel.
How tight are they?
So come into a table position.
And you might want a block.
So on hands and knees,
Keep your hips just about over your knees.
Reach your arms forward.
We're going to come into puppy pose.
So you might want a block under your head.
If you have shoulder issues,
You may not go very far.
Or you might need to bend the arms.
So bring your forehead to either the block or the mat,
Keeping your arms straight,
Taking your heart towards the mat.
This is also called melting heart pose.
And just notice how the shoulders and upper back feel.
Listen to your shoulders.
Again,
If this feels too uncomfortable or you have shoulder issues,
You may not want to go very far at all.
So next,
We're going to use our blocks.
You can position your two blocks just about shoulder distance apart.
On the lowest setting,
Come into table pose.
And again,
This may or may not work for everyone.
If your shoulders are really tight,
You may not want to use the blocks at all.
You might want to just have your elbows on the mat instead of on the blocks.
But what we're going to do is place our elbows on the blocks and bring our hands together in prayer position.
And then bring our hands and thumbs towards the upper back or behind the head.
And the forehead is going to go towards the mat.
So come into table pose.
Bring your forearms onto the blocks.
And then bring one elbow and then the other onto the blocks.
Make sure this feels okay.
Bring your hands together in prayer.
And start to take your heart towards the mat.
See if your forehead will easily make it to the mat.
And notice if your hands can come towards the upper back.
If not,
Just pause.
Stop where you are.
If it's too much,
Try your elbows just on the mat instead of the blocks.
And we're going to hold here for a few breaths.
Continue to breathe here.
This should feel like a nice stretch in the upper back and shoulders.
And again,
Make sure the forehead is supported either on the mat or you might place a towel or a small blanket under your forehead if it doesn't quite make it to the mat.
Hips just about over the knees.
You could also take the hips back slightly,
But you don't want the hips in front of the knees.
That will put too much pressure in your upper body coming forward.
So of course,
Listen to your body.
Find whatever variation makes most sense to you.
And take a few more breaths here.
Anytime you feel you need to release a little bit more,
Take a nice inhale and an open breath.
Open mouth sigh of an exhale.
Let it go.
And then on your next inhale,
Slowly make your way back up.
Release one arm,
Then the other.
Come onto one hand and then the other and notice how you feel.
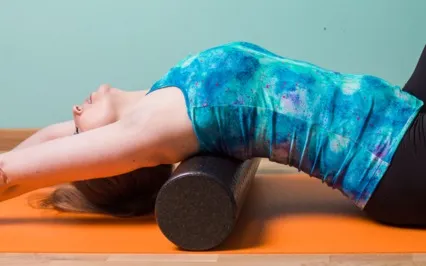
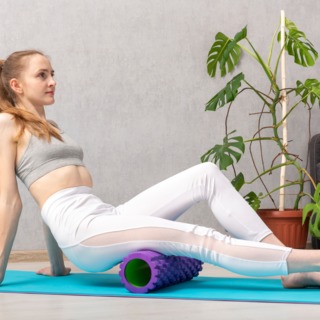
So we're going to use the roller next.
We're going to get into the upper back.
You might want a block as well as the roller.
We're going to be using the roller to lay over so that our upper back is on the roller crossways across our upper back,
Just sort of behind the heart.
The shoulders are going to be over the roller and our head is either going to be on the block,
Maybe the low setting,
Maybe the medium setting,
Or you can have your head on a blanket or two,
Whatever feels good.
Or if this is too much of a back bend for your back,
You could do the same thing with the rolled blanket under your upper back.
So again,
The shoulders and arms are above the roller.
Taking the roller across your mat,
You want to have it maybe about two feet away from one of the ends of your mat.
Come into a seat,
Knees are bent,
Feet flat on the mat.
So thoughtfully begin to lay back onto the roller or your rolled blanket.
So the back of the heart,
The mid upper back,
Is on the rolled blanket or your foam roller.
Your shoulders and arms are above the roller.
Arms might be in a T shape.
Shoulders are probably not going to be touching the mat,
Even if you're just using a rolled blanket.
So position the arms where they feel best to you.
You can keep the knees bent,
But I find straightening the legs one at a time can feel really nice.
And it just invites a little bit more relaxation into the body.
But again,
If this feels too intense,
Back off.
Make sure you have some support under your head if you're using the foam roller.
Foam roller is a much larger diameter than usually a rolled blanket.
And you might feel that you need the block maybe at the medium setting,
Or some might like it at the low setting.
So find what feels best to you.
Soften the shoulders.
Soften the upper back.
Begin to breathe into the area where you're feeling this sense of openness and maybe a sense of pressure in the upper back.
So breathe into the area of the upper back.
Soften the shoulders and begin to tune into your breath.
Nice full inhales.
Soft sigh of an exhale.
Let it go.
We'll take a few more breaths here.
So start to bend one knee and then the other.
Maybe bring one hand behind the head and slowly make your way back upright.
Pause here.
Notice sensation.
Notice how the upper back and shoulders feel.
Okay.
So now we're going to get the tennis ball.
Set your roller aside and get your tennis ball or therapy ball and go ahead and lay back down on your mat in constructive rest.
So the knees are bent,
Feet flat on the mat about hip distance apart and take your tennis ball and place it under your right upper shoulder onto the upper trapezius.
You're going to place that tennis ball just slightly below the top of the shoulder and in between the spine and your shoulder blade.
So it should feel like it's on muscle or connective tissue,
Not a bone.
So from here,
Relax your arms by your side.
You can keep your right arm bent and straighten it.
You might find that you're lifting up the left upper back as well so that you're having the pressure of just the weight of your upper torso on the ball.
This should feel like some maybe deep tissue massage and begin to find some movement.
So you're moving your shoulders maybe a little bit left to right.
Might move that right arm out and up.
Maybe you're bringing the arm up over your head and then down by your side.
You can have the elbows bent.
Just explore here.
How does this feel?
This is one of my favorite ones to release tension and tightness and those knots,
Those trigger points that can just sort of form in our upper trapezius.
This is sometimes where many of us hold tension and tightness.
So continue to move here.
Notice what feels good to you.
Let your body guide you here.
And if the ball tends to move a little bit,
You might need to adjust it if it starts to slip out and move away.
Or you might just want to move the ball slightly,
Maybe just a quarter inch or so up or down,
Left or right,
And find a new spot.
Again,
Move in any way that feels good to you.
If this is too intense,
You can also do this instead of laying down.
You could do it against a wall.
You could also put the tennis ball in a sock,
In a thin sock,
So that you hold on to the end of the sock and then the tennis ball won't get away from you.
So find whatever variation works for you.
Again,
You might be finding some sensitive and sore areas here.
And you can increase the pressure or lighten up on the pressure as you need to.
Notice what actions in your body make the pressure deepen or lessen.
I find if I want to deepen it,
Sometimes just pressing into my feet,
Lifting my hips slightly will really increase that pressure.
Make sure if you're already feeling enough pressure,
Avoid that for now.
Good.
So now remove the tennis ball.
You can just hold it in your hand or lay it beside you and pause.
Stay laying on your back and notice the difference between left and right.
Notice how one side feels different than the other.
Notice the difference between right and left.
And then when you're ready,
Take the tennis ball in your left hand and place it under your left shoulder.
Again,
In between the spine and the shoulder blade,
Just on that upper trapezius where we tend to hold tightness and tension.
You're going to find where you want it.
It should feel like a nice massage,
Maybe a deep massage.
Again,
Find some movement here,
Side to side.
You might move that left arm up or down.
You might move the shoulders a little bit.
And you also might find certain spots where you want to just hold and relax over the ball.
That's totally fine as well.
Listen to your body.
If you find a good spot,
You might just want to stay there and linger and just breathe into it,
Encouraging your body to release tension and tightness.
Make sure you're still breathing.
Again,
You might want to move the ball maybe a quarter inch,
A couple centimeters left to right,
Up or down.
Find the spots that feel good to you.
One side might feel different than the other.
So this also is great to do every day,
Usually about two to three minutes of focus in one area,
Is all you really need for a myofascial release practice.
So you could choose a couple things each day that you like and just mix and match it so that you can get into the whole body on a regular basis.
Good,
A little bit more here.
Find a good spot,
Maybe a new spot.
And then take the tennis ball out from under your left shoulder.
Lay still for a moment and notice the difference.
If there is a difference,
Hopefully both sides feel almost about the same now.
And then thoughtfully roll over to one side or the other and slowly press yourself up to a seat.
From here,
You might notice even more sensation in the upper back and shoulders.
Notice how this feels.
And then come into table pose and we're just going to notice how our upper body feels now,
Either in puppy pose or if you would like come into a downward facing dog.
Tuck your toes,
Lifting your hips up and back and come into your adho mukha svanasana,
Downward facing dog or whatever variation works for you.
Notice how the upper back and shoulders feel.
We haven't gotten into the legs in this practice,
So the hamstrings might be feeling a little tight.
Feel free to pedal the feet or whatever movement feels good to you.
Lengthening through the spine,
Lift your hips up and back,
Slight engagement in the core.
Lengthening through the spine,
Notice how the upper back and shoulders feel.
You should feel probably a little bit more open than the legs right now.
And feel free to stay here as long as you would like.
And then when you're ready,
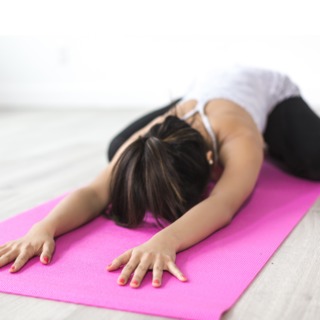
Thoughtfully lower the knees and come into child's pose and rest.
Make sure the head is supported.
And a few deep breaths here,
Maybe soft sighs of an exhale,
Let it go.
And then thoughtfully come to a comfortable seat once more.
Maybe closing the eyes,
Notice how you feel.
From here,
You might continue into the rest of your yoga or morning practice.
You might add another recorded practice,
Maybe getting into the legs and hips or whatever you have planned for your day.
Maybe bring the hands together at your heart with appreciation for taking this time for yourself today.
Have a beautiful rest of your day.
Namaste.