Thank you for joining me today.
We're going to be working on exercises to reduce the risk of falling.
We're going to work on strengthening our legs.
We're going to work on mobility and agility.
We're going to work on posture.
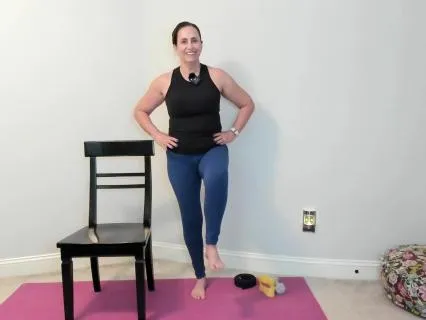
What you need for class today is a chair.
That's where we're going to start,
Seated in a chair.
Mine is on a yoga mat.
You do not necessarily have to have a yoga mat beneath you,
But just make sure that your chair is not on a slick surface.
Your chair is not going to slip if you push on it a little bit,
Because we will be standing up and using the chair for support.
Other props that you might want to grab,
I have a lightweight,
Optional.
I have a loop band.
Again,
That's optional.
And I also have a yoga strap that will be used at the end of the class.
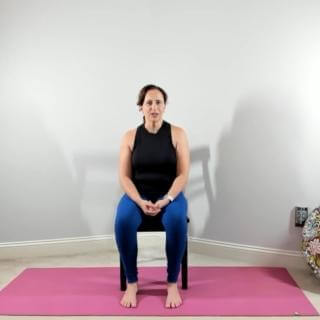
So let's get started.
Have a seat in your chair.
Place your feet on the floor.
Spread out your toes,
Drop them down.
Take a moment to notice what you're actually sitting on,
Your sits bones,
The bones at the base of the pelvis.
The knobby protrusions on the base of the pelvis.
Your shoulders,
Roll them up,
Back,
And down.
And then bring the ears over the shoulders.
I'm going to take your hands and place them on the sides of the ribs.
As you breathe in,
You're going to fill into the hands,
Feel the ribs expanding.
And as you breathe out,
Knit the hands in towards each other to signal the ribs to pull in towards the spine.
Inhale,
Move the hands out as the ribs expand.
Exhale,
Draw the hands in as the ribs move inward supporting the spine.
As you continue.
The front ribs are moving,
But also the side and the back ribs.
So it's a 360 degree breath.
Abs are lightly engaged on that exhalation to brace.
Let's take three more rounds of breath.
As she finishes this last breath.
Let the hands come to the legs.
Let the chin lower to the chest.
As you inhale,
Lift your chin up,
Feel a stretch in the front of the throat.
As you exhale,
Lower down.
We'll do three more.
We're going to make this motion a little bigger to include not just the cervical spine,
But the rest of the spine.
I'm going to pivot to show you the side view.
I'm going to use my hands,
Pull against it to lift my chin up,
But lift my tailbone up behind me.
And then as I breathe out,
I'm going to rock back.
Slide the tailbone under,
Spread the shoulder blades apart.
Inhale,
Use the hands,
Traction the chest forward.
Shoulder blades in and down.
Exhale.
Shoulder blades spread apart.
Think of it like a seated version of cat and cow pose.
Two more.
Sit up tall,
Ears,
Shoulders over hips.
Grab onto the side of your chair,
Lean up and over with the spine and the arm.
Take a breath,
Breathing into the side ribs that are being stretched.
And then switch.
Up and over,
Not just the arm moving,
But the spine moving as well.
Let's do one more each side.
Come back up to the center.
When it comes to balancing and we want to improve our balance,
We really need to have mobile feet and ankles.
So that's where we're going to start.
We're going to bring one foot up,
Cross over on the other leg.
You're going to grab on top of the toes,
Or if you're comfortable,
Thread your fingers in between the toes,
The hand-foot shake,
The yoga hand-foot shake.
I'm going to hold on top today.
I'm going to bring my toes back towards the sole of my foot and then forward towards the shin.
Gentle motion in both directions.
Two more.
Now I'm gonna make it a little bit bigger after this one.
I'm gonna move my ankle and my toes.
And forward.
And forward.
Find a range of motion that works for you.
One more.
Now we're going to draw a circle.
Guiding around the foot with the hand.
Reverse the direction for five.
Four,
Three,
One.
Last thing on this foot.
I'm going to turn the sole of the foot up a little.
Turn the sole of the foot,
You might use one or two hands,
Down.
Turn up.
To face you.
Rotate down towards the floor.
When you're moving your foot,
You're also going to feel your ankle changing position from pronation to supination one more time.
Release and we'll switch.
Crossover.
Grab on or thread the fingers in,
Move back and forth.
For the first motion,
Try to keep your ankles still and isolate to the toes.
Start to move toes and ankle extension.
Selection.
As you're doing these motions,
Notice a difference if there is one between each side,
Each foot.
Let's start our circle,
Making sure your foot is hanging over a little bit off of the leg.
Reverse.
Bye.
Four,
Three,
Last two.
And won.
We're turning up and down,
One or two hands guiding the sole of the foot up and down.
So the foot down.
So it's the top and the midfoot that you're moving.
We're going to do two more.
Release.
All right,
We're gonna work on agility.
Starting on one side,
You're going to lift up your.
Toes,
Your heel,
Your foot,
Your heel is off the floor as well,
Very close to the floor.
You're going to tap your toes down,
Top of the foot,
Tap,
Tap,
Tap.
Tap,
Tap.
This is working your shin.
The muscles that will help you to keep your foot lifted when you're going up an uneven surface so you don't hit your toe.
Cause you to trip.
Can you pick up your speed?
Five.
Four,
Three,
Two,
One.
Let's switch feet.
Same thing,
I'm hovering my foot off the floor,
Tapping with the toes.
Tap down,
Down,
Down,
Down.
Five,
Four,
Three,
Two,
One.
Show you the side view again.
Same starting position,
Foot just off the floor.
This time we're going to tap with the heel.
Like a pogo stick.
Down,
Down,
Down,
Down.
Once you have that motion,
I want you to alternate toe,
Heel,
Toe,
Heel,
Five.
Four.
Three.
Two.
One.
Other side.
Start with the heel first.
Tap,
Tap,
Tap,
Tap,
Tap.
Get that going.
And then begin to alternate toe,
Heel,
Toe,
Heel,
Toe,
Heel,
Five.
For.
Three,
Too.
1.
You should feel some warmth,
Some heat in the shins.
OK,
We're going to go on to a quad extension.
For this,
You can do it body weight only.
If you have a weight nearby and you want to use that,
It can go above the knee on the thigh.
So we're going to extend our leg straight out and then draw back.
Be mindful if you have a bar across the bottom of your chair,
Your range of motion might be a little bit limited as you pull under.
Two more.
Switching sides.
Body weight only or an additional weight on top,
Up.
Quad.
Hamstring.
We've got five to go.
Five.
Or Three.
And one.
All right,
You can put that weight,
If you had it,
To the side.
And if you have a loop band that you want to use for the next one,
You can grab your loop band.
You can do this without a loop band.
You will still feel it.
This is going to add extra resistance.
If you're using your loop band,
It's going around the outer blades of the feet.
Feet on the floor.
Sitting ears,
Shoulders,
Hips stacked.
I'm gonna lift one foot out,
In.
Out.
In with or without the band.
Step out,
Step in.
Wide,
Narrow.
Bye.
Or Three,
We're working outer hips.
One,
We switch sides.
We've got eight.
Seven.
Bye!
Four.
Three.
Won!
Now,
If you had a.
.
.
Larger band or one that was more stretchy instead of alternating one side out one side in.
If you needed more tension on that band you could go out and in two at the same time.
If you have a tight band,
That's gonna be hard.
So that's why we did the single out and in.
Okay,
I'm gonna lift up my toes with or without the band around the same spot,
The blades of the feet.
You're gonna turn knees and toes out,
Knees and toes forward.
Knees and toes out.
Knees and toes forward.
Open.
Close.
Open.
Close.
When it comes to balance,
We want to have strong outer hips,
Strong glutes,
Strong legs in general.
Bye.
Four.
Three.
And one.
All right.
So you can put that band to the side if you were using it.
We're going to move up to the upper body,
Work a little bit on some exercises for our posture.
You can do these seated or standing.
I'm going to do them seated just so you can see my arms in the frame.
You can also stand up and do the exact same thing.
We're going to start with a Y position.
Arms come across the chest.
You can cross at the shoulders.
We're going to open into a Y.
Lead with your thumbs to the back.
And then cross with the other arm on top.
Pull back,
Thumbs to the back,
Shoulder blades in and down.
Alternate the top arm.
Open.
Close.
We've got six left.
Open.
Close.
Five.
Or.
Three.
One.
We're going to take it to a W.
Pull back on the elbows,
On the hands,
Squeeze the shoulder blades in,
Hold for three,
Two,
One,
Relax.
Pull back,
Squeeze in,
Three,
Two,
One,
Relax.
Pull,
Hold,
Three,
Two,
One,
Relax.
We're gonna do five more.
Pull,
Hold,
Three,
Two,
One,
Relax.
Four to go,
Four.
Release.
3.
Release.
Release.
One.
Release.
One more for the posture.
A T position,
Palms up,
Thumbs to the back.
Pull the thumbs back,
Hands come a little bit behind.
And then relax back to the natural.
Position.
Pull back.
Release.
Fall.
Release.
Pull.
Release.
Four left,
Four.
Three.
One more.
Bring it down,
Move those shoulders a little.
They should be warm.
Okay,
We're gonna stand up for the next.
Bit.
As you come up you can use your chair at any point or wall for balance.
I'm going to move mine forward just a little.
So I can touch the side or you can stand behind it.
I'm to the side just so you can see.
My legs and feet better.
Toes are pointing forward.
Finding in yoga what we call mountain pose.
So feet are parallel.
We're shifting forward and back.
We're trying to balance the weight over the big toe,
The little toe,
And the heel.
Think of it like a tripod or a triangle.
You're pushing those six points down.
Stacking like we did in seated,
Ears over shoulders,
Over pelvis,
And now over the ankles.
I want you to imagine coming out of the top of the head a light And you're going to draw a circle on your ceiling.
By moving from your ankles.
Forward.
Side,
Back.
As big or as small as you're comfortable with.
Pause and go in reverse.
Notice how that second direction feels compared to the first.
Is your circle just as big as it was?
Come into the middle.
If that exercise was challenging,
I want you to repeat it one more time.
If it was not challenging,
You're going to close your eyes.
Remember,
You have your chair,
Your wall nearby if you need to touch or if you need to open your eyes at any point.
Here we go,
Round two.
Same thing,
Option to close the eyes.
Now,
If you do decide to close the eyes.
What does that do to the size of your circle and the pace?
Let's go in reverse.
Are your feet gripping,
Your toes gripping more when your eyes are closed,
If you chose to close your eyes?
All right,
Go ahead and open them up.
We're gonna move on.
That's a good exercise to practice to improve your balance.
When we're balancing,
The input we take from our eyes,
We take input from our ears,
We take input from what we can feel,
In this case,
What is under our feet.
Our brain uses all that input to decipher what we need to do,
And it does it within a split second.
So if we want to work on balance,
Something like closing the eyes,
We've removed one of those three pieces,
The other pieces have to work a little bit harder to give the brain the information.
It's a good way to practice.
Okay,
We're moving on to our single leg stand.
You can stand to the side or the back of the chair.
Remember,
If your chair is not on your yoga mat,
Make sure it's not a floor that is going to slide.
You've got it secure.
We're not supposed to put a lot of weight in it,
Though.
We have a light touch.
If we're using the chair,
We're standing up nice and tall.
So the single leg.
Exercise and we're going to lift our outer leg.
Knee in line with hip.
Hold.
And then bring it down,
Either fully down or floating.
Lift.
Hold.
Use the chair as needed.
Down.
Lift,
Hold.
Down.
We're going to do five more.
Lift,
Hold.
Down.
Eyes can be helpful if you're struggling on single leg.
Down.
Focus your gaze on one spot,
Something in the distance.
Down.
I think we have two more.
Lower.
One more time.
Lift.
Lower.
Little stretch for the outer hip.
Reach up.
And over the chair.
OK,
We're going to do side two.
I'm going to switch sides.
You can turn around now that you know what you're doing.
Face the other direction if you need to.
Try to stay tall,
Try not to hike your hip when that outer leg lifts and we're not leaning.
To the side,
Light touch,
Here we go.
Hold.
Lower.
Lift.
Hold.
Lower.
Lift.
Hold.
Lower.
This is halfway up.
Hold.
Lower.
Four to go.
Four.
Lower.
Three.
Lower.
Last two,
Almost there.
Lower.
One more.
And bring it down.
And again,
I'm going to use the chair for support,
Lean up and over,
Stretch out the outer hip.
The ribs.
Okay.
Next one,
Outer hip.
If you want to use additional weight besides your body weight,
You could have a weight on the outside of the leg.
I will show you.
If you want to use it,
You hold it here to the outer hip.
We're going to lift the leg now to the side.
I'm going to go back over to side one.
Same things apply.
We're tall,
We're not leaning,
We're not death gripping,
Whatever we're touching.
You want to lift from the outer blade or the heel of the foot,
Not turning the toes to the side.
Here we go.
Lift.
Hold.
Lower.
Again,
The lower is all the way down or floating the foot.
Lift.
Hold.
Lower.
Lift.
Hold.
Lower.
LIT.
Hold.
Lower.
Halfway.
Four to go.
Four.
Lower.
Three.
Lower.
Soon.
Lower.
Final one.
And bring it down.
I'm going to do the same side body stretch.
This time,
Though,
I'm going to step one foot across,
Make an X.
Then lift up and over.
OK,
Switching sides with or without your weight.
Standing.
Tom!
Light touch.
Optional weight here.
Hold.
Lower.
Lift.
Hold.
Lower.
Left.
Hold.
Lower.
Let's hold,
Lower.
Four to go.
Four.
Lower.
Three.
Lower.
2.
Lower.
One more.
Second side is more challenging because both legs were working the first time.
All right,
Cross it over or keep the feet side by side,
Reach up.
Release.
OK.
We're going to shift gears,
Give the legs a little rest,
And work.
On the core.
With our chair.
So we're gonna do a couple different things.
First one is spinal balance.
I'm going to switch sides.
Hands can be on the seat of the chair.
Or you can use the top of the chair.
Seat's going to be a little bit easier.
Wrists under shoulders,
Knees under feet.
We do spinal balance typically in a yoga practice on our mat on all fours.
So we're starting in the same setup,
Stacking the joints.
We're going to shift our weight to our right leg and lift our left leg behind.
Make sure you have clearance in your space.
You can keep both hands down or lift up the right arm.
Release,
Reset.
Make sure you're not arching your back.
You're not rounding your back.
You've got that nice,
Long,
Neutral spine.
Abs are lightly engaged.
Remember the breathing exercise that we did at the very first thing,
That knitting in on the exhale.
You want a little bit of that knitting together of the abs.
Let's do the second side.
Right leg back.
Optional left arm forward or you can have both hands on the chair.
Release.
We'll keep alternating.
Leg comes up.
Optional opposite arm.
And release.
When you're bringing the limbs down,
Try not to shift a lot side to side.
Keep your abs engaged.
Minimize movement left and right.
Work at your own pace with this.
Let's finish off one more left leg lift and right leg lift.
Now I'm going to use my chair,
Either the back or the seat,
To do something that looks like down dog.
I'm going to walk my feet back a little bit more,
Pull my hips back,
Let my head come in between my arms just to stretch out the back of the body.
Walk it in and up.
The other thing we're going to use our chair for the upper body is push-ups.
Why do we need to do push-ups or should we attempt to do push-ups?
We want to be strong enough that if we cannot avoid the fall,
We can control our descent.
So you can do these against a wall.
You can do these against the back of your chair or the seat of your chair.
I'm going to demo using the back of the chair.
Same thing if you were using the wall,
Except for your hands are going to be flat.
You're going to walk your feet back a little.
Lift your heels off the floor.
Abs lightly engaged,
That bracing that we practiced at the very beginning.
Ears in line with shoulders in line with hips.
And then we're going to bend our elbows,
Bring our chest.
Towards the wall,
Towards the chair.
Push.
On the exhale.
Inhale on the way down.
Exhale on the way up.
Now the position of my arms,
My elbows are not way to the sides,
They're slightly down,
Almost like the head of an arrow.
There's an angle of my elbows down as I'm doing my push-ups.
So again.
You're in a plank.
Squeeze the glutes,
The quads,
The belly.
Bend the elbows,
Lower the chest.
Exhale,
Straighten,
Drive through the hands to push back.
You want to find a surface.
That you can use and you can get in about 8 to 10 repetitions with good form.
If you're using a lower surface and you're not able to get in 8 to 10,
Good repetitions,
You want to come up to a higher surface.
We're going to move back to the lower body,
Moving on to our side or lateral lunge.
I'm going to show you a few different options for this.
Beginning level,
It's a side step.
You'd walk out.
Out!
And And you can have your chair in front of you or do this with your hands against a wall,
Kind of gliding the hands out.
You're taking it to the side.
Taking it back in.
So this is the first level of moving side to side versus forward to back.
You could make it a little bit more challenging by making it more of a step and squat as you go out.
Step and squat as you come back.
We want to move in all planes of motion,
Not just practice forward and back,
But side to side.
All right,
My chair has been confiscated.
Let's see what we have next.
We're going to be going into our four-part balance.
And part one,
We've already practiced feet.
Side by side,
Mountain pose.
Weight balanced between the big toe,
Little toe,
And heel.
So that's part one of the four-part balance.
Part two is stepping one foot forward.
So I'm going to take a step forward with one foot.
Eyes go out to the distance.
I want to see how I'm feeling balance wise.
I can use support if I need to.
From there,
The third step is to narrow the base of support.
So you're bringing your heel closer to being in line with your toe.
Called a tandem stance.
I would take it slow.
Gradually wiggle the foot closer to that tandem stance.
Rechecking,
Looking out to the horizon,
Seeing how your balance is,
And then adjusting again if needed.
Eventually working up to heel to toe.
That's our tandem stance.
That's stage three of the balance.
Now stage four is a single leg,
So I'd be lifting this leg up.
We're going to do that together.
When you lift your leg,
If you need to use the chair,
Use it.
If you do not need to use the chair,
Keep your hand off as long as you can.
We're gonna try to hold for 20 to 30 seconds.
I'm gonna let you know every five seconds where we are so you can see how long you have been able to balance on one foot.
And make a note of which foot this is and how long you're able to balance.
All right,
Here we go.
We're lifting that outside leg.
Inside leg closest to the support is the standing foot.
We're at five.
We're at 10.
Fifteen.
2020.
25.
30.
Shake it out.
You're going to switch sides.
You can turn around.
You do not have to move your chair.
I'm just going to move it.
So I can stay facing you.
Same thing on the other side.
Give a little wiggle first.
Look down at that standing foot,
Knee and toes straight ahead.
We'll lift in three.
Three,
Two,
One.
Hand on or off the chair.
We've got five.
10.
15.
20.
25,
Almost there.
30,
Awesome job,
Shake it out.
So you wanna record how long you were able to stand on one,
How long you could do dumb side two,
Were you touching,
Were you not?
That is something you record,
You repeat this again and again and again,
And you're gonna get stronger,
You're gonna be able to hold it longer or use less support.
All right,
We've got one more thing that we're gonna do standing up,
And then we're gonna sit and do some stretches at the end.
So the last thing is,
Called the sit-to-stand test.
So this is where we're going to sit in our chair,
Stand up for the next 30 seconds.
I'll show you in a demo in a second.
We want to see how many repetitions we can get in.
It's a great way to strengthen your legs.
Okay,
So I'm going to show you the side view,
Turning my chair.
You're sitting all the way down,
Feet flat.
You're coming all the way up,
Opening the front of the hip.
Come down.
Come up.
Now what if you don't feel comfortable?
Some ways you can do this.
You can hold on as you're sitting down.
Hold on as you're coming up.
You could have a second chair in front of you that you use for support.
If you're feeling more comfortable with the exercise,
You can cross your arms over your chest.
I had my arms forward.
You can cross and make it X as you come up and down.
So we're going to see how many we can get in.
In 30 seconds.
This is a good way to get you a benchmark of where you're starting from.
Repeat this again and again and again and you're going to get stronger and you're going to increase the number and get more in in your 30 seconds.
All right,
Here we go.
We start in five,
Four,
Three.
Two,
One.
All the way up.
All the way down.
We're not just tapping lightly.
You're counting your repetitions.
And stop.
All right,
So you write that down as well.
Keep a record.
Do this again and again,
And you will get stronger.
You will increase your number.
You'll keep bumping it up,
Up,
And up.
We're going to grab our yoga strap.
I'm going to adjust my chair.
And we're going to do some stretches to finish off.
If you don't have a strap,
Something that can.
.
.
Help you reach your foot.
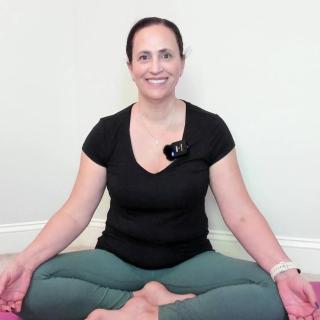
Starting our figure four stretch,
Ankle over thigh.
Either upright,
Ears,
Shoulders,
Hips stacked,
Or keep that upright but hip hinge and lean forward.
Try not to round if you're coming forward.
Your other option is staying.
In neutral,
Crown of the head towards the ceiling.
Let's bring ourselves up.
Grab our strap or towel,
Whatever we're using to extend our arm,
Bring our leg straight out.
Soften your shoulders,
Keep your chest open.
Push out through that heel.
Let's take our leg over to the side.
You want to feel a little bit more on your inner hamstring.
Inner thigh.
Come back forward.
Slide the strap off,
And we'll switch.
Think you're four,
Stay upright.
Or lean.
Keep your foot flexed.
Collarbones broad.
We're here for another five.
Go ahead and bring yourself up.
Lasso your foot.
Big toe position.
One.
Do your best not to lean Back to get the leg up.
Remember what we were sitting on,
The sits bones?
Just.
.
.
On top of the sits bones,
The two bones at the base of the pelvis,
Knobby protrusions,
That's where you want to be.
Taking it to the side.
Here for three.
One.
You can remove your strap,
Put that to the side.
We've got one more stretch together.
I'm going to turn to the side of my chair,
Grab on to the back of the chair with my arm,
And then dangle that one leg off,
The outer leg off.
I'm trying to stretch here in the and in the quad.
Your toes can be tucked or flat on the back foot.
You can stay upright or you can take your outer arm and lean up and over the chair.
After the side leg lifts,
All that outer hip work we did at the beginning with the band.
You might want to do a little extra stretch for that area.
All right,
Let's switch sides.
Slide two.
Hold on with one arm.
Back the knee up so it's below the hip.
Option to reach up and over.
And release.
Go ahead and slide back into your chair where we first started.
Take a breath in through the nose,
Lift the shoulders.
Open the mouth.
Let it go.
Did a great job today.
Thank you for joining me.
The more that you practice these exercises,
You can do these daily,
The stronger you're going to get.
The more you're going to feel comfortable with your balance and your coordination.