Hello everyone.
If you've ever been in a classical platter studio,
You might have wondered what all these weird things that sometimes studios have hanging on the wall or lying around,
What these weird things are.
So two of them we're going to explore today because it's quite easy to.
.
.
Rebuilt or to find the same function with small little things at home.
Joseph Pilates believed that a healthy body is a body which is from toe to the top of your head.
In balance,
Strong and flexible.
And that's why a lot of things include very specific work with our feet.
So for example,
In a classical studio,
When you start on the reformer,
You will always start with footwork,
Where you work the three positions of your feet.
So your back is supported.
It's not a lot of work because.
.
.
Although there's always a lot of work involved in Pilates,
But the first exercise in the reformer focuses on the feet.
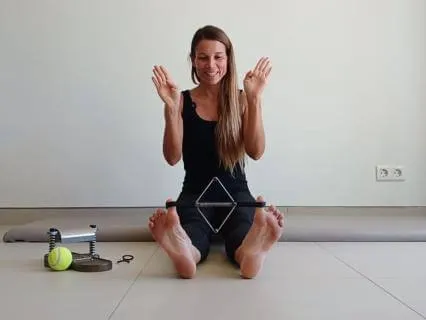
And Cho was so obsessed with the feed that he specifically built two small apparatuses working the feed.
So we have two of them here today and we will do a few exercises together.
This one that's quite heavy,
It's called the foot corrector.
It makes a lot of noise.
And this smaller one here is called the toe corrector.
So you can see both of them have a spring.
So here's a spring in the middle and here we have two springs on the side.
The exercises we do with the foot corrector can be done at home with a tennis ball,
Although it's not.
.
.
Perfect because as you see here there are two springs here with the plate on top so for example when you're then standing with your foot on top of this and you're more pronating or supinating so putting pressure on either one side too much then you will get stuck here this small apparatus is so great because it forces us to put equal weight and pressure on the foot,
Which sometimes can really quite a lot of work even for the concentration.
So the exercises we can do with the ball as well,
But yeah,
We don't get the same feedback 100%,
But it's good enough.
And then the second one is the toe corrector,
Which you can rebuild.
Quite easily.
We just need to be creative a little bit with two hair bands or some rubber bands.
You have sometimes from vegetables from the supermarket,
You have these rubber bands.
So the important part is that both are roughly the same strength and size.
And go for one that's actually very strong but you have quite a lot of resistance if you think about here the spring is quite a lot of resistance actually so choose two elastics which have bit of stronger one and then you just make a knot in between like this and we have roughly the the same idea let's put this way okay so i'm sure you're very curious about these things so let's get started We start with the foot corrector and I will show you both ways with the original one and then also with the tennis ball.
Make sure you're on a surface where you don't slide too much.
No accidents are happening.
For the foot corrector,
We start standing.
And you want to place so an original one the heel on the platform and all five toes equally on top of that little plate then from here little bend in the knees and you try from your ankle to press those two springs down and up.
So when you have the tennis ball at home,
You keep the heel on the floor,
You try to spread evenly all five toes across the ball and then from your ankle try to press into the ball and release.
Press into the bowl.
And you So try to almost as if you want to grab with your toes the ball.
I'm going to do a few more repetitions here.
So you do shift weight a little bit forward,
But think you really want to move from the ankle.
So.
That also means,
That's what I meant before,
That you want to prevent the bolt from rolling away.
Try to lift the foot and then press down.
Lift the foot actively and press down.
Last one.
The second one I show you again first with the foot corrector.
You place pretty much the center the arch of your foot on top of it and the same principle you're going to press down and lift i don't know if you hear the springs are making noise a little bit ends up.
Sounds pretty funny.
And okay this is what i tried to explain before so on the foot corrector you're really forced to press evenly on inside outside so you have no chance to pronate or to supinate with the ball it's a little bit harder and i see also my foot wants to go a little bit actually more external rotation So give your best and always check and watch what your foot is doing.
We're going to do a few more.
And I'll try to,
Yes.
A few more on the foot corrector.
With the next one,
So with the foot corrector we flip it around.
And I'll place the heel on top.
And the toes down.
So finger on high heels.
Again you want to move from the ankle and not from the rest and you can do it the same with the ball putting the toes on the ground.
And you press into the ball.
And release.
So here my tennis ball is almost a little bit too soft.
If you noticed when I was pushing down on the foot corrector,
That really worked.
When I'm coming up here.
I really really have to work to push it down.
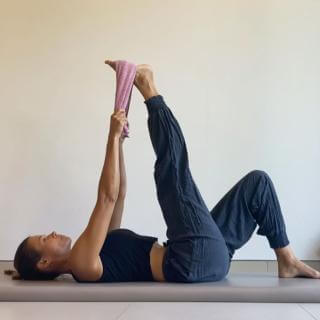
Now with the next one,
That's an easy one.
You can do this easily with the ball as well.
That's literally a massage.
So you're going to roll.
Into the bowl.
Yes,
Feels actually pretty amazing.
I love it.
And then both feet on the ground.
And you should feel a difference.
You definitely should feel a difference left and right.
So we start over again with both feet.
Starting.
Um with the food corrector there you go Oh,
I had a few cracks immediately.
In my toes.
And like before you want to mainly work from your ankle.
And as always,
Try to notice a difference left and right.
And just pay attention what's happening.
Good.
Then again on arches.
And you just try your best to work evenly.
Let's hear if you can hear the squeaking of the springs.
Good and then the last one we can do with the ball because my feet are very small feet so for the last one my feet are almost too small There you go.
And then with the heel,
Pressing down.
Like always,
You want to stand tall.
Both legs are active.
And then give your self a little foot massage.
This sequence is really,
Really nice.
I dare early morning.
I like to do this early morning to wake up my feet.
Or before going to bed,
If you had a really long day where you had to walk a long time.
But you had to wear uncomfortable shoes.
This is really nice to give you a little spa experience.
There you go.
Then both feet down.
Good!
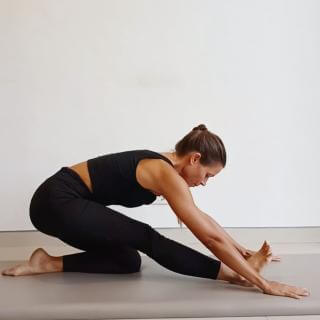
For the next one we're gonna use the toe corrector.
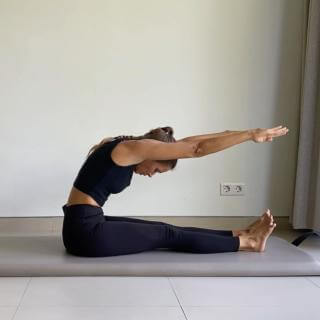
All right so for this second part for the toe corrector we need to find first a position where you can sit with your legs straight for quite a bit of time because there's a whole sequence we're gonna do So maybe if your hamstrings are very tight,
You might want to sit on top of a block or a pillow or something.
So we need to sit in this position.
Hips upright,
Spine tall,
Hands next to the body,
And the legs straight with the feet flex.
So if this is difficult for you,
Find a position with a block or with a pillow where you can sit now for the next couple of minutes in this position.
So,
Now there comes the truth.
Place your homemade toe corrector above your big toes.
And it should be more in in in the middle not all the way down okay So from here.
Send energy through your legs.
Keep the feet flexed.
And now from here.
You see here's a little spring so you want to imagine at your homemade toe corrector that you want to open the spring by turning your legs out and bring them back together.
So even though it's called the toe corrector,
The exercises,
Involves entire legs so it starts really from the hips so imagine the sit bones coming together as the thighs are turning out And back to center again.
And back three more um back to center so i notice my right side is a little bit lazy So I give my best to focus that the right side works as much as the left.
One more.
And back to center so the next one is you start with the same you open the spring from your thighs then point your toes forward without closing the spring.
Flex your feedback.
And close the spring.
Again open.
And.
.
.
Your toes forward.
Flex.
And close.
Three more.
Open.
Coin Flex.
And close.
Open and Thanks.
And close.
Last one.
I feel my hamstrings,
My outer hips,
The thighs,
Actually everything working.
And close.
Good for the last one.
I'm gonna change to this one so you can see it also with the homemade.
You start with the same open Then one foot goes forward point and the other ones to flex even more.
Back to center and close.
And change.
So alternating left and right.
And I notice compared to the original one with the spring,
These elastics are actually a little bit too weak.
So I feel still the same activation in my legs,
In the hips.
But way much less work.
Back to center.
Let's see each side one more time.
So when you build your own toe corrector.
Try to get some real heavy Rubber bends.
Back to center and close.
Very nice.
And that's it.
I hope you enjoyed that little introduction to these small little things we have in the classical Pilates world.
And thanks for joining me.