Hi,
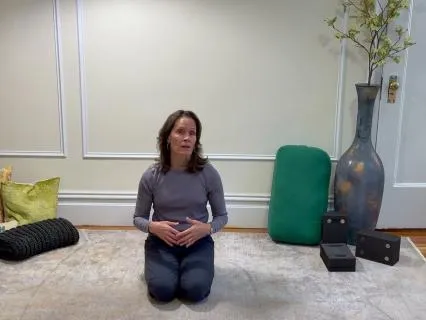
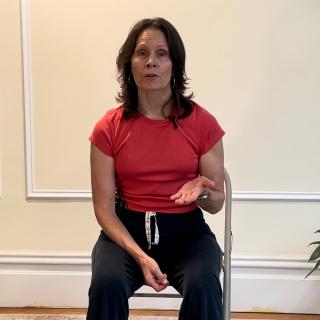
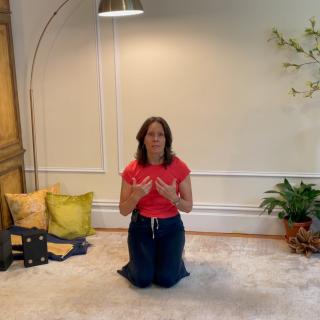
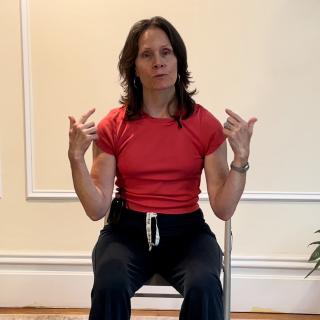
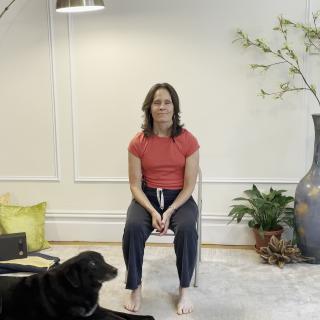
I'm Lisa,
And I'm so happy you're here for this Hanna Somatic Yoga Session.
In this session,
We're going to be working specifically with muscles of your neck,
Shoulders,
Arms,
Hands,
And fingers.
Generally,
As a rule,
Move in the way that it's comfortable for you to move.
That may mean in a specific movement you do a very micro movement,
Or you may just imagine a movement today.
In this class,
We are working to stay not only with a comfortable range of motion,
But within an easeful range of motion.
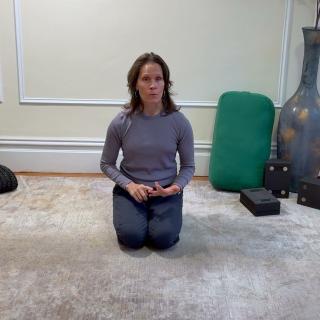
And so you're going to want to have blankets,
Pillows,
Props,
A lot of things around nearby so that should you need them to feel comfortable or stable at ease in whatever we're doing,
You have them.
Now the way you know what I'm doing feels comfortable and useful is that you're tuned to the internal sensations of whatever it is you're doing.
And because I want you to be able to tune in as you're doing what it is you're doing,
As much as possible,
I invite you to not watch me.
Even though this is a video.
So listen.
Hear the instructions as they're given,
And as best you can,
Organize your movement around the instructions given.
If you find that you're unclear or something just doesn't feel right,
Pause your movement.
Do take a moment to watch me.
But then take a moment to imagine yourself doing what you saw me do so that you could do yours.
This video is a longer practice,
And so if you find you're looking for a practice that's a little shorter given the time you have on a certain day,
Please look at a shorter video that I've done to pull out some key parts of this longer-form video.
So when you're ready.
You have everything that you'd like to have nearby.
Come to find a comfortable position.
And just take a moment to breathe intentionally.
Use that intentional breathing.
As a way of redirecting your attention inward.
And it's also helpful in bringing you to the present moment.
If you are intentionally breathing,
You have to be present for your breath in,
And then you have to be present for your breath out.
Take a moment to do a body scan.
Use your mind.
Tune in and notice what sensations are present in your body at the beginning of this breath.
And so we'll start with some panosomatic exercises.
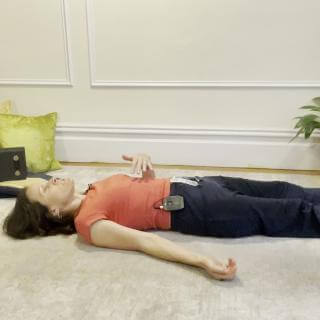
If your legs are straight,
You're going to bend your knees and stand your feet.
And you're going to do a movement of your pelvis,
Which causes a movement in your low back.
This is called arch and flatten.
It's the first exercise in the daily cat.
As you tip your pelvis forward,
Top of pelvis goes towards the ceiling,
Tailbone goes towards the floor,
Your low back lifts,
It is in an arch.
And then you slowly release the muscles you contracted.
Come out of the arch,
Come out of the forward tilt of your pelvis,
And you're in neutral.
Now gently tip your pelvis back.
Top of pelvis is going back towards the floor.
Tailbone has lifted a little.
Your low lumbar spine or your lower back has flattened a little.
Your contracting muscles in your abdomen.
Slowly release what you contracted to return to neutral and come out of that flatness.
Tilt your pelvis forward again,
You're arching your low back.
This time,
Bring your chin a little towards your chest.
Not by lifting your head.
But by drawing the back of your head up the floor a little.
Slowly release.
And as you tilt your pelvis back,
Gently flattening your lumbar spine.
Roll your head back a little,
Your chin comes away from your chest.
And then slowly release what you contracted to return to neutral.
Do that one more time and then we're going to change your head position.
So you're tilting your head and pelvis forward.
Slowly releasing,
It's a voluntary pandiculation.
And then you're gently tilting or rolling your head and pelvis back and slowly releasing what you contracted.
Until you return to your neutral.
Now gently turn your head a little to one side.
And with your head turned to that side.
Tilt your head and pelvis forward.
Slowly release.
And tilt your head and pelvis backwards.
Slowly release.
Continue for two more cycles.
Keep your movement within a comfortable,
Easeful range.
You're contracting targeted muscles by moving in the way you're moving.
And as you release out of the movement,
Returning to neutral,
Those muscles are being decontracted.
When you've completed about three cycles,
Very gently turn your head through center and a little to your second side.
So your head and pelvis forward a little.
Slowly and with control,
Release,
Return to neutral.
And then tilt your head and pelvis back.
And slowly release.
Continue for two more cycles.
And when you've completed.
Bring your head to your neutral position.
Take a moment and feel the effects of what you've been doing.
If your arms are not on the floor,
Bring your arms to the floor.
Wherever your arms are.
Gently roll them in.
It's an internal rotation of your arms.
And you're going to use that rolling in to help you bring your two shoulders forward.
Front of body is forward.
Slowly release and your shoulders will come back a little and your arms will roll out a little.
Now from wherever your arms ended up,
Roll your arms out or away from your body.
It's a lateral rotation of your arms.
And as you roll your arms out,
Gently draw your shoulders back.
And slowly release.
This time as you roll your arms in and bring your shoulders forward,
Gently flatten your lumbar.
Slowly release what you contracted muscles in the front of your body.
From your neutral,
Roll your arms out,
Draw your shoulders back,
And arch your low back a little.
And your return to neutral happens as you release the muscles you contracted in the back of your body.
Do that one more time.
Roll your arms in as you bring your shoulders forward.
Gently flatten your low back.
Slowly release.
From your neutral,
Then roll your arms out,
Draw your shoulders back,
And arch your back.
Release what you've contracted,
Return to neutral and pause.
So let's do the second exercise in the daily cat arch and curl.
We'll bring in your toes.
Feet.
So you're going to place your hands underneath your head in a way that's comfortable for you.
Bring your elbows forward.
And as you flatten your little back,
You're contracting your abdomen.
Use the contraction of your abdomen to pick your head up a little and we call this a curl.
Slowly release out of the curl.
Control your release to neutral.
From neutral R.
So you bring your tailbone back,
Your head back,
Even your elbows can come back.
And slowly release.
This time as you bring your elbows forward and curl,
Pick up the ball of each foot.
Slowly find neutral.
And when you arch,
Pick up your heels.
And slowly return to neutral.
You can breathe out as you're curling forward and lifting ball of the foot.
Breathe in as you do your controlled release to neutral.
And you may pause in neutral,
Breathe naturally.
When you find another breath in,
Use it to help you arch and pick up your heels.
Breathing out,
Returning to neutral.
You can wait for your next breath out or continue breathing out to curl forward and lift all the way.
Slowly release.
Let your arms come down by your side.
If you'd like,
You can leave your knees bent.
If it's comfortable,
You can let both legs be long.
And we're going to do a few movements with your neck.
I want you to be Very mindful here,
And even err on the side of doing less than you think you can.
Be very gentle with your neck.
The first movement targets specifically these big,
Thick muscles on the side of your neck,
Your SCN.
So you're going to turn your head.
To one side.
And the SCM on the other side of your neck is the muscle,
One of the muscles you use to turn your head.
So that's where you put your attention.
On an exhale,
Just slightly pick your head up.
Maybe it's just a length.
And as you inhale,
Release and let your head rest back into the support.
Exhale,
Pick your head up a little bit.
Inhale,
Release,
Let your head come back.
Take as much time as you need to completely let go.
Exhale,
Pick your head up a little bit.
Inhale,
Release,
Let it come back.
Slowly now turn your head through center to the other side.
Place your attention on the side you're targeting.
And on an exhale,
Pick your head up a little.
And as you inhale,
Slowly return to neutral.
Exhale lifting your head up that little bit.
Inhale,
Release,
And feel your head heavy into the support of the floor.
Bring it up a little.
And slowly release.
Before you reposition your head to neutral.
Just rest a moment.
And then slowly bring your head to center.
So we're now going to work with the muscles that are contracted when we are stuck in what's called the head forward position.
It's where our head is being positioned in front of our body.
And for a lot of us in this day and age,
We're in a little bit of the head forward position.
It has a preparatory movement which is a little bit of an arch in your neck.
Which means that you're released.
Is both letting your head come back into the ground and coming out of the arm.
So you're going to tilt your head back just slightly.
That's the arch.
And then with an exhale,
Move your head straight forward to the ceiling.
Glide it straight up to the ceiling.
Now let your head come slowly back.
And release your neck out of the arch.
Feel the back of your neck warm.
So your head back just a little bit in the arch.
Exhale,
Glide your head forward.
Inhale,
Release.
And return to neutral.
One last time,
Gently arch your neck.
And as you exhale,
Glide your head forward.
Inhale,
Release,
Let your head come back,
Chin sinks a little as you come out of the arch.
Rest for a moment,
Tune in to the sensations you've created.
Please now stand your feet on the floor.
And we're going to do a version of the arch and curl that incorporates lower body.
So more of your motor sensory cortex is recruited because more parts of your body are participating in your brain.
Hands come to behind your head.
And I'm going to guide this with right leg.
But if you know your left leg often feels tighter to you or you feel less connected to your left leg,
You can start with your left leg.
On an exhale,
Curl forward,
Use your abdomen to pick up your head,
Elbows come forward,
And bring your right knee in towards your body.
Slowly release.
And as your foot finds the floor,
Slide it away from you to slowly lengthen your right leg.
With your right leg long.
R.
Come out of your arc.
Flex your ankle,
Move your right heel away from you.
Flex your knee at bend,
Start the flexion of the curl of your spine,
And bring your knee in.
Slowly come out of those flexions.
And you can point your right foot away from you.
That's extension at your ankle.
As you extend your spine.
Slowly release,
Touch neutral.
Press your heel away,
Flexing from your ankle through your knee,
Your hip,
All the way through your spine.
And slowly.
Really.
Excalibur coming out of that extension pattern.
One last time,
Flex.
Curling forward knee coming in.
We're going to change sides.
So as you uncurl your spine,
Put your right foot on the floor and lean.
Find it in the L and R.
As you exhale,
Come out of your arch.
And now curl forward bringing your left knee in.
Inhale brings you out of the curl.
And you may need to wait until your next inhale occurs.
With that inhale,
Extend.
You're pointing your foot away,
Head and tailbone,
Elbows moving back.
Exhale,
Release out of the arch,
Out of the extension.
And you may need to wait for your next exhale to push your heels away,
Flex through your knee,
Hip,
And spine,
Curling forward.
You may use the first part of your inhale to come out of the curl,
And the second part of your inhale to do your arch.
First part of your exhale to come out of your arch.
Second part of your exhale to curl forward.
Do one more cycle.
Breathe in the way that you can.
Comfortably and continue to move smoothly and comfortably.
Curling forward,
Bringing left knee in.
This time as you uncurl,
Put your left foot on the floor and leave it there without straightening your leg.
And with both knees bent,
Both feet grounded,
Do one last cycle of arch and curl.
Just letting both sides of your body do the same thing.
Then slowly release,
Find a comfortable position.
Invite your body to relax.
Tune in and notice the effect of what you've been doing.
Slowly bend your knee.
Turn to one side,
And take your time.
To bring yourself up to stand.
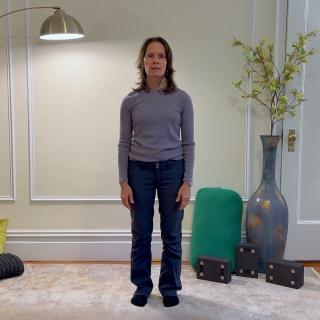
Once you're standing,
Just feel your feet into the ground.
Feel the full height of your body.
And we're going to use a standing position to work with some muscles of your arms.
Some of the patterns you did lying down will come into it.
Standing,
It's easier to let your arms freely move.
I'm going to stand to the side so that you can see the movement.
I'll be describing it so as much as you can,
Just listen,
Try not to need to watch me.
And if you do need to watch me,
Try to watch me without moving at the same time.
We'll change this in a moment but to get the direction of your mood.
Start with your palms facing forward.
So if you need,
Turn your arms so that your palms face forward.
We're going to do flexion from your fingers all the way up to your shoulders.
So flexion of your fingers is like you're gripping something.
You're taking a hold of something.
Now flexion at your wrist is your palm coming towards your oral.
Flexion of your elbow is your hand moving towards your shoulder.
And flexion of your shoulder is your elbows lifting in front of you.
Slowly release from your shoulders.
Through your elbows.
Through your wrist.
And through your fingers.
And you can let go of the muscles you use to have your palms face forward.
So now extension.
Once again,
Turn your arms so palms face forward.
And to do the extension,
We're going to start at your shoulders and work our way down.
Extension of your shoulder brings your arm behind you.
Extension of your elbows straightens it.
In this position,
Extension of your wrist means your palms are facing the floor.
You've brought the back of your hand towards your core.
And when you extend your fingers,
They straighten and they may separate.
Slowly release until your arms are resting at your side.
So we're going to add in a spinal movement.
This is going to become a standing cat cow.
But before we do,
Let's add the same internal-external rotation we did on the floor to those flexion-extension patterns you just did.
Internally rotate your arms,
The back of your hands kind of face each other.
Flex your fingers,
It's a gripping.
Flex your wrists,
Palms towards forearms.
When you flex your elbows,
They bend.
And as you flex your shoulders,
Remember your elbows lift a little.
And then slowly release.
To do extension,
Laterally rotate your arms,
Turn your palms to face forward.
Extension of your shoulders,
Arms go behind you.
Extension of your elbows,
Stay straight.
Extension of wrist,
Back of hand towards forearm.
Extension of fingers,
They link.
And slowly.
Renewably.
So in the cat-cow,
And you can visualize this as I describe it,
You arch your spine,
Which represents the cow.
You come out of it,
And then you flex your spine,
Which represents the cat.
And because we're doing it standing,
You can let your upper body also participate in those patterns.
Let's start with the cow.
So you're going to laterally rotate your arms.
Extend through your arms down to your fingers and extend through your spine.
Chest goes forward and up.
Pelvis is going forward.
You may find your weight in your toes and your heels lifted.
Slowly reunite.
Internally rotate for the cat,
Your arms.
Flex from your fingers,
Wrists,
Elbows,
Shoulders.
And now do a little curl like a cat.
And you may notice your knees want to bend.
And then slowly release.
Do two more cycles on your own,
Do your movement.
Place your attention on the side you're contracting,
That's the side you bend towards.
You may just breathe naturally,
Organizing your movement.
Or you can exhale as you do your flexion,
Your tap.
Inhale coming out of the flexion and into extension,
Which is your breath.
And when you complete.
Take a moment.
And then thoughtfully transition down to the floor.
And we'll take our minute to relax and practice self-sensing.
You can breathe a little deeper if you want.
You can use the OM count.
Silently count OM 1,
OM 2,
OM 3,
OM 4 as you breathe in.
Om 1,
Om 2,
Om 3,
Om 4,
As you breathe out.
Visualize These next three movements,
As I describe them,
And then we'll,
They'll all happen from your hands and knees.
We'll take a short period in between to get some of the sensory feedback.
And then we'll come onto your back and take the full time.
So the first one,
You're going to be on your hands and knees in a comfortable position.
And you're going to lower to your right forearm,
Putting your right elbow where your right hand was,
Then your left forearm,
Left elbow where your left hand was.
And you end up on your forearms and knees with your forearms parallel.
Then you put your right hand where your right elbow is,
Your left hand where your left elbow is,
And you press up to straight arms,
And you're back on hands and knees.
So you're working with tricep and bicep muscles in your arms.
And other muscles and you're working with stabilizing muscles in your trunk.
The second posture we're going to do is the plank pose.
You're making your spine straight like a board.
And often it's with your legs straight.
If today it's better for you to do it with just one leg straight or remaining on your knees,
You do.
And the last thing we're going to do is a bow.
Where you're picking up opposite arm and leg.
So when you're ready,
Bend your knees,
Gently turn to the side.
Come on to your hands and knees.
And gently Bring your left elbow down and then your right elbow down.
And then left hand back and right.
Your elbow goes to where your hand was.
Your hand goes to where your elbow is.
And you can just move at a pace that feels comfortable for you.
And you may see what it's like to start the movement with your other arm.
And when you've completed a few cycles.
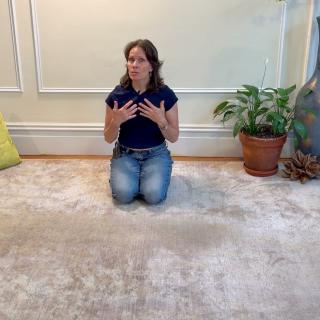
If there is a version of Child's Pose that you can be in comfortably,
Come to Child's Pose.
If sitting is better,
Come to sit.
Find a comfortable position just for a moment.
To invite your body to relax.
And to get some of the feedback.
And now visualize your plank pose.
And then come to do the version of playing.
As you visualize doing.
Breathe as regularly as you can.
Remember,
We're trying to do postures with ease,
So if you notice tension in your body,
See what you might do to release that tension.
And after about 20 seconds.
.
.
Slowly come out of your plank into your position for relaxation.
We'll just take about 10 seconds.
And now visualize that last posture here,
The balance.
From hands and knees,
You're going to extend one arm forward,
The other leg back,
Opposite leg back.
And see if you can lift them and bow.
So bring one hand arm forward,
Opposite leg goes back.
And as you feel ready,
Maybe you lift.
Breathe as regularly as you can.
Release tension where you can.
Focus on the muscles you're using there in the front and back of your body.
After about 20 seconds,
With as much control as you're able to,
Release.
And change sides.
Slowly coming out of your posture.
Gently turning over onto your back.
Find the position that's comfortable for you.
And relax.
You're tuning into the new sensations within your body.
We call that sensory feedback.
We want that information to be fully communicated.
From your body up to your brain.
Gently bend your two knees,
Stand your feet on the floor.
Let's do a cycle of cat number four,
Arch and curl diagonally,
Just to reset anything that needs to be reset.
Right hand is going to come behind your head.
You can take your left knee lightly in your left hand.
On an exhale,
You're going to curl forward.
Your abdomen is what picks up your head.
Turn,
Aim your elbow at your opposite.
Slowly release.
You can keep a hold of your knee if you'd like.
And now,
Art.
Come out of your R.
Curl forward,
Turn,
Aim your elbow at your knee.
Slowly release.
All right.
Amount of your art.
One last time here.
Curl,
Forward,
Turn.
Slowly release,
Put your foot on the floor and we'll change sides.
Left hand helps you to support the weight of your head,
Right hand guides right knee.
As you exhale,
You curl forward and turn.
Uncurling,
Head up,
Left elbow come back.
You can keep hold of your right knee.
And now our cheer bath.
Releasing out of your arch,
You're ready to curl forward again and turn.
Slowly returning to neutral.
Arching,
And as you come out of your arch,
One last time on this side,
Curl forward and turn.
And then put your foot on the floor.
Release your arms down,
Release your legs down.
Take a moment to tune in and get the feedback and see if you're comfortable.
You might be more comfortable to have something behind your knees or something behind your head.
Once you're comfortable,
We're going to do a few cycles of abdominal breathing.
It's an intangible version.
Of what is natural respiration.
When we breathe in.
Ideally our belly is soft and can move forward so that our diaphragm can fully descend.
When we exhale and our diaphragm moves back up,
Our belly naturally comes back.
So here.
.
.
We are intentionally squeezing in.
As we breathe out.
And then we're intentionally releasing,
Letting our belly relax so that it can round forward as we breathe in.
Flattening your belly back as you gently squeeze.
To exhale.
Releasing the contraction and letting your belly come forward as you breathe in.
Continue for a few cycles.
Apply the same principles of practice that you do for your movements.
Keep this breathing practice within a comfortable range.
Make it as smooth a breathing as you're able to make it.
Do less.
If doing less is where smooth,
Comfortable breathing is.
Complete the cycle you're in the midst of,
And then return to the breath you do naturally.
And you may notice that your natural breathing has changed a little bit.
Prepare now for a short guided relaxation.
Invite your body to relax for this next little while.
Allow me to be your voice for this next little while.
As I name different parts of your body,
You get to tune in to those parts of your body.
Notice the effect of my suggestions.
And perhaps use it as an opportunity to send appreciation to each part of your life.
I am relaxing my feet.
I am relaxing my legs.
I am relaxing my pelvis.
I am relaxing my abdomen.
I am relaxing my chest.
I am relaxing my back.
I am relaxing my hands.
I am relaxing my arms.
I am relaxing my shoulders.
I am relaxing my neck.
I am relaxing my head.
I am relaxing my face.
And my job.
I am relaxing my entire body.
My entire body.
It's relaxing.
Choose your position for a meditation practice.
You can stay as you are or gently transition to sit.
We want to see.
Choose a seat if you are sitting that is comfortable and where you can sit upright.
Your eyes can be opened or closed.
If you'd like,
You can take a hand gesture.
Meditation practice is a practice of holding your attention on some chosen target.
So our target for this practice is your natural breath.
Tune in to the sensation of breathing in.
Until it's time to tune into the sensations of breathing out.
Remember it's a practice,
So if at any point.
.
.
Your attention moves away from your target.
When you notice,
Just gently come back.
You focus on your breath.
Bring your attention back and now focus on the ground.
Very beautiful.
Take a full breath in to the end of your exhale,
Palm forward.
When you're ready,
Breathe in again.
One last time.
Take a moment to notice the effects of your practice.
Thank yourself for making space in this day to practice.
I thank you for joining me.