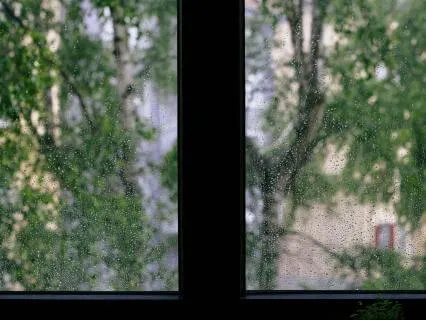
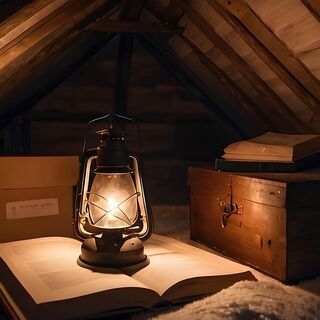
A rainy afternoon at the bookbinding workshop.
Tonight,
We try our hand at the old craft of bookbinding.
There's no pressure to be an expert or to do anything perfectly.
We'll be learning from an old bookbinding manual on how to make a simple booklet.
Using simple materials at a slow and gentle pace.
After all,
Slow,
Cosy hobbies are meant to be savoured and enjoyed for what they are.
We've arrived in the cosy little village workshop.
It's raining outside but it's summer so it's not cold.
Instead,
You're thankful for the rain.
Soaking into the potted trees out front.
And washing away the oily film on the road that goes past the workshop building.
Inside,
There are a few rustic workbenches,
And the room has rows of shelving units that reach floor to ceiling.
They're crammed with books,
Papers,
Tools and little unfinished projects like wooden carvings.
As the clouds have shrouded the summer sun.
Lamps are lit in every corner to pool warm light where it would otherwise feel gloomy.
Today,
You'll be learning some basic bookbinding.
Hence one of those slow,
Methodical crafts that give you as much enjoyment doing them.
As getting to use whatever book you make.
All it takes is some paper folding,
Constructing basic shapes and a little measuring.
And you'll get a beautiful handmade book you can use for whatever you like.
In the cozy workshop,
You'll get to personalize your book however your heart desires.
It's just you today,
So you'll have full reign over the paper available.
But you can choose that in a bit.
There's no rush.
You're excited at the prospective,
Getting to make something with your own two hands.
It doesn't matter how long it takes.
And it isn't a competition.
Instead,
It's a chance to spend some time creating.
Without judgement.
Away from every demand in your daily life.
You know that taking this time for yourself in a cozy space is the relaxation your brain needed.
And with that thought in mind,
You cast your eye to a small workbench with a padded stool right next to the window.
On the worktop is a well-loved box crammed with all the supplies you'll need today.
You take a seat,
Already feeling at home.
It seems there's a printed inventory.
So you can tell what all of the items are that are stashed inside the box.
On top,
There's a roller,
A pair of six-inch scissors,
A medium pencil,
A tapestry needle,
A wooden triangle.
And a bone folder.
As a paper cutter.
Some eyelid punches,
And a paste brush.
Although you may not need all of this today.
You look further down into the box to find more materials.
There's newsboard,
Which is really a kind of cardboard.
Vellum Deluxe,
Which is a kind of tinted cloth made of cotton.
There's cover paper of all different patterns and colours.
Including some wallpaper.
There's marbled paper.
Craft paper Drawing paper Bread Rope Manila then there's page paper in white,
Ivory and grey.
There's drawing paper,
Newspaper,
And then some linen thread,
Some silk,
Some raffia.
And eyelets.
You also see some macrame cord,
Some white and coloured tape.
Some book binders twine.
And some gummed tissue.
You won't need most of this today,
But this box is now yours to keep.
So you have everything you need for future projects too.
To begin crafting your booklet,
You'll need a few bits and pieces out of here.
The thick ivory paper looks beautiful for writing and doodling.
Which is mostly what you plan on using your book for.
So,
You select seven sheets that will end up becoming your signature.
Next,
You leaf through the patterned and coloured cover papers.
You toy with the idea of selecting a solid colour like the emerald green,
The inky blue or dusty rose sheets you spotted.
That way you can decorate it with washi tapes,
Stickers or doodles at a later time perhaps.
That is,
Until you spot some beautifully embossed charcoal grey paper.
It has little herbs and cat silhouettes embossed into it,
And you know instantly this is your cover.
Now depending on what you're going to use your booklet for will change the size you make.
For lists of ingredients,
Books you want to read or recipes.
Making your pages long and thin works well.
If you wanted to make a sketchpad,
Something bigger and squarer might suit you.
And a journal or a tarot guidebook?
A generous rectangular page would give you plenty of room to write everything down.
You sit and have a think for a while,
Gazing out of the raindrop-spattered pane onto the footpath area to the back of the workshop.
Overgrown wild bushes and herbs hang heavy with the downpour.
And it springs to mind that you've been after a little Field Notes style book to doodle and document the herbs and berries you've started to forage.
Perfect.
Even the pretty herb cover fits,
So you settle on a narrow,
Longer booklet that you've already mentally found a home for in your book bag.
The first thing to do is to measure out the size of your inner pages,
Which you'll gently fold and crease with your bone folder to create the folios.
You find the vintage wooden ruler and a pencil.
It's a classic yellow and black HB pencil.
Freshly sharpened.
And mark out the same measurement on the top and the bottom of the paper.
Then move to line your ruler up vertically with the marks you just made.
Gently guiding the tip of the pencil along it to get a perfect precise line.
This is where you'll cut so that when you fold these crisp ivory sheets in half,
They're perfectly narrow.
You smile to yourself as it starts to take shape.
Simple,
Quiet steps to make something you'll use every day.
Next,
Before you start cutting,
You'll need to create your cover.
Ideally,
This will be a little wider and a little taller than your writing pages.
Not by a lot,
By about half a centimetre,
So it protects them.
You line up your ruler again to the writing pages and jot down their dimensions.
You keep this in mind while measuring up your cover page and add a little extra to the height and width.
When you're satisfied,
You slide all of the pages,
One by one,
Into your paper cutter.
Checking the lines all match up.
And then slowly and methodically slide the little blade firmly over each individual sheaf,
Just the shh,
Shh of the paper,
Lulling you into a content state in your repetitive work.
When the sheets are ready.
You move on to prepare them for sewing.
This bit is also very simple and therapeutic.
And ties all of your hard work together.
Back to your box,
You rummage for a silky spool of green thread and a matching needle.
It's okay that you're eyeballing the length of thread.
About the length of your forearm will do.
Because you don't need much.
So you can turn your beautiful pieces of paper into a book.
You'll want to fold them first.
You do this again,
Slowly,
To individual pages to make sure they're crisp and neat.
Taking your bone folder,
You press the folded edge of each and slide it up the length of the pages,
One after the other.
It's funny,
Isn't it?
That making your booklet is so straightforward.
Yet most of the time we just buy a notebook right off the shelf.
Without considering how it's made.
Because you've slowed down and created one for your exact needs from basic materials,
You'll pause for a moment and think back to this cozy,
Comforting ritual every time you go to jot a note or a doodle.
You deliberately stack each of your pages now,
One inside the other.
With your cover on the outside.
Your page is arranged neatly and ready to join.
You thread your needle first time,
Wrapping the end around the needle a few times and sliding the knot down with your finger and thumb to create a little quilter's knot.
Time to punch your holes before you connect your pages.
Better look for something to use as a backing so the needle can punch a neat hole.
A piece of felt would do,
So you lay your materials back down and get up from your comfy stool.
To have a little wander in search of something.
You amble to the shelves over the opposite side.
This one looks crammed with all manner of craft supplies like yarn cakes,
Looms and Tunisian crochet hooks.
In a basket,
You find some random fabric offcuts.
Too thin.
A needle felting pad could work.
There's a handmade one from Hessienen,
What feels and sounds like rice or buckwheat stuffing.
It makes a nice tinkling sound similar to a rain stick as you shift its weight in your hands.
It might be a bit lumpy and crease your paper.
But there's a fin cutting a foam board.
Perfect.
You take it back to your workbench and wash with a triumphant feeling that you're giving something destined for the bin a new purpose.
Getting comfy on your stool again.
You find up the measurements you jotted down for the pages earlier.
And find the middle of your signature.
Then confidently push the needle through all seven pages and your cover,
The foam resting underneath.
You do the same for a hole near the top and the bottom.
Then begin connecting the paper and finally bringing together your booklet.
You carefully pass your needle through the middle,
Inside to outside.
Then through the top,
Outside to inside.
And repeating the ritual again to secure it at the bottom.
Until the thread ends up back where it started,
So you can fasten it and tie it off.
Giving it a clean snip.
Your booklet is now complete.
Nothing quite like the feeling of losing track of time.
Creating something,
No matter how simple.
That you can use every day.
It's the perfect companion to your walks into the woods when you go foraging.
Or when you spot a new plant pop up in your garden that you don't recognise.
With every cut,
Crease and stitch,
You imbued this little notebook with a piece of you and this content slice of magic you experienced in this workshop on a gloomy summer day.
The rain has abated now,
A weak trickle of sunlight through the clouds competing with the warm lamplight.
You'll enjoy the journey home,
You think,
As you place the paper scraps and tools back in the box,
Ready for next time.
You leave through your new booklet,
Fresh and ready to be filled with notes and drawings.
Maybe you'll make more for different hobbies.
For now,
You tuck it between the pages of a novel you carry in your bag to keep it safe.
Switch off the lamps.
And begin your trip home.