Hi,
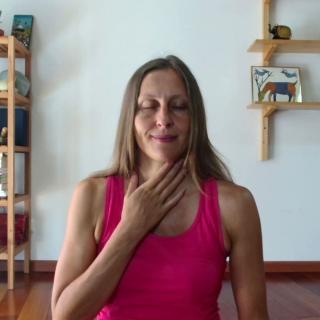
I'm Veronica.
I'm going to show you today a quite short sequence.
Where we're going to mobilize all of the joints in the body.
And this is a great practice to do in the morning.
Maybe half an hour after you wake up.
You could also do it when you sit for a long time at the desk and you need a break.
Or you could treat it as a warm-up for a yoga practice.
So let's begin by working on the spot.
So you can look straight ahead and keep on walking.
So that your feet decide.
Where they want to live.
What is the most natural position for them.
Let them dance.
And then start shifting your weight between the heels and the toes.
You can lift the toes and lift the heels alternately a couple of times.
Eventually landing somewhere where you feel that the bodyweight is distributed evenly on both feet.
Try to keep a microbend in your knees rather than locking them throughout this practice.
And we're going to move now the toes,
Only the toes.
So let's try lifting the big toes.
And then lower them.
See if you can do it without looking down.
Try lifting all the other toes and lower them.
You could repeat it a couple of times,
Big toes up and down,
Or the four toes up and down.
You could lift all five and lower them.
Once you move the toes a little bit in this direction,
Let's try shifting the weight more to one foot,
Try to keep the micro band and then rotate the foot with the leg out a little bit and come to the board of trustees.
And then start flicking the toes under,
So you curl them under so that all the toenails are touching the ground and then you go back.
So you flick back and forth,
You could do it fast,
You could do it slow,
It doesn't matter.
And you can continue with the same foot drawing circles with the ankle.
And you could keep all the weight on the standing leg.
Or you could shift some of the weight on the leg on which you're working,
Which is going to give you a different sensation.
You could also try.
.
.
Full circle where you rotate around,
Revolve around the big toe.
So the toes are also,
The toenails are also in touch with the mat.
And if you still want something extra for the food,
And you could also do the court swing.
The front of the foot,
Not the toes,
The front of the foot touching the mat a little bit behind and then you can Bend both knees slightly.
So it opens the front of the foot,
The front of the ankle.
Spin 10 bits.
And give yourself a moment to compare the right foot with the ankle and the left foot and the ankle.
There might be some difference now.
And you can do the same on the other side So rotate the foot and the leg a little bit.
Tuck the toes under and then undo it.
You can keep on going at any pace that works for you.
Flick back and forth,
Flick back and forth And then you can do the ankle circles.
Choosing whether you're focusing on mobility.
So without any weight-bearing or you want to add some weight-bearing so that the muscles in the leg you're working at active.
I'm alright And of course,
You can experiment with both directions.
And if you want you can do those full circles when you revolve around the big toe.
One direction and the other direction as you wish You could add,
Of course,
Saying if you think that this is the part of the body that is going to benefit with a little bit more of opening.
And then come back.
So we've done the toes,
We've done the ankles,
So now we can move to the knees.
It's best now to keep the feet together.
At least the big toes together.
Then you can keep your arms straight and place the palms on the thighs just above the knees.
And here again you have a couple of options.
So you could do a classic four circles with knees.
Or you could do half circles.
So if you decide on half circles then the knees move forward to one side and back.
So it's just half of a circle,
And you can repeat it a couple of times.
You might notice that when you make this movement,
It's actually not just the knees that are moving,
But also ankles are working quite a bit.
And you could obviously.
.
.
Should obviously try the other side as well if you're doing half circles and if you want to work more on the balance and strength you might try version when you lift your heels off the ground so the heels are off the ground and you draw the circles or half circles in this position which obviously is going to be a bit more challenge.
And always if you feel like your legs worked quite a lot you can shake them a little bit to give them a rest.
Now we're moving further up to the hip.
You could place the hands on the hips or not,
It doesn't really matter.
Let's draw some cells.
So a classic circles with the hips.
However,
Try to focus on the movement in the hips and not in the upper body.
So rather than drawing full circles with the whole upper body,
You remain within your central axis.
And it's just the hits that revolve.
Around that central axis.
So head stays more or less in the same position.
Even though it is quite That's all.
Movement.
You might.
.
.
Take your time to notice whether there is a difference.
Um,
Any Rigidity.
Maybe some moments of hesitation,
Something jumping over.
Notice all of that and you could observe that if you keep on going for a while,
Whatever was first a little bit jerky.
Becomes smoother and smoother.
And again changing the direction can bring a different sensation.
Now you could also try different versions of mobilizing a hip.
For example,
Have slightly wider stems.
And try drawing an infinity sign with the hips.
So you could imagine a horizontal number 8.
So you could imagine that's 4.
You are drawing that sign on the floor,
On the mat,
With your hips.
And sometimes it helps to interrupt the fingers and use the fingers to draw that shape.
On the floor.
And the hips just follow.
And it might feel relatively easy going in one direction so it's fine.
Worth to check.
It is the same if you change the direction.
Now one more option for you and how you could move your hips.
And that is a little bit of a simulation of walking.
So the first step towards it is.
Imagining that you have a hook.
Attach to your hip and somebody pulls by that hook upwards.
Which means that the hip comes up.
And if the hip comes up together with it,
The heel will lift as well.
So it's just this movement in one place.
You could try it on the other side as well.
So imagine that somebody pulls by the rope,
Lifting that hip up and together with it.
You could do it even alternately and notice what it does to your shoulders.
And you could stay with that,
Or you could take it a bit further by making that fake step.
It's a circular movement.
You're lifting the hip,
Moving it forward and then lowering and moving it back.
So when you lift the hip,
The heel comes off the ground and when you lower the hip,
The heel returns.
That's a circle forward.
Coming from the hip.
And if you combine the two sides.
You get this walking motion.
Working on the sculpt.
You could try that also in reverse.
Which is forward,
Up,
Backwards,
Down,
Forward,
Up,
Backwards,
Down,
Alternately,
Right and left So just for the heat.
You can always shake everything.
I'm going to catch up with Lucy before we go fire up.
Let's try to move the part of the body that usually doesn't move on its own.
And this is the rib cage.
So you could think of it as joining four dots.
Reaching with the ribs forward,
Reaching with the ribs to one side,
To back,
To the other side and if you join all four dots That's where you get that.
Circles with the ribcage.
Try to isolate just the ribcage,
Obviously there will be some response.
From other parts of the body.
Initiate the movement from the ribcage down.
That one.
Might take quite a while to get.
As the ribcage usually isn't very well mapped on the brain.
So don't worry if it doesn't happen in the beginning.
Keep on practicing.
Just make sure that it's not the hips and it's not the shoulders that do the job,
But you focus on the ribcage.
After that we can move to the shoulders.
And it is the same principle,
You could first discover all the four points,
So moving the shoulder forward and releasing,
Moving the shoulder backward,
Releasing,
Shoulder up,
Release.
Down release from those four points we're getting a circle forward up backward down And it's worth to try with one shoulder at a time so that you notice whether there are those changes.
Stiff beats,
These moments of hesitation,
Jerky beats.
And that's where you explore that for a while.
Checking that the movement comes from the shoulder,
Not from the arm.
Then you could do the same with the other side.
Exploring four directions.
So a bit of shortening in the chest.
Then shoulder blades coming closer towards the head.
From the coming up.
And moving down.
From those four dots you could make a set.
Circling the shoulder back.
And then you could add both shoulders but still checking that it's not the arms making this movement but the shoulders,
The shoulder blades.
Always nice to explore different versions of the same movement so what would happen if you started from the elbows Here it's going to be much more movement in the ribcage.
And the shoulder blades will be gliding all along the back.
There is some more movement in the spine even,
Head reacts.
So,
Very different movement.
Once we've got to the elbows,
We can move now to the wrists.
Let's try the Mexican way.
Now interlock the fingers.
Whichever thumb lands on the top,
Changes the sound.
Make sure that your wrists are really loose.
It's going to work only if the wrists are loose and floppy.
Don't keep them rigid.
And start waving.
So the wave starts from the elbow,
Moves down the forearm for the wrist to the other wrist and the other elbow.
With very loose wrists reacting to that wave.
You could keep on going in one direction but you could also change the direction and notice and how much tricky it is.
And as if you already interlocked the fingers,
Then you can keep the palms facing down and draw some circles above your head.
So even more of that sliding,
Gliding movement of the shoulder blades here.
You could explore all directions.
And then release.
You could also rotate your arms.
In and out.
Coming from the shoulders all the way to the wrists.
And finally,
We're going to move to the neck.
So it's just really small circles with the head.
Very small circles.
You didn't want your head to fall off the neck.
Tiny movements,
No dropping of the chin,
No dropping of the ears,
Really small circles.
If this movement is smooth.
And how much smoother you can make it.
It usually helps to make these little circles to find a place for the head where it feels lightest at the end of the spine.
We could finish with mobilising the entire spine by rolling down and up again.
So drop the chin to the chest.
Head drops,
Shoulders round.
You can bend the knees now more.
First the cervical spine opens,
Then the thoracic.
As you keep on going down,
You bend the knees more.
Let the head hang down.
Upper part of the body hanging loose you could stay here still or you could catch the elbows and swing the upper torso or you could switch the hands a little bit along the floor it's all up to you highest version.
You could even wiggle your tail a little bit,
Your tailbone.
Then keep the weight just in the center of the feet,
Knees bent,
Very very slowly start rolling up one vertebra at a time.
Bit by bit,
Bit by bit,
Without missing out any part of the spine coming back.
With the head flat.
It's always nice.
To check.
How is the body now after moving?
All the drawings.
So give yourself that moment and maybe finish with letting your breath move the arms out and up on the inhale.
Then you can point the palms down and move the hands along the midline of the body.
And that's it!
Enjoy.
Thank you very much.