Hello and welcome.
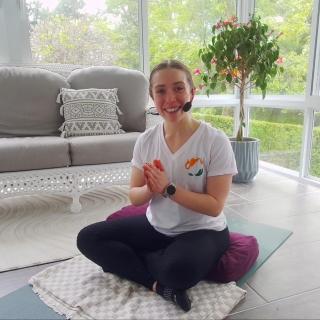
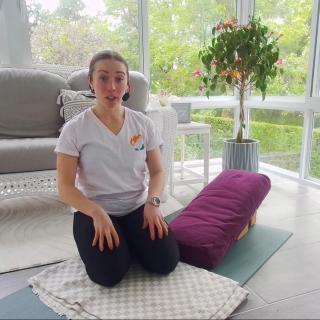
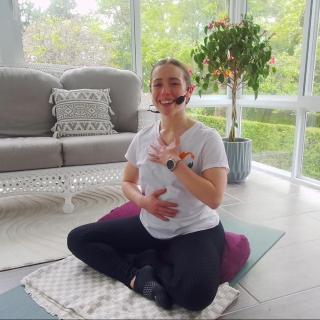
My name is Ashley and I'm so grateful that you chose me to share a yoga practice with today.
Today our class is going to be around the theme of twisting.
When we twist our bodies,
We are almost like a wrung towel,
Twisting out and wringing out all of the old energy that's left in your body,
Things that you don't need anymore.
And by doing that,
It leaves space for new things to happen.
So with this twisting class,
I'd like you to bring to mind maybe a new start or a new beginning that you're exploring in your own life.
And hold that intention in your heart during class.
So to begin,
I'd like you just to close down the eyes.
If that does not feel safe,
You can also hold a soft gaze.
Roll the shoulders down and back.
Lift through the heart.
Hands can be face down or palms down on your knees if you'd like a little bit of extra stability.
You can also flip the palms upward to receive.
And while we sit here in stillness,
I'd like you to notice your breath.
Notice the cool air coming in through your nose.
And then back up and out through the nose on the exhale.
With every exhale picturing that old stagnant energy.
Flowing out of your nose.
And into the world around you.
As we sit here in stillness,
I'd like to read a quote.
That goes with today's theme.
In every twist,
We're reminded that transformation begins within.
As the body spirals,
It wrings out what no longer belongs.
Stagnant energy,
Old stories,
Attachments,
And patterns.
Each exhale becomes an act of release.
Each inhale a renewal.
Letting go creates room for what's meant to flow in.
When you twist,
Imagine yourself turning toward your highest self.
Peeling back the layers until only truth remains.
The body purifies,
The soul expands,
The spirit shines.
Together,
Let's take a deep collective breath through the nose.
Expand and sigh it out.
Two more times here.
And our last inhale.
Swallowing your throat.
And blink the eyes open.
We're ready to begin.
So our first pose today,
We're going to take our hands,
Interlace the fingers,
Place your right thumb over your left.
Might feel awkward,
But let's try it out.
Flip the palms forward.
And then bring those arms as high as you can.
Without.
Letting the shoulders rise.
Your elbows can totally stay bent here.
If you can straighten it awesome.
Not required.
As you breathe,
Reaching higher with those arms,
Creating space in the shoulder area.
Exhale,
Bring those arms down.
Change your interlace,
So this time.
Left will be over right.
And reach up to the sky.
You might find that one side is more flexible than the other,
And remember that's completely normal.
Breathing,
Feeling the sensation in your shoulders.
And release those arms down.
Good.
Maybe shake out the wrist a little bit.
Bring some life into those hands.
Leg stretch out forward,
Staff pose,
Dandasana.
Here I'd like you to sit tall.
In order for our body to revolve,
We must have a long spine.
So this pose reminds us how to bring a long spine by pushing through whatever's on the floor.
Right now,
It would be your tailbone.
And then lifting through the heart and lifting through the crown to create a nice,
Strong,
And tall spine.
Next we'll introduce our first twist,
Taking your right leg into the your chest.
Then we're gonna use our hand to guide our left ribs toward the inner right thigh.
Guiding,
Guiding,
Guiding.
Using your hands on your knees for support.
Still keeping the tall spine we practiced in Dandasana.
Shoulders and hips.
Are aligned the same way.
So if you find that the shoulders are twisting more than the hips,
I'd like you to bring them back just slightly so everything aligns.
On your next exhale release back into staff pose straighten out those legs maybe find that tall spine once again rolling the shoulders back and then we'll take our left leg in.
Guiding our right ribs toward the inner left thigh.
Once again,
Shoulders and ribs stay aligned with each other.
Shoulders don't rotate more than the ribs.
They stay rotating as one.
With every inhale,
Find more height.
With every exhale,
Relax the shoulders a little bit more.
On your next exhale,
Begin to unravel.
And feet come back forward to staff pose.
Beautiful.
We're going to come to a tabletop position so you can bring your knees over,
You can come through center.
If you were sitting on a blanket.
You can put the blanket under your knees.
Palms on the ground,
Fingertips spread wide,
Wrists under the shoulders,
Knees under the hips.
Gentle Cat Cow.
So cow position,
Belly button hangs low.
Shoulders down.
The crown of the head reaches to the sky.
Heart shines forward.
Tuck your tailbone forward to cat position,
Creating a hollow space.
In your stomach area,
Your chest area.
Back rounds up to the sky.
On the cow pose,
We inhale,
Expanding through the ribs,
The diaphragm.
On the cat pose,
We let all that air out,
Exhale and create space for that hollowness within.
One more time,
Cycling through cow.
And then up to cat.
Back to a neutral spine,
Maybe shake it out a little bit.
In this position,
We're going to do a little bit of a rotation practice.
I'm actually going to face you because I think it might be a better angle for you to see.
You can stay in whatever position you're in.
I'm still in tabletop pose.
What we're going to practice is twisting with the ribs and the shoulders.
So take one arm,
I'm gonna start with my left.
And bring it up to behind your ear.
It's a lot of balance happening here.
And what we're going to do is take the rib cage,
So moving from the rib cage instead of the shoulders,
Twist down.
Until the elbow is reaching for maybe the right wrist.
It doesn't have to touch.
Then push against the floor,
Still moving from the ribcage.
See how far you can twist in the other direction.
The right hand that's on the floor is really our anchor here.
I'm using a push through that right arm to give myself stability.
To practice the twisting here.
Move slowly.
Driving from the ribcage.
As you twist.
One more twist here,
Reaching up through the elbow.
And then come back to neutral and replace that arm.
Whew,
Maybe we sit back to child's pose.
Roll out your wrists.
Maybe roll out your neck a little bit.
And when it feels right,
You can come back up to that tabletop position.
So this time we're gonna be pushing now through our left wrist,
Our left hand,
Right arm comes up,
Fingertips behind the ear.
Driving from our right rib.
Elbow toward the.
.
.
Other wrist.
Push against the floor.
Rotate with your ribs.
All the way up to the sky.
You might notice that this side can rotate better.
Or maybe not so great compared to the other side.
Know that imbalances are normal.
And that's why we train one side at a time.
To notice the imbalances and work on them.
Moving slowly as you cycle back and forth between these two poses.
Last time with bold positions here.
Elbow to opposite wrist.
Push against the floor,
Elbow to the sky.
And release the hand.
Sit those hips back.
Child's pose.
Maybe you roll out your wrists once again.
If necessary.
I'm going to turn back sideways.
That we can enter our next position.
So coming up out of child's pose,
We're going to move on to our backs.
Move the blanket out of the way if you have it underneath you.
And I'm gonna introduce.
.
.
Prop called the belt.
If you don't have a yoga belt,
You can use anything that seems long and skinny like this.
You could even grab a pair of leggings,
A towel,
Anything that's going to have a long and skinny shape to it.
And what we're going to use this belt for is to help us bridge the gap between our hands and our legs.
So the position we're taking is called supta pandan gustasana.
We're going to be doing the A variation and the C variation.
These stretches are going to help us prepare for one of our peak poses today which requires flexibility in the hamstring but also the outside of the thigh or the IT band.
So taking the belt or whatever belt you've grabbed,
You can pause me to go grab that now if you need to,
We're going to lie on our backs.
I'm going to demonstrate with the leg closest to you first.
We're going to do each leg,
So just pick one to start.
Ticket your belt.
Place it either on the meaty part of the foot Or perhaps you prefer mid-foot.
I like a little bit in between those two places.
The leg that's on the floor is active.
And then with this leg.
.
.
We're going to use the belt to bridge that gap.
Notice how I'm holding it.
And then attempt to pull that belt toward your face.
Until you feel a really intense and deep stretch in the back of the leg.
In this position,
The leg that's working always has a soft knee.
So just be mindful that you're not locking that knee out.
So leg is straight,
Knee is soft.
Using the belt.
Pull that leg toward your face of course.
This flexibility is gonna vary.
Depending on.
How much you do this already.
The legs straight up to the sky,
That is a perfect position to be in.
You could even be closer to here,
As long as you feel the stretch.
That's what we're going for.
Breathe through it.
With every exhale,
Maybe trying to bring your leg a millimeter closer to your face.
We're going to transition into the next position.
The leg is actually going to cross our midline toward her.
The other leg.
So what you're going to do is take the belt both sides,
Place it in the opposite hand.
This arm can come flat for stability.
And now we're going to attempt to pull this leg across the midline.
For me this is a very tight area so I probably moved maybe five inches or so.
Over.
If you find that you can barely move this direction,
Know that This is one of those muscles that is very,
Very tight on most people.
And with practice.
And repetition,
It could feel more open.
So maybe you take this stretch and you turn it into a habit.
Maybe you do it every day.
Every other day.
It's a great stretch to do before bed.
Breathing through.
Sending that air to the outside of the leg here.
One more breath.
And bringing that leg back up.
A position and bend it in.
Replace the leg straight.
We'll be taking the other side.
So whatever leg you did not do before.
.
.
Place that belt over the meaty part of the foot or maybe toward the midfoot.
Other leg on the floor stays active.
With a soft knee,
We push that foot toward our face.
One leg is always going to be more flexible than the other.
Shoulders relax into the mat.
Bye!
Feeling the openness happening in the hamstrings.
One more breath here.
And then we'll take the belt in the arm that's on the side with the straight leg on the floor and pull the leg across the midline.
A few inches,
Nothing crazy until you feel that deep and intense stretch happening on the outside of the thigh,
Perhaps also the outside of the calf.
Send all of your breath into the outside of that working leg.
Allow it to go in and clear out anything that's creating tension.
Last big breath here.
And release that leg up to the sky,
Bend it back in,
Remove your belts.
Great job.
Belt goes off to the side,
Which every way you'd like to transition,
We're going to come back to tabletop.
So I'm rolling onto my side,
Turning around.
Tabletop position you could replace the blanket under your feet if you'd like we're going to start to introduce a little bit more movement now.
So taking your left leg,
Step it forward.
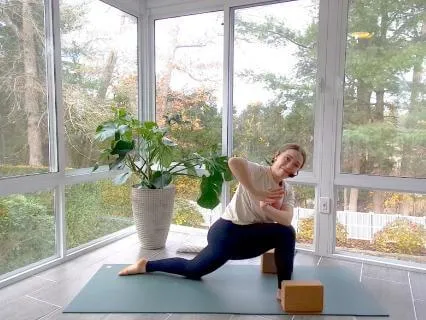
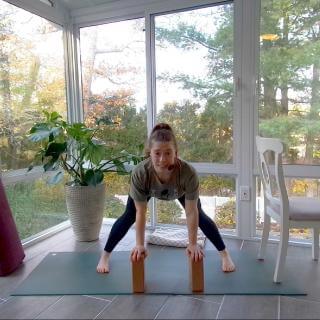
We're going to start in a low lunge position.
Front leg has a vertical shin.
So move that foot around,
Move the back knee around until you can achieve that positioning here.
So knee directly over the ankle.
You're going to feel a giant opening happening in the hip flexor area.
In here,
You can also introduce some blocks.
So if you don't have blocks,
A book,
Anything that resembles this shape that helps bring the floor toward your hands is great.
So I'm bringing my blocks here.
So I don't have to reach so far toward the floor.
Feeling the opening in the hips.
If you're feeling adventurous and you have the balance,
You can be straight up,
Arms to the ceiling.
Otherwise,
Still hold on to your blocks,
You've got it.
And with this position,
We'll do one breath.
And then we're going to introduce a twist.
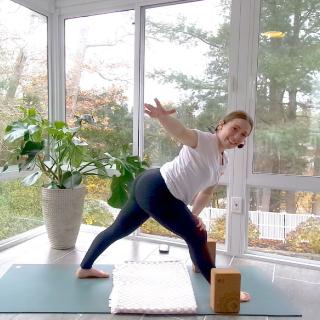
So hands come to heart center.
Taking your right elbow toward that left knee.
If you can rest it there,
Great.
If you're almost out here,
That's fine too.
Taking the ribs along for the ride.
And finding that twisting position.
As you breathe,
Perhaps you can twist more.
Picturing the energy ringing out of the body.
One more breath here.
On the exhale,
Arms either come to the blocks or up to the sky.
Beautiful.
A little bit of a counter pose.
Hands come to the blocks.
Sit back,
Lift the toes in the front.
I'm moving my blocks back so you can see.
A little bit of a runner's lunge stretch.
And then you can bring that energy back forward using the blocks.
Knees come together.
Sit back child's pose.
Another counter pose as we prepare for our other side.
And back up.
This time we'll take the right leg forward.
Move my block out of the way so you can notice.
The vertical shin once again.
Using our blocks,
Maybe we start shifting our body forward a little bit,
Opening up the hip flexor.
If you'd like to,
Arms can reach up to the sky,
Body comes upright.
Feel the deep stretch here.
On your next exhale,
Hands come to heart center.
Now taking the left elbow toward the right knee.
Twisting from the ribcage.
You can also try.
To place the elbow on the thigh.
For me,
This side is more difficult,
So I'm barely making it there.
I think I'm actually going to create some space because that allows me to have some height.
Remember,
This is not a contest to get your elbow on your knee.
This is about feeling and embodying that twisting motion in the body.
Exhale here,
Hands come to the blocks,
Shift those hips back,
Toes lift in the front.
You can bring your blocks with you as you shift back.
Runner's lunge.
And then push back into that leg,
Use maybe the blocks to bring the knee back to the other knee.
Sit back,
Child's pose.
At this point,
If you'd like,
You can move your blocks out of the way.
We are going to tuck the toes from tabletop position and lift the hips to the sky.
Downward dog.
If you'd like to walk your heels one at a time toward the mat,
You can.
You can also find stillness here.
Bend through the knees,
Look forward,
And walk toward your hands.
Knees still bent.
Roll up one vertebrae at a time.
Roll those shoulders back.
Maybe a deep cleansing breath here.
Hands to heart center.
Beautiful.
We're going to take a mountain pose.
I want to demonstrate.
You can use a block or a pillow or anything really here,
Maybe even a rolled up blanket.
I'm going to help you notice and feel in your body what it means to internally rotate your groin.
This is also going to help us in our peak pose today when we rotate to even get further into that rotating motion.
So you're going to take your block,
Your pillow,
Whatever you've chosen to use.
And I'd like you to place it in between your thighs.
Feet about hip distance apart,
Ground through the feet into the four corners,
The two sides of the mound and the two sides of the heels.
And then taking the inner thighs.
Roll them in and back and almost engage the inner thigh muscles around the block.
So it's really staying there.
Somebody tried to pull it out.
They cannot.
So by rolling those inner thighs back,
We're creating an internal rotation of the groin.
And this is going to help us in our warrior positions,
Our pyramid positions we're about to do,
To hold the pose with good integrity,
And also help us with our peak pose,
Which involves a twist.
So just notice that movement in the body.
Legs are strong.
Take one inch below the belly button and then up.
Create even more.
Strength and stability in the body.
Great.
Shoulders roll down and back.
We open the palms to receive.
Strong and beautiful mountain pose.
Nice job.
Alright,
Let's grab the block and release.
So we're going to remember that motion as we take our warrior one.
Coming to the top of your map,
Stepping back with the left leg.
Your heel will be at six o'clock and your toes will be at 11 o'clock.
Rotating those inner thighs inward like we practice in mountain pose.
Helps with stability.
This also helps us pull the feet apart on the mat and really create a good foundation.
From here,
Hands to heart center.
Now you can stay here and just focus on the stability of the legs.
If you'd like to try a little bit of a twist,
We're going to be twisting toward the inner thigh,
Toward the standing leg.
So I'm going to be facing away from you to start.
So take the arms,
Keep them at heart center,
Rotating from the ribs.
You can even guide it with your hands toward the inner thigh.
Once your stopping point is found,
Thumbs to the shoulders.
Arms straight out.
This technique of bringing the thumbs to the shoulders ensures that our arms are in line with the shoulders instead of us thinking that our arms have to be in line with the legs.
The arms should be in line with the shoulders and our twist happens from the ribs.
As you get into the pose and keep breathing,
You might be able to rotate those ribs a little more and bring the arms along for the ride.
It all moves as one unit.
One more breath here,
I know this is a difficult position.
And hands come to heart center,
Come back to neutral,
Bend into the front leg.
Step forward.
Great job.
Shake it out a little bit.
We will do the other side.
So from our mountain pose,
Step back now with your right leg.
Heel is at six o'clock,
Toes are at one o'clock.
Hands to heart center.
Feeling the strength of your thighs.
Rolling the inner thighs back.
From here,
Once again,
You can start to rotate.
This time I'm guiding my right ribs toward my left leg.
Hands to heart center.
Once you find you can't twist anymore.
Thumbs to the shoulders.
Arms come straight out to be in line with the shoulders.
And then as time goes on.
You keep breathing,
More releasing can happen.
Maybe we can twist a little bit more.
Ribs and shoulders move together.
Beautiful.
One more breath here.
Hands come to heart center,
Unravel your twist,
Bend into the front leg,
Step up to mountain pose,
Shake it out.
We're going to add on to this sequence now.
So taking our blocks and having them handy.
So you'll put them in the tallest position.
Pretty wide on the mat.
I have one on either side to give you space for some feet to move in the middle.
At the top you're going to step through to mountain pose and we're going to do the same twist sequence as before.
So stepping back with your left leg to warrior one,
Toes at six,
Well heel at six,
Toes at eleven,
Arms to heart center.
We're going to involve that twist taking your left ribs twisting them in toward the inner thigh.
Thumbs to the shoulders.
Expand out through the arms.
One breath here.
Hands to heart center.
Gently twist back to your original place.
Counter pose,
We're going to straighten the front leg.
Hands come to back pockets.
Lift and shine through the heart.
Drop the shoulders.
And then take your thumbs to your hip crease,
Push the hips back,
Keep the front leg straight with a soft knee.
And stop when your hamstring catches.
That just means when your hamstring feels tight,
You can't go anymore.
This is where we stop.
Hands can be at the thigh,
Especially if you don't have blocks or if your blocks seem too short.
You can stabilize,
Stabilize,
You can stabilize here or if your blocks are handy and you can reach them.
Reach for those blocks,
Keeping a flat back.
In this position,
Remember the internal rotation of the inner thighs.
So rotate those inner thighs toward the back of the mat.
Notice how the stretch changes for you.
Breathing.
I'm going to provide you some options.
So if you have your hands on your front thigh instead of a block,
I'm going to show you the option for twisting.
You would bring one arm out to the side.
I have my back arm out to the T position.
And then you can use your hand on the thigh to guide your ribs toward the inner thigh and bring that other arm along for the ride.
If you have a block.
You will take the block and you will bring it closer to the inner foot.
Use your block for stability.
Guide your ribs.
Over toward the inner thigh.
And like we did before,
Thumb to the shoulder.
We jump straight.
This is a very difficult pose.
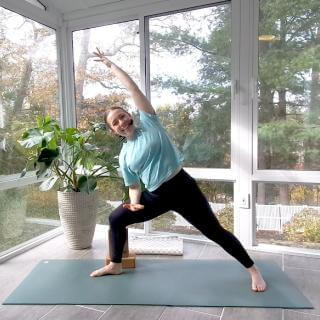
Parivrtta Trikonasana,
Revolved Triangle.
Picture yourself.
Ringing out.
The stagnant energy that you don't need anymore in this pose.
Breathe.
If you have to come out of it,
No worries.
Shake it out.
Try to come right back in.
We're going to try one more breath in this position.
And on the exhale,
Reach for your thighs or move your blocks back out to the original position.
Bend into the front leg,
Step the feet together,
And stay in a halfway hamstring stretch.
Bend into your legs.
Stand up straight.
Shake it out.
That was a great sequence.
Very difficult.
Good job.
Okay.
Maybe hold mountain pose just for a breath.
Come back to yourself.
Notice how you feel.
Release those shoulders down.
Release any tension you're holding on to in your jaw.
Your shoulders,
Your glutes.
Your neck,
Maybe you rock your head side to side.
We're going to try the other side.
So your blocks can be,
Once again,
Wide,
Feet in between.
Stepping back now with your right leg.
Heel at six,
Toes at one o'clock.
Gonna begin with our warrior one,
Hands to heart center.
If you find that you're not stable,
Make sure your feet are about hip distance apart.
That will help when we start twisting with your stability.
From here,
If you'd like to try twisting.
Guide your right ribs toward the left inner thigh.
Once you find you can't twist anymore here.
Thumbs to the shoulders expand.
Nice.
One more breath.
Hands to heart center,
Unravel.
From here,
Straighten the front leg,
Soft knee.
Hands in back pockets lift through your heart keep that lift hands to the hip crease push those hips back as you shine your heart forward And you can either.
.
.
Rest your hands on your thigh in the front for stability,
Or if your blocks are handy,
You can grab the blocks as well.
Now I'm going to demonstrate both variations so that you can take whichever one is going to work for you.
If you're on your thigh,
One arm comes out.
You can use the hand on your thigh to guide the ribs toward a rotation.
Thumb to shoulder,
Arms straight out.
This could be your twist.
If you have your blocks handy.
Move the block closer to your foot.
It doesn't have to be right next to the foot,
So you can adjust depending on.
How you're feeling and how much you think you can twist.
Guiding the rib.
Into your twist.
Walks here for stability.
Thumb to shoulder.
And expand.
Feel the deep stretch.
Your breath is going to be your anchor here.
So keep breathing.
Outer thigh working hard,
Both feet working hard to keep you steady.
Twisting,
Releasing.
Purifying.
Last breath here.
And either come back down to your thigh or the blocks.
You can move that block back over.
Bend into the front leg,
Step the feet together,
And then strain the legs slightly to a halfway lift,
Hands on the thighs for stability.
Deep bend into the knee and up to mountain pose.
And shake it out.
Great work,
Everybody.
Okay,
We're going to go into our counter sequence.
There's a lot of work we just did.
Move your blocks out of the way.
Feet together.
Deep breath up.
Exhale,
Shine the heart forward,
Bend in the knees,
Hands to the floor.
Stepping down to our tabletop.
And then we're going to find a seated position.
If you'd like to invite your blanket,
Back onto the mat.
Under your tailbone you totally can.
The pose we're going to take next is called Janu Sirsasana.
It is a single leg forward fold.
We're going to take the forward fold in its original state,
But then I'm also going to introduce a little bit of a twist to it as well.
So taking.
Both legs out straight to start.
Back to Dandasana.
And then we're going to take a right leg in toward the ground.
Our inner thigh on the left.
If you find that this is too much for your hip flexibility,
Your leg can also come to the calf instead.
If it's coming to the calf,
You may want to bridge the gap with a block or a pillow so that you can have ultimate stability here.
Shining up through the heart.
You can also use the strap for this if you have it handy.
So if you want to use a strap,
I'll show you this first and then I'll do it without in case you don't have one and don't want to use one.
Strap wraps around.
The meaty part of your foot.
And then we shine forward with the heart.
And the strap just helps you keep your shoulders down as you.
Come into the stretch.
If you don't want to use the strap.
It's the same thing.
You're going to climb down your leg,
Find a place to stop.
Keep reaching down with the shoulders.
To keep a good flat back.
Breathing.
Picturing the energy releasing out through the bottom of your foot.
Out of the body.
Here's where I will introduce the twist for you.
Taking your right arm.
Bring that right arm to the outer blade of the extended leg,
And that's going to force you to do a little bit of a rotation.
If you find you can't reach the foot,
The hand can come to the outer calf as well,
Or even the outside of the knee.
So just introducing a little bit of a rotation here in addition to the hamstring opening.
It's actually really similar to that revolved triangle pose we just did.
But now we have the stability on the floor to help us.
One more breath.
Come back to the straight position first and then climb up the legs.
We'll take it to the other side.
Extend both legs.
Left leg comes in either to the inner thigh or the inner calf.
If your knee doesn't touch the floor,
You can bridge the gap with your block or your blanket.
If you're using a strap,
Strap comes around the front of the foot and we grab the strap.
Or if you're not using a strap.
Reach down toward the calf,
Shoulders down,
Lift through the crown of your head.
Breathing,
Embracing the stillness.
Picturing the energy flowing out of the bottom of your foot.
If you'd like to introduce the twist.
Taking your hand of the left arm.
Placing it either on the outer blade of the foot or the outside of the calf or knee.
And use the arm to help guide your twist,
Pushing against the leg.
Breathing.
Releasing more with every exhale.
And then first release your twist.
And then walk.
Beautiful.
We'll do one hip opener together.
We're actually going to do it on our back.
We'll do reclined pigeon today.
So you can have your blanket nearby because we will be taking our final resting pose very soon.
Lying on your back.
Taking the ankle and crossing it over the top of the thigh so above the knee Push the knee of the bent leg away.
If this is enough of a stretch in your hip for you,
This is great.
You can keep this or you can take the thigh.
That's on the bottom.
And pull that side toward you as you push away.
With your knee.
Huge opening in the hips happening here.
Breeze through it.
Releasing any energy still trapped in the hips.
Release your pigeon,
Both knees or both feet touch the ground rather.
Shift your hips over two inches to your right and let those knees drop to the left.
In this position,
If you find that you have a huge gap between your knees,
You could place a blanket between them.
You could place a block between them.
Anything that's just going to help you with stability as you twist.
One more breath here.
These come back up to the ceiling if you had a blanket or a block there remove it for now we're going to take our other side for the pigeon so taking your ankle crossing it over the top of the thigh.
Pushing the knee away.
If you'd like to grab for the thigh and pull it toward you,
Go for it.
Here's a good opportunity to maybe roll out an ankle or two.
Breathing,
Releasing.
Release your pigeon.
Shift your hips 2 inches over to the left.
Left the knees drop over to the right.
Bridge of the gap in between your thighs with a blanket or a block if you'd like.
And release.
One more breath here.
Remove the blanket.
I'm going to give you an opportunity now to take any pose that you'd like to take.
That could be a happy baby with the knees coming toward your armpits,
Maybe legs up to the ceiling,
Legs up the wall.
Anything that your body's craving right now before we enter our final pose or Shavasana.
So in Shavasana,
There's a bunch of poses you can take.
Basically,
You want to find something that's restful that you can maintain for a few minutes.
So options.
Lying on your back,
Feet flat on the floor,
Knees up to the ceiling.
This helps keep your back flat.
You can also take any kind of blanket or bolster and place that under your knees.
To help keep the back flat as well.
Some people also prefer to have the soles of their feet together and legs out to almost like a butterfly position lying down.
Or you could even take the entire Shavasana in a seated pose or even lying on your side.
So I'm going to invite you to take that resting position now.
I'm going to go silent for a few minutes so that you can fully let the practice integrate into your body and you can find that sacred rest at the end of our yoga class today.
So take your Sravastana and I'll see you on the other side to close the class.
You Start coming back to your body by deepening your breath.
Start wiggling your fingers and toes,
Inviting small movements back into the body.
Maybe we wrinkle the nose a little bit,
We make some facial expressions.
Rolling out the neck,
The wrists,
The ankles.
Eventually you can have those movements land you either on your favorite side or you can come up to a seated position if you prefer that.
Whatever position you choose,
Whether you're on your side or seated,
I'd like you to place a hand on the heart.
And the other hand can either be on the earth or on your belly.
I'm going to share an excerpt from that quote that I read at the beginning of class.
Come back to the intention that you set.
And the things you wanted to release today as I read this quote.
Letting go creates room for what's meant to flow in.
When you twist,
Imagine yourself turning toward your highest self,
Peeling back the layers until only truth remains.
Now our body is purified.
Our soul has expanded.
And our spirit can now shine.
Hold on to that.
Take a deep breath through the nose.
Audible exhale.
If you were on your side.
Move into a seated position,
Any comfortable seat.
Once again,
Placing a hand on the heart and a hand on the belly.
Find stillness.
Feel the lightness and purity of the body in this moment.
We're going to take a collective inhale.
Arms come up to the ceiling.
And on your exhale,
Just do gentle rolls through the wrists as your arms float down to the floor.
Final release of anything that's left.
Inhale,
Arms come up.
Exhale,
Rolling through the wrists.
Organic movements as our arms float down.
And one more time on this last inhale,
Arms come up.
Hands meet at the top.
Trace a line down from the crown of your head.
Over the middle of your forehead.
Over the lips.
Throat.
Down to the heart.
Swallowing your throat.
Blink,
Open the eyes.
And maybe smile a little bit.
Thank you so much for joining me today.
Namaste and peace to you.
I hope that this is a great practice for you and I hope that you let go of anything that was holding you back.
And now you can make room for something new.
I hope to see you in a practice soon.
Again,
Thank you so much.
See you soon.