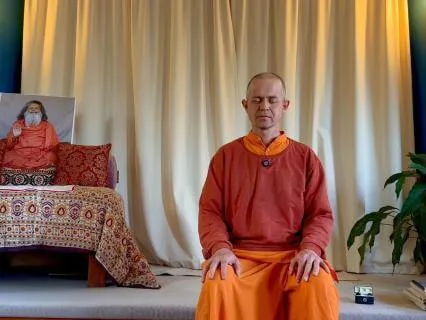
So welcome everybody to our practice of seated yoga.
Make yourselves comfortable.
And for one minute or so,
We begin with relaxation.
Close your eyes and find the most comfortable position possible.
You can also lean on the back of your chair.
If you need to.
And take couple of longer,
Deeper inhalations,
Exhalations Breathing out we relax our whole body.
And with the inhalations Feel your body.
And the deep breath that brings you more into.
.
.
The connection with your physical body.
Mentally scanning the body from your toes to the top of the head.
And from the top of the head to the toes.
Feel the contact of your feet with the floor.
Contact of your body with the chair you're sitting on.
The hands on the knees or thighs.
Relax your face,
Muscles.
Shoulders.
The whole body.
And now we can slowly start to move the fingers.
You can close and open your palms.
A few times.
Then roll your shoulders,
Push them a little bit forward,
Up,
Backwards,
Down.
Feel the movement of your shoulders,
Your arms.
And then opening your eyes.
And look towards your right hand And with inhalation we're going to lift the right arm up over the head.
And reaching up towards the ceiling,
Stretch,
Spread your fingers,
Hold the breath in and with exhalation returning your arm back.
On your knee.
Same with the left.
Arm breathing in,
Lifting up.
Stretch.
Hold the breath.
And exhaling,
Relax.
Again the right side right arm breathe in Hold the breath,
Reach,
Stretch the arm.
And exhalation.
Relax.
Left arm.
Breathe in.
Stretch.
Exhalation down.
Now we will stretch the both arms breathing in And you feel the sides of the torso stretching,
Holding the breath.
And exhalation slowly down.
We can lift the arms sideways now for a change.
Inhale.
Stretch.
And this way,
Exhalation down,
Relax Okay,
Now through the front inhalation.
Stretch,
Hold the breath.
And exhaling down.
One deeper in-breath,
Out-breath,
Feeling the effect of these gentle stretches.
Now we're going to place the fingers on the shoulders.
Let the elbows be as low down as possible and as close to each other as possible.
And whilst breathing in.
.
.
Bring the elbows backwards.
Lift them up.
And exhaling forward Together and now.
Half of this circle is inhalation and second part exhalation.
Continue with these movements feel as you're doing the practice that the movement and your breath All in synchronicity.
Now when the elbows come again together,
The point where we started.
We're going to reverse this.
So inhalation,
Lift the elbows up.
And exhaling backward and up.
So you can feel this part.
Of the movement as we lifting the elbows and breathing in the stretch is there in our chest.
Expanding of the of the chest space and we're filling it with the fresh new energy.
One more time.
Very good.
And when you finish this then you can relax,
Place your hands again down to your knees For a moment.
We are pausing here,
Feeling the effects of the movements.
Now if you interlock your fingers like this and put the palms to the back of your head.
At this point we need to sit a little bit perhaps more forward on your chair.
So that your back is straight.
And gently press the elbows backwards.
Inhale in the middle.
And with exhalation twist the upper body to the right side,
Keep pressing elbows gently backwards.
Inhaling come back in the middle Exhalation to the left.
And with inhalation,
Come back.
We're going to continue with this exhaling Twisting to your right side Breathing in back in the middle.
Exhale in.
Inhalation back continue in your own time and let your attention be there where you experiencing this movement.
Very good movement exercise to release the tensions from our upper back.
Also from the lower back it helps our digestion.
Very good,
One more time to the left side and after that stop in the middle Bring the elbows forward.
And we're going to.
.
.
Round just the upper part of your back.
So let the pelvis move gently forward and then rounding the upper back.
Chin comes to your chest,
Shoulders relax.
And stay in this position And feel the upper back,
Your shoulders.
Maybe.
.
.
Even in the chest space made of Warm feelings spreading.
And with next inhalation we will come back.
And then with exhalation return your arms beside the relax or on your knees and feel the.
.
.
Again effect Now the next exercise of arms will be beside the chair.
And as you're breathing in lift the right arm up bring the upper arm near your ear and exhaling bend to the left side We feel the stretch.
On the right side of your body.
With inhalation returning back Turn the palm facing forward and exhaling.
Slowly down.
Now the left arm,
Breathe in,
Lifting.
Upper arm to the ear exhaling bending to the right and there's no need to force it just go as far as inhalation come back as far as you naturally can exhale,
Relax Right arm.
Long breath in,
Lifting.
Exhalation bend.
Breathing in,
Return.
Exhalation relax Left arm in breath.
Exhalation Coming back,
Breathing in.
And down,
Breathing out.
We will repeat one more time with each arm.
Go ahead.
Good.
And hands on the knees.
Again,
Short pause here,
Feel the breath,
Feel your body.
Relax.
Good now we bring our exercises to this part of the body the middle we did a lot in the top And have your legs little bit apart like this.
Interlock fingers.
This is called the grinding and we're going to.
.
.
Lean forward as far as you can with straight back.
And imagine you're holding.
.
.
Stick let's say I'm going to draw a big circle zero shape so as you inhale Go to the right,
Feel the twisting in the middle of the body,
Lean a little back.
Exhaling left and forward.
And these big circles you can carry on half of the circle inhalation second half exhalation.
And now next time when you are in this position the middle where we have started we stop here and Just go down like this,
Relax.
Let the muscles of your arms relax here,
Neck relax.
Abdominal breathing.
Very good.
We're coming up,
You can click.
Go as if you are lifting up something from the floor.
And exhalation.
Relax.
We go one more time,
Now to the other side.
It's the same beginning,
But start the circling movement to the left.
Breathing in,
Left.
Ladle back.
Exhale,
Right forward.
In order to be able to do this part,
A little bit leaning back,
Of course you need to sit in the front part of your chairs.
So there is a space for that.
Good,
One more time.
And then the same relaxing.
Point here Arms relaxed,
Shoulders,
Neck.
And we coming up.
Lifting up slowly.
With inhalation.
And exhalation,
Relax.
Deep breath in.
.
.
Out.
.
.
Good,
And finally we come to our legs.
Now.
.
.
The best Exercise.
To a little bit release tensions here in the hips.
Could be perhaps this pavana muktasana or bicycle we can do both so let the knee be as low down as possible so we not lifting it up arms are straight Inhale first.
And then with exhalation lift the knee as high up towards your chest as you can,
And if possible,
Try to bring the forehead or nose to your knee.
Then breathing in.
We will lift the head and breathing out the knee goes down Again,
Inhale.
Exhaling,
Lifting.
Head to the knee.
Inhaling,
We can make it more simple with the breath,
Lower the leg down.
And again,
Exhale,
Lift.
And inhalation.
Straight spine.
Push chest forward one more time.
Exhale.
And inhalation down.
And relax.
You can perhaps notice if we stop here the difference between Right leg and lift.
In the energetical level.
Very good,
Now let's carry on with the left leg.
Inhale first.
And now we go up exhalation.
Breathing in,
Slowly down,
Chest little forward,
Straight spine and again exhale Knee up,
Head to the knee.
Breathing in slowly down.
And carry on.
This exercise is good not only for our hip muscles but also again for digestion can help also with the energy levels.
Sometime when we feel tired is because of our Digestion.
Very good,
So after this one we can stop Finish this exercise.
Deeper inhalation,
Exhalation.
And we go back to the right leg.
Now comes the bicycle.
You could do.
.
.
Movement like this.
Or if you need a little bit assistance with your arm strength,
You could lift the knee little higher.
With the help of your hands and then stretch and down.
Breathing is natural.
I come a little bit like this so you can see Even you could move the.
.
.
Foot intuitively that the ankle joint also receives some Some exercise.
Okay,
Good.
Now let's lift the knee up and hold it here for a moment.
Just squeeze the leg.
As tight as comfortable.
Feel the breath.
And release.
Again short noticing There is difference.
Between right and left leg And let's begin with our left.
So the same forward bicycle with or without and the help of your hands if you can go quite high Without the help,
That's fine,
Otherwise use the hands.
Good.
Okay.
And now if you lift your right knee and just move the leg like this to the side Out and back again.
So a little bit for our here the hip joint Yeah.
Especially if you are sitting a lot then the tensions can build up in this part of the body.
Ok,
Once more And then switch to the left leg.
Good.
And now we will hold the left knee up because we did not after the bicycle just for a moment feel the breath,
And relax.
Very good,
Now you can sit back on your chairs.
And close your eyes for a moment.
Feel the effects of all exercises that you have practiced.
Notice if your body feels a little bit more alive,
Energized.
Notice also changes in your breath perhaps I'm in the mind too.
We're going to complete our practice with chanting OM three times The Shanti,
The peace mantra,
Om Shanti,
Shanti,
Shanti.
Deeper inhalation Ah.
Of Om.
Uh.
.
.
Om Shanti.
Shanti.
Shanti.
Move your fingers Bring your palms together.
Rub your palms.
Place warmer hands on your face.
Gently massage your face muscles,
Eyelids,
Nose.
And open your eyes.
So thank you.
Short practice sitting on the chair you can do during the day whenever you have time or as a break in between of your work,
Office work is a very good short and effective method.
Wish you all the best.
Hmm.