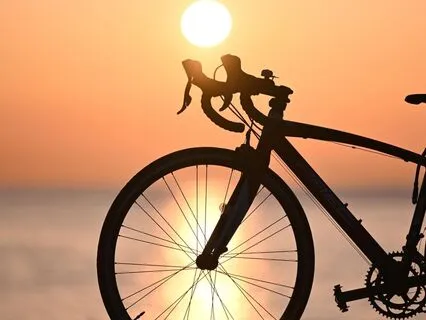
Welcome to this yin yoga practice for those who cycle.
People who spend a lot of time on their bike often experience tightness in the hamstrings,
Quadriceps,
Glutes,
And calf muscles.
And this practice was created with the intention of alleviating tightness for better flexibility and comfort.
Yin differs from other forms of yoga such as vinyasa in that rather than activating muscle groups,
We are relaxing and releasing them.
Yin yoga has the benefit of stretching deeper tissues such as tendons,
Fascia,
And ligaments.
Because these tissues have less blood supply than other muscular tissues,
More time is needed in the postures to allow for a deep stretch and rejuvenation.
We'll be flowing through a series of yin poses today.
And I want you to keep in mind that I'll be inviting you to hold each pose for an extended period of 3 to 10 minutes depending upon the posture.
So know that you have the time and spaciousness to fully sink into each posture.
And that being said,
I also highly encourage you to listen to your body and make any adjustments necessary if the posture feels too intense.
In addition to muscular relief,
This slow intentional practice of yin yoga has the added benefit of awakening the parasympathetic nervous system,
Thereby promoting relaxation and recovery and reducing the stress levels in the body.
I encourage you to practice on a yoga mat if you have one,
But if you don't,
A folded comfortable blanket may work as well.
And I also encourage you to have an extra light blanket nearby.
To begin your practice,
You'll want to start in a comfortable cross-legged position with your spine straight and your hands resting face down upon your knees.
Go ahead and relax your shoulders away from your ears and close your eyes.
Become aware of your natural breath.
Bring your awareness to your throat and as you exhale,
Begin to slightly constrict the back of your throat,
Keeping your mouth closed,
Moving into your ujjayi breathing.
You'll want to maintain this breathing technique throughout the practice to support further release in each of the poses.
Now,
I invite you to move forward onto your hands and knees.
You might take a few rounds of cat and cow to release the back,
And then,
When you are ready,
Move into a wide-legged child's pose with your knees wider than the hips,
Your hips reaching back towards your heels,
And your arms extended outwards,
Palms down.
When you are comfortable,
Allow yourself to sink into the posture.
We'll be here for 4 minutes.
If it feels okay with your body,
I'd like you to begin moving into straddle fold.
This is a forward fold pose with the legs spread wide.
Inhale deeply,
Taking one final breath in child's pose before engaging your core as you lift your torso off the ground and,
Shifting your weight into your hands,
Come back into tabletop position.
Spread your knees wide while keeping your feet together and come back onto your seat.
Exhale,
And slowly extend your legs out to the sides,
And then,
When you are ready,
Begin lowering your torso towards the ground,
Perhaps leaning onto your forearms,
Or perhaps bringing your forehead all the way to the ground,
Continuing to listen to your body.
You can also reach for your feet with your hands if that feels comfortable,
But no need to push for this if it does not.
Remember that the goal here is to relax into each posture.
Everyone's body and range of flexibility is different,
So no need to push yourself farther than is comfortable.
We'll be here for 4 minutes.
To exit the straddle pose,
Slowly walk your hands back toward your body,
Sit up tall,
And bring your legs back together.
Take a deep breath in and then exhale fully.
The next pose we'll be moving into is legs up the wall,
So please go ahead and move the short end of your mat snugly up to the base of the wall.
To move into this posture,
You'll want to sit with your right side against the wall,
Your knees bent,
And your feet drawn in towards your hips.
Now swing your legs up against the wall as you turn to lie flat on your back.
Now scoot forward until you can place your hips against the wall,
Or slightly away if that's feeling better for your body today.
This pose can be very calming and beneficial for the nervous system,
And it's also very helpful for improving circulation.
This can counteract blood and other liquids pooling in the legs after hours of cycling.
Inverting the legs allows gravity to help return the blood to your heart,
Improving overall circulation and reducing swelling.
It can also be beneficial in reducing lower back tension.
If you find that the pose is feeling too intense,
You may bend your knees slightly or place a folded blanket or pillow under your hips for more support.
We're going to really take our time with this pose and spend 10 minutes here to let the body reap the full benefits.
So I invite you to bring your awareness back to your breath and continue to practice your ujjayi breathing.
Taking a deep breath in,
Slowly begin to lower your legs down from the wall,
Bending your knees.
Roll onto one side and push yourself up into a seated position.
We'll be moving into our final pose before Shobhasana,
Pigeon Pose.
So when you are ready,
I invite you to slowly move back into a tabletop position with your hands directly under your shoulders and your knees beneath your hips.
Ensure your spine is neutral.
Now slide your right knee forward towards your right wrist and extend your left leg straight behind you.
Your right foot should be flexed.
Depending on your body and flexibility,
You can either keep your right foot closer to your left hip or extend it further outwards for a deeper stretch.
Make sure your hips remain square to the front of your mat.
Now inhale deeply and lengthen through your spine while keeping your chest open.
Be sure to avoid collapsing into your lower back.
Now I invite you to exhale as you gently lower your upper body over your right leg.
You can rest on your forearms if that feels good or extend your arms forward on the mat for a deeper stretch.
We'll only be here for 3 minutes,
So try to stay present with the posture and allow your breath to gently guide any tension out of your body.
To come out of the pose,
Gently lift yourself back up onto all fours before transitioning into child's pose.
Pause for a moment here and then return to all fours in tabletop position again for the other side.
Again making sure that your hands are directly beneath your shoulders and your knees under your hips.
With a neutral spine,
Begin to slide your left knee forward towards your left wrist and extend your right leg straight back behind you.
Your left foot should be flexed with your left ankle near your right hip.
You may either keep your left foot closer to your right hip or extend it further outwards for a deeper stretch,
Again making sure the hips remain square to the front of your mat.
Inhaling deeply,
Begin to lengthen through your spine while keeping your chest open and begin to gently exhale as you lower your upper body over your left leg and move your arms into the position that is most comfortable for you.
I was in a yoga class probably about a dozen years ago,
But it always stuck with me because the teacher said something that I found so interesting about pigeon pose.
He said that he tried to do this pose every day because it kept him honest.
I think he was referring to the release of tension and release of stored emotions that some people experience in the pose.
When you're experiencing stress,
Part of our body's primal protective mechanism is to prepare the body for flight,
Sending a surge of power to the hips.
And if that surge isn't needed or discharged from the body,
The tension can remain stuck there and create a lot of tightness.
Pigeon pose is really helpful for alleviating that tightness and dispersing stuck energy.
When you are ready,
Take a deep breath in and again gently lift yourself back up onto all fours.
You may choose to do a few rounds of cat cow here if that feels good for your body or you may come directly into a seated position before moving into Shavasana.
You want to lie flat on your back with your arms relaxed at your sides and the palms facing up about 8-10 inches away from the body.
Draw the shoulder blades down away from the ears and slide them toward one another until they seem to rest flat against the floor underneath you.
Let the weight of your upper body rest on the shoulder blades.
Bring the legs about 12-18 inches apart adjusting the distance until the hip joints relax.
If you would like,
You may place a folded blanket over the belly to encourage a grounding sensation.
From then,
When you are ready,
Close your eyes,
Turn your head side to side a few times,
Gradually resting it upright and in the center.
Now turn your attention to the breath.
Inhale through your nose and become aware of the breath as it fills your lungs.
Your abdomen rises.
Without pausing,
Begin to exhale,
Continuing to breathe through your nose while allowing the abdomen to fall naturally as air leaves your lungs.
Relax and allow the rhythmic nature of the breath to take over as inhalation and exhalation flow effortlessly into one another.
As we prepare to conclude the Shavasana,
Slowly begin to bring your awareness back to the body.
Wiggle the fingers and the toes and gently stretch your arms and your legs.
Take a deep breath and as you exhale,
Roll over to one side in the fetal position.
It might feel supportive to give yourself a gentle hug here,
Thanking yourself for practicing today.
Use your hands to support yourself as you slowly come up to a seated position.
We'll end the practice by bringing the hands to heart center and bowing deeply before gently fluttering the eyes open.
It's my pleasure to guide you through your practice today.