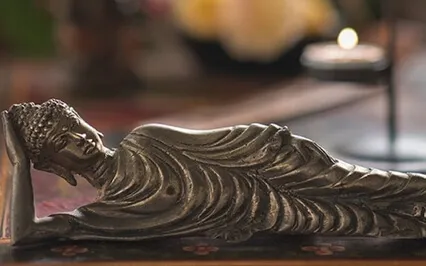
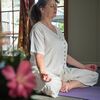
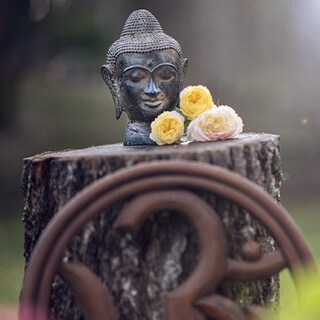
Coming into a comfortable position,
You might like to be in paramvit stiti,
The base position,
So sitting on the buttocks,
Legs extended out in front.
If you need a little bit of extra support for the spine,
You can pop a cushion and just sit towards the front of that cushion,
Using the cushion to tilt the pelvis a little,
Enabling the spine to be more upright in this position.
We're going to begin with the Paavana Muktasana series,
Known as PMA 1,
And this series is all about the joints.
The focus of the practice is to coordinate the breath,
The movement,
And the awareness,
So this is the challenge,
Focusing on gently moving in rhythm with the breath.
So with this series,
We always begin with the toes and work our way all the way up the body to the neck.
So having the feet about hip-width apart,
Have the toes turned up towards the ceiling so the feet are upright,
And just moving the toes,
So keeping the rest of the feet still,
On the inhalation,
Begin drawing the toes towards the head.
Use the full length of the in-breath to arrive at your final position.
Pause for a moment,
And then on the exhalation,
Begin curling the toes away from the body,
Again using the full length of the out-breath to arrive in your final position,
And pause.
So continuing in this way for up to four more rounds of the breath,
Inhale as you draw the toes towards you,
And exhale as you curl them away from you.
You're arriving in your final position before you've finished that breath.
You need to slow down the movement.
Now on completion,
Bring the feet to stillness,
And just notice any effects from that practice.
Moving up into the ankles now,
So on the next inhalation,
Drawing the toes towards the body,
Pushing the heels of the feet away from the body.
Again pause,
And then on the out-breath,
Full length of the out-breath,
Begin pointing the toes towards the floor,
And again pause in the final position.
So up to four more rounds in each direction,
Working with the breath,
Staying focused on the gentle movement,
Coordinating it with the breath.
You may notice the awareness begins to wander off.
Just draw it back nice and gently.
Part of what we're doing with these mindfulness practices is also training the mind to concentrate,
And that can take quite a bit of practice.
Now on completion,
Bring the feet to stillness,
And just notice any effects from that practice.
Now moving into Guftakra,
Ankle rotations,
By firstly placing the hands on the tops of the legs,
So you can feel what's going on in the legs during the practice.
Separate the feet just far enough,
So that when you circle the toes in towards each other,
The big toes just touch,
And continuing to rotate the feet in this way from the ankles down,
Feeling through the hands that the rest of the leg is still.
This is the challenge with this practice,
Focusing the movement from the ankles down.
Remembering to change directions.
The body usually begins in the easiest direction,
So notice any challenges to your coordination.
So notice any challenges to your coordination as you change directions.
Now on completion,
Bring the feet to stillness,
And just notice any effects from that practice.
Now moving up into the knees,
With knee bending and kneecap contractions,
As well as a little bit of a hamstring stretch.
So bending the right knee,
Interlacing the fingers behind the right thigh,
Lifting the right foot off the floor,
And checking that the torso is up nice and straight.
On the next inhalation,
Begin straightening the knee,
Clench all the muscles around the kneecap,
And hold.
And then on the exhalation,
Release by bending the knee,
Keeping the foot off the floor.
Again,
Inhale,
Straighten,
Clench and hold.
When you're ready to exhale,
Release on the exhalation,
Bending the knee to the chest,
And again keeping the foot clear of the floor.
Now we're going to add a little stretch to the back of the leg,
So on the next inhalation,
Straighten the knee,
Clench all the muscles around the kneecap,
And hold,
And bring the toes towards the head to lengthen into the back of the leg.
And exhale,
Release.
Inhale,
Straighten,
Clench,
Hold,
Toes towards the head.
And exhale,
Release.
And then the final round,
Inhale,
Straighten,
Clench,
Hold,
Toes towards the head,
And then without leaning back,
Lift the leg,
Bending the elbows,
And as soon as the leg starts to bend,
Stop there,
Keeping the knee straight.
And then exhale,
Release by bending the knee to the chest,
And then straighten the leg along the floor.
Take a moment to compare the two sides of the body,
Notice any difference between the side that you've been working with and the side that has yet to be worked with,
And then preparing to practice to the other side.
So again,
Bending the left knee in towards the chest,
Interlace the fingers behind the left thigh,
Check that the torso is upright and the foot is off the floor.
On the next inhalation,
Straighten,
Clench,
And hold.
And on the exhalation,
Bend the knee to the chest to release.
Then inhale,
Straighten,
Clench,
And hold.
And exhale,
Release.
Adding the stretch to the back of the leg,
So inhale,
Straighten,
Clench,
Hold,
Bring the toes towards the head.
And exhale,
Release.
Inhale,
Straighten,
Clench,
Hold,
Toes towards the head.
And exhale,
Release.
Final round,
Inhale,
Straighten,
Clench,
Hold,
Toes towards the head,
And without leaning back,
Bend the elbows to lift that left leg,
Stopping where the leg starts to bend.
And then exhale,
Release by bending to the chest and then straightening the leg along the floor.
Pause for a moment to again compare the two sides.
Then you might want to jiggle the legs a little to release any tension.
I'm preparing now for a slightly stronger practice with the knees,
Janu Chakra,
The knee crank.
We're going to be creating oval shapes in the air with the foot,
While keeping the thigh still.
So creating the shapes in the air from the knee down.
So making sure that your torso is upright,
Bending the right knee,
And interlace the fingers behind the right thigh,
Lifting that right foot off the floor.
So begin circling the foot up towards the ceiling,
If you can straighten the knee,
Do so.
Then on the exhalation,
Sweeping out to the side as you come down towards the floor.
So moving in an outward direction.
Moving up,
Out,
And then down.
Inhale as you straighten the knee and exhale as you bring the foot back down towards the floor.
Make sure the thigh remains still.
That's the challenge with this practice.
Up to five rounds in this direction.
Then up to five rounds in the opposite direction.
Moving in the opposite direction,
The foot goes out to the side first,
Up towards the ceiling,
And then in towards the center of the body.
And on completion,
Releasing the leg down to the floor.
Jiggle the legs to release any tension.
Pause for a moment with the eyes closed to compare the two to the other.
And then on the exhale,
Release the leg down to the floor.
And then on the exhale,
Release the leg down to the floor.
Jiggle the legs to release any tension,
And pause for a moment with the eyes closed to compare the two sides.
Now preparing to practice to the other side.
Checking that the torso is upright,
Bend the left knee towards the chest,
And interlace the fingers behind the left thigh.
On the next inhalation,
Sweep the foot out to the side and up towards the ceiling,
Straightening the knee if you can,
And then finishing your oval shape by bringing the foot down,
In towards the center of the body,
And down towards the floor.
So again,
Up to five rounds in each direction,
Creating oval shapes in the air,
Whilst keeping the thigh perfectly still.
And you've completed five rounds in each direction.
Let me straighten the leg out along the floor once again,
Jiggle the legs to release any tension,
Close the eyes,
And feel for any effects in the knees.
Moving up into the hips now,
Beginning with Sharani Chakra,
Hip rotations.
Begin by bending the right knee,
And then allow the knee to fall out to the right side.
Now you can either leave the sole of the right foot against the left thigh,
Or if you're comfortably able to lift the foot on top of the left thigh,
Do so.
Left hand on the right foot,
And the right hand is on the right knee,
With the index finger pointed.
We're going to use this index finger as a guide for our practice.
Keeping your eyes glued to that index finger,
Focusing on manipulating the index finger to get a rotation into the hip joint,
So moving the right knee more than the foot,
Begin circling around,
Creating a round circle with that index finger,
Aiming to make the circles as large and as round as you can.
Practicing up to five rounds in this direction,
And then five rounds in the opposite direction.
Again,
You may notice your coordination being challenged.
Just make a mental note of that,
That's okay.
When you've completed five rounds in each direction,
Bringing the right knee to center,
And then straighten out the leg along the floor once again.
It's very important for the care of your knees to make sure that you don't bend and twist at the same time.
So always bend the knee first,
And then allow it to go out to the side,
And when you're completing,
Again bring the knees to the center,
And then straighten the legs along the floor.
Prepare to begin on the other side by bending the left knee,
Allowing the left knee to go out to the side,
And again either placing that left foot on top of the right thigh,
Or have the sole of the left foot against the inner thigh.
Right hand on the foot,
Left hand on the knee with the index finger pointed.
And then keeping your eyes glued to that index finger,
Begin manipulating the leg,
Working the knee more,
Creating circles in the air with that index finger.
Five rounds in each direction once again.
Now you may notice some crazy shapes with that index finger,
That's okay.
Just aiming for large round circles,
And do what you can.
And when you've completed five rounds in each direction,
Bring the left knee to the center,
Straighten the leg back along the floor,
Pausing for a moment to see how it feels,
You've matched the sides now.
Tickle the legs a little.
Adha to Taliasan,
Half butterfly.
So again,
Bending the right knee,
And allow it to go out to the side.
Once again,
You can leave that right foot,
The sole of the foot against the left thigh,
Or you can place the right foot on top of the left thigh,
Whatever is more comfortable for you.
Left hand on the foot,
Right hand on the right knee.
And then closing the eyes,
Focus on relaxing all the muscles in that right leg.
You want to allow the muscles to be completely passive,
Because we're going to use that right arm and hand to do all the work,
Checking that the torso is upright.
On the next inhalation,
Cupping the right knee with the right hand,
Begin lifting that leg up towards the ear.
Then on the exhalation,
Without letting the leg muscles engage,
Use the right hand to support the leg as it drops back down towards the floor.
And then slide the hand onto the top of the knee,
Create a gentle pressure down into the floor.
Again,
Slide the hand so that it's cupping the knee once more.
On the next inhalation,
Lifting the knee up towards the ear.
And then remember,
Don't let the leg muscles engage as you allow the leg to drop down towards the floor,
Supported by the right hand.
And then slide the right hand onto the top of the right knee and apply gentle pressure down into the floor.
So practicing up to three more rounds,
Like this.
Try not to allow the torso to move with the practice.
Remain upright and still.
Keep checking to see whether those leg muscles have reengaged.
Keep them passive.
And when you've completed,
Bringing the right knee to the center and then straighten the leg out along the floor once again.
A little jiggle,
Just to loosen any tension.
Pause for a moment to compare the two sides.
And then preparing to practice on the left side.
So again,
Bending the left knee,
Allow it to fall out to the side.
Placing the foot either on top of the right leg or against the right thigh.
And the left hand cupping the left knee.
Again,
Checking that the torso is upright and the muscles of the left leg are completely passive before you begin.
The next inhalation,
Cupping the left knee and lifting it with the left hand up towards the ear.
Then on the out breath,
Supporting that knee as it comes back down towards the floor.
And then sliding the hand onto the top of the knee and gentle pressure down into the floor.
Cupping the knee once again on the inhalation,
Lifting up towards the ear.
Leg muscles completely passive as you allow the knee to come back down towards the floor.
Slide the left hand onto the top of the knee and gentle pressure down into the floor.
So again,
Practicing up to three more rounds with the left leg.
And then on completion,
Bringing that left knee in towards the centre once more and straightening out the leg.
A little jiggle to loosen any tension.
Close the eyes and check in on how you're feeling.
Now if you suffer from sciatica,
Even if sciatica isn't an issue for you at the present moment,
Please stay with the half butterfly,
Adha Titali Asana,
And practice up to three more rounds to each side.
Otherwise preparing for Purna Titali Asana,
The full butterfly.
So bending both knees,
Allow them to go out to the side so right knee goes to the right,
Left knee goes to the left.
And bring the soles of the feet together.
Interlace the fingers around the toes and draw the feet as close to the torso as possible.
And now checking that the spine hasn't collapsed down,
That you're sitting forward on the sit bones,
Lifting up through the spine so that the torso is tall and upright.
On the next inhalation,
Bringing both knees up towards the ears.
Then on the exhalation,
Allow those knees to come down towards the floor,
And then gentle push a little further down towards the floor.
Inhale,
Lift the knees up.
And exhale,
Let them go towards the floor.
Gentle push.
One more round like this.
So inhale,
Lifting the knees.
Exhale,
Letting them drop towards the floor.
Gentle push.
And then tiny little butterfly flutters.
So just allowing the knees to flutter up and down,
Just moving a short distance.
Close the eyes if you're comfortable too.
Feeling into the tension in the inner thighs.
We store a lot of tension in this part of the body.
See if you can allow these muscles to soften and let go as the practice progresses.
Mentally counting another 50 little flutters.
Then bringing both knees together again,
And then straightening out the legs.
A little dual.
Noticing any effects from that practice.
Now preparing to move up into the hands.
So extending the hands out in front of the body,
Shoulder height.
This is a little bit strong for you.
Remember you can support the hands if you need to.
And on the inhalation,
Spread the fingers as widely as you can.
Then on the out breath,
Bring the thumbs into the palms of the hands.
And then one finger at a time,
Closing the fingers over that thumb to make a fist.
Little finger comes last,
And then squeeze the fist at the end of the exhalation.
Then on the inhalation,
Open from the little finger first.
One finger at a time,
Releasing that fist,
Thumb comes out and spread the fingers as widely as you can.
So again,
Continuing in this way,
Closing the fist finger by finger on the out breath,
Squeezing the fist at the end of the out breath.
Then on the inhalation,
Beginning to open the fist from the little finger first,
Finger by finger,
Thumb comes out and then stretch the hands as widely as you can.
So up to three more rounds like this.
Notice any difference between the fingers,
Maybe some,
It's a little discomfort.
Maybe there's a range of motion difference between the fingers or the hands,
One side to the other.
Just notice this.
And then bring the fingers together,
We're going to move up into the wrists now with wrist bending.
So on the inhalation,
Drawing the fingers towards the body,
Pushing the heels of the palms forward,
As though leaning against a wall in front of you.
Then on the exhalation,
Keeping the hands nice and flat,
So no knuckles,
Tilt the fingers towards the floor.
Full length of the in breath,
Bringing the fingers back towards the body and pause.
Full length of the out breath,
Tilting the fingers towards the floor and pause.
Up to three more rounds like this.
Remember if the arms get tired,
You can rest at any time.
And on completion,
Wrist rotations.
With the thumbs on the inside,
Place the hands in soft fists.
And then keeping the forearm as still as possible,
Focusing all the movement from the wrists down,
Begin rotating the fists around either direction to start,
But both hands moving in the same direction,
Up to five rounds in each direction.
If you're finding that your forearms are moving despite your best efforts,
Then take hold of your wrist with the opposite hand and just move one wrist at a time.
Notice any difference between the range of movement in each wrist.
On completion,
Preparing for elbow bending.
By turning the palms upwards to face the ceiling,
Keeping the upper arms parallel with the floor.
On the exhalation,
Bring the fingertips to the shoulders.
And on the inhalation,
Extending the hands out in front once again,
Shoulder height.
So exhale as you bend the elbows,
Fingertips to the shoulder,
And inhale as you straighten.
Up to three more rounds like this.
And completing with the fingertips at the shoulder,
Take the elbows out to the side.
Again,
Keeping the upper arms parallel with the floor.
And on the inhalation,
Open the elbows so this time the hands go out to the side.
Exhale as you bend and inhale as you straighten.
And then you up to three more rounds in this direction.
And on completion,
Lower the arms.
You might want to roll the neck and shoulders a little bit,
See how you're feeling.
Preparing to move the body now.
So you're ready to change positions,
Coming down into Shavasana,
Lying on your back with your head as close to your device as you can manage.
And now coming to lie on the right side of the body,
Raising the right arm above the head along the floor,
Bending the left knee,
Sole of the foot on the floor,
And pushing yourself over onto your right side.
And then just warm a little into the shoulders with shoulder socket rotations,
Long levers.
So bending the knees up towards the chest just to stabilize the body,
Resting the head on a bent or straight right arm,
And having the left hand resting on the hip.
That's important with this practice to maintain a straight elbow and contact between the fingertips and the floor throughout.
On the next inhalation,
Extending the left arm out in front of the body at chest height,
Fingertips on the floor.
Elongate the arm out of the shoulder socket so the arm is as long as it can be.
Begin rotating the hand around the top of the head,
Keeping the elbows straight,
And there'll come a point where you'll need to roll back a little to maintain the contact with the floor.
Just roll back enough to keep that contact in place.
Roll the hand over as you need to to maintain that contact,
And then bring the hand back to the hip.
So continuing with four more rounds like this,
Inhale as you take the hand around the top of the head,
Rolling back and rolling the hand as you need to maintain contact with the floor,
And then on the exhalation,
Bringing the hand back to the hip.
And three more rounds.
Try and keep the knees together and on the floor if you can,
So you get a nice spinal twist through the practice as well.
And when you've completed five rounds in this direction,
Practicing five rounds in the opposite direction,
So again starting at the hip,
This time taking the hand behind the body,
Beginning to circle around,
Nice long arm,
Fingertips in contact with the floor,
And exhaling as the hand comes back to the hip,
And four more rounds like this.
When you've completed,
Coming to lie on the front side,
Head on one side or the other,
Arms down beside the body,
And take a moment to compare the two sides.
And then coming to lie on the left side,
Again bending the knees up towards the chest,
Head resting comfortably on a bent or straight left arm,
And the right hand resting on the hip.
And the next inhalation,
Extending the right hand out in front of the body at chest height,
Fingertips on the floor,
Elongate the arm as you straighten the elbow,
And then take the hand in a circle around the top of the head,
Rolling back just as far as you need,
Turning the hand as you need,
And on the exhalation bringing the hand back to the hip,
Practicing five rounds in this direction,
And again five rounds in the opposite direction.
Notice any difference between the tension on this side and the tension that you found in the other shoulder.
It's a lovely way of keeping mobility in the shoulders and it works into the neck as well,
Great for upper body tension.
And again when you've completed coming onto the front side,
Head on the other side this time,
Arms beside the body,
And feel into the neck and the shoulders.
And when you're ready to change positions,
Coming onto all fours,
Preparing for madhyarayasana,
The cat pose.
So remembering how to place your hands in the right position,
Bring the buttocks back onto the heels,
Forearms are on the floor,
Elbows are against the knees,
And the palms are flat on the floor.
Then come up onto all fours.
The next inhalation,
Moving into upward cat,
Head up,
Tail up,
Arching the spine so the navel goes towards the floor.
Elbows should remain straight throughout the practice.
Then on the next exhalation,
Downward cat,
Head down,
Tuck the tail under,
Pushing the spine up towards the ceiling,
And unless you're about four months pregnant,
Draw the navel in towards the spine to create that extra abdominal compression.
Inhaling into upward cat,
Full length of the in-breath to arrive in the final position,
And exhale into downward cat.
Again,
Full exhalation to arrive in the final position.
Continuing like this,
Up to eight more rounds in each direction.
If your neck is finding this practice a little bit strong,
You can keep the neck in a neutral position if you need to.
You can add the eye mudras if you like.
So in upward cat,
As the head and the tail come up,
Take the eyes to the eyebrow center,
Jambhavi mudra.
Then on the exhalation,
As the head and the tail takanda,
Take the eyes to the nose tip,
Nasa Kaga mudra.
Continue.
Feeling the spine becoming activated.
And on completion,
Bringing the spine into the neutral position,
Staying on all fours,
And preparing to move into twisting cat.
So fixing the gaze on the right hand,
Keeping the right elbow straight.
On the next inhalation,
Taking the right hand out to the side of the body,
And extend if you can up towards the ceiling,
Following with your eyes the whole way.
Both elbows are still straight.
Then on the exhalation,
Full length of the out-breath,
Bringing the hand back down towards the floor.
When you've almost reached the floor,
We're going to thread the needle,
So take that right hand into the gap between the left hand and the left knee.
Slide the hand through along the floor,
And bring the right shoulder down towards the floor,
Reaching the floor if you can.
And then on the next inhalation,
Again coming up,
Fixing your eyes to your right hand,
Straightening the left elbow as you extend the right hand up towards the ceiling once more.
So up to five rounds in this way with the right arm.
Inhaling as you open,
Feeling the chest open,
The shoulder blades to come together at the back.
And then on the out-breath,
Bringing the arm down,
Threading the needle through,
Bringing the right shoulder to the floor.
Noticing where the arm wants to deviate from the path that goes straight out from the body.
Noticing if it wants to go towards the back of the body or towards the front.
When you've completed the five rounds,
Bringing the body into the neutral position once again,
And fixing the gaze to the left hand.
On the next inhalation,
Taking the left hand with a straight elbow out to the side,
And again up towards the ceiling if you can.
And then on the out-breath,
Still following with your eyes,
Bring the left hand down towards the floor,
Taking it through the gap between the right hand and the right knee,
And bringing the left shoulder down towards the floor.
Continuing with another four rounds on the left side.
Noticing any difference in the range of motion between the sides.
Becoming aware of any restrictions in the range of motion in that shoulder.
And on completion,
Coming back into the neutral cat position.
Then you can either come into Vajrasana,
So sitting back on the heels if that's comfortable for you,
To make Vajrasana a little more comfortable.
You can pop a blanket underneath the feet,
If it's the top of the feet,
That is giving you some grief.
And you can put a cushion between the heels and the buttocks,
Just to distribute the weight a little bit more evenly.
You also might like to use your meditation stool if you have one.
Otherwise,
Coming to sitting in the base position,
Parambit Stiti,
Sitting on the buttocks,
Legs extended out in front,
And place a little cushion underneath the buttocks,
Just to create a little bit of support in this position.
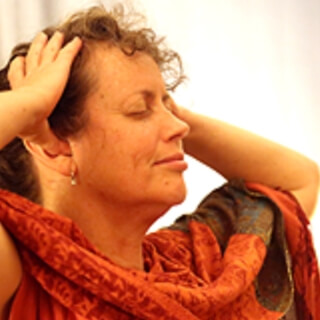
Close the eyes,
And notice any effects from those practices.
And preparing now for more neck movements.
We've been through a forward and backward movement,
And a side to side movement with our Marjaryasana combination.
We're now going to do a neck tilt and a full rotation.
So keeping in mind if your neck is delicate,
If you've had previous neck injuries,
Please practice with extra care,
Only moving within the range of movement that your body will allow today.
So closing the eyes,
Head in a neutral position,
Arms are beside the body so the shoulders can relax away from the ears.
They will want to join in on these neck practices.
And focus entirely on the neck.
Deep inhalation here.
And on the next exhalation,
Allow the right ear to go towards the right shoulder.
Resisting any urge to bring the shoulder up to the ear.
And pause.
Inhale to centre.
And on the next exhalation,
Left ear goes towards left shoulder.
Pause.
And inhale to centre.
So continuing for up to four more rounds to each side.
Moving into the tilt on the out breath.
And centring the head on the in breath.
Feeling for any differences in the tension from the left to the right side.
And on completion,
No rush.
Bring the head back to the neutral position.
Feel for any effects from that practice.
And you can roll the neck and shoulders a little.
See how you're feeling.
And then preparing for a full rotation.
Keeping in mind a full neck rotation can be a little bit strong if your neck is not terribly good today.
And in this case you can do half circles if you would like to.
So keeping the chin in towards the chest.
You can roll the ear round to the shoulder and then roll back into the centre once more.
Otherwise,
Full rotations.
So again,
Head in the neutral position,
Eyes closed,
Shoulders relaxed away from the ears.
And full focus on the neck.
On the next exhalation.
Bringing the chin in towards the chest.
And then moving in either direction.
On the inhalation,
Rolling the head back.
Keeping the neck muscles fully engaged.
And then on the exhalation,
Bringing the head around and the chin back in towards the chest.
Continuing up to four more rounds in the direction you're travelling.
Notice any limitations in your range of motion.
Any temptation for the shoulder to come up to the ear to protect the neck.
Keep everything soft but the neck muscles fully engaged.
And when you've completed your five rounds in the direction you're travelling,
No hurry.
Coming back with the chin in towards the chest to change direction.
And practising up to five rounds in the opposite direction.
Remembering that if you reduce the rounds in one direction,
It's important for balance to reduce the number of rounds in the opposite direction as well.
Again,
When you've completed your five rounds,
Chin is in towards the chest as your final position.
And then lift the head into the neutral position.
Keep the eyes closed as you feel into the effects of the practice.
And then you can once again roll the neck and shoulders and see how you feel.