For those of you who don't know me,
My name is Vicky and today I'm going to do a 30 minute yin yoga session.
For those of you who haven't done yin yoga before,
Maybe you've done yoga,
Maybe you haven't,
Yin yoga is a much slower practice.
We're in the poses for approximately 3 to 4 minutes,
So it's really important to be comfortable in the positions and also to feel stimulation in specific areas in each pose.
So I'll tell you what they are and I will also give you some adjustments to try and make sure that you have that stimulation but also that you don't have any pain anywhere.
It's really important in all forms of yoga to listen to your body,
But particularly in yin yoga because we're in the poses for so long.
Then please do listen to your body,
Adjust when necessary,
Give yourself time to do that and then just focus on your experience.
Focus on what you're feeling in the body,
Notice if anything comes up and I will guide you through that.
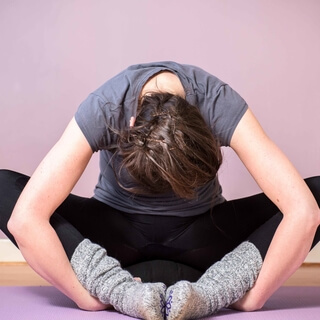
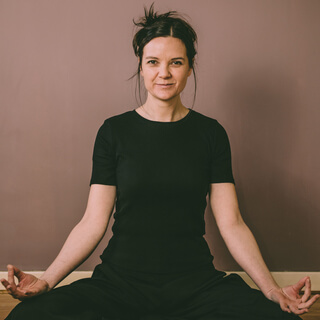
So if you want to start by taking a comfortable seated position,
That can be any position you like,
So it can be for example kneeling,
Perhaps sitting up on something or even if you might prefer to sit cross legged maybe with one leg in front.
You might feel more comfortable with your legs straight out,
Whatever is most comfortable for you.
So as always,
We will start with the breathing exercise just to bring you into the room and to calm you down a bit before starting.
Change your seated position and if you're comfortable with closing your eyes then close your eyes,
Otherwise you can soften your gaze,
So just letting your eyes rest on something but not really paying attention,
Just softening the gaze.
Now bring your shoulders forwards,
Up and back so that you're straightening the back.
The chest is open,
Shoulders are relaxed,
Take a deep breath in through the nose,
Out through the mouth,
In through the nose and out through the mouth.
Just sense where the feet are,
Where they're touching the floor.
Maybe one foot is touching the other.
Notice the weight of the arms,
Keeping straight but relaxed.
Sense if you're holding any tension in the body and if you are then just direct your out breath.
Imagine that you're sending the out breath into that area to soften that area,
Particularly the face,
The shoulders.
And then come to your natural breath,
Noticing where you feel the rise and the fall of the natural breath in the body.
Maybe the shoulders going up and down,
The chest,
The belly.
Where do you feel it strongest in your body?
And we're just going to do a short round of box breathing which I'll take you through.
So just breathe out completely,
Then we're going to breathe in the nose for four.
So one,
Two,
Three,
Four,
Then hold for four.
Two,
Three,
Four.
And out the nose,
Two,
Three,
Four.
Hold two,
Three,
Four.
Breathe in,
Two,
Three,
Four.
Hold two,
Three,
Four.
Then out,
2,
3,
4,
Hold,
2,
3,
4,
In,
Hold,
Out,
Hold,
In,
Hold,
Out,
Out,
Out,
Out,
In,
Hold,
Out,
Hold,
In,
Keep the body relaxed,
Hold,
Out,
Out,
Out,
Out,
Out,
Out,
Out,
Out,
Out,
Out,
Out,
Out,
In,
Hold,
In,
Hold,
And out,
Hold.
Now just let go of the breath,
Going back to your normal breath and notice how you feel.
And then when you're ready,
Just open your eyes and we'll move into the first position.
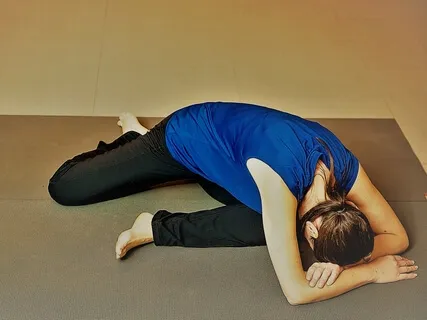
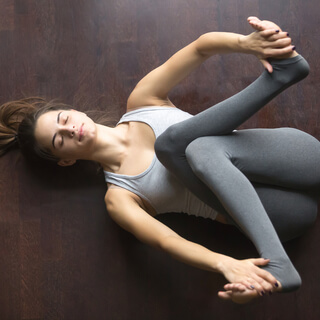
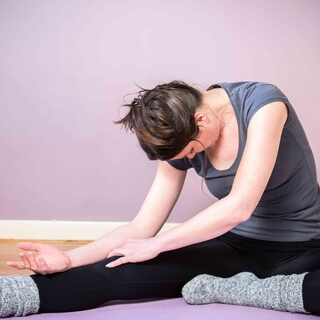
So today we're going to do a yin yoga class focused on twists.
It'll be around 30 minutes and the poses will be twisted versions of dia and flamingo and end with a reclined twist.
So if you're sitting on anything,
Just move it away.
Start with both knees bent and your feet on the floor.
Now let the right knee drop to the right so that the outside of the right ankle is on the floor or close to the floor.
It doesn't matter if the foot is close to the body or a bit further away as long as the knee is comfortable.
Now keeping the knee bent,
Bring the left foot back towards the left outside hip.
Don't pull on the knee but bring it as far back as you can so that you're starting to feel a stretch on the hip flexors here.
Not too much,
Not too little,
But you can feel it.
And then we're just going to twist to the right.
Don't twist too far as in yin yoga we don't go to our full range of motion.
We go around to about 60 or 70% so we can relax into the pose.
Hopefully you're feeling a bit of a stretch here in the hip flexors,
Maybe even in the quads.
Twisting the organs,
Twisting the spine.
So if this is where you want to be,
Stay here and relax into the pose,
Keeping the twist and keeping the stretch there.
Alternatively you might want to go down a little,
For example go down onto the hand rather than the fingertips or you might prefer to take something to rest on like a block or a cushion and go down onto the elbow.
All options are fine as long as we've still got the twist here.
If you find that you lose that stimulation in a different variation however,
Then you might want to go back to the original pose.
Personally I lose the stretch on my hip flexors if I go down on my elbow so I'm going to stay up on my fingers,
But that's me,
That's my body.
If it's feeling a bit painful in the lower back at this point,
Then you might want to twist back to the centre a bit or try moving the left leg further forward or possibly a bit further back.
Close your eyes again if you're comfortable with that,
Making sure that your body is feeling relaxed even though you're stimulating it and just notice where you're feeling this in the body,
Which part.
Remember that you can see the poses for each audio class on my website,
But please do use them as a general guide.
What's more important is the target area,
The area that we want to feel the stimulation in and the target areas in all the poses today are in the torso where the twist is.
Perhaps as well as the twist in the body and hopefully stretch in the back hip flexors,
You might be feeling a stretch somewhere else,
That's also fine as long as it feels like stimulation in a general area and it's not feeling painful.
Sometimes it's difficult to tell the difference,
But if it feels like stabbing or pinching or some kind of electrical sensation,
Then be very careful with that and adjust the pose.
Okay,
So on the next out breath,
Then slowly untwist back to the centre.
Keep the right leg where it is,
But gently place the left foot on the floor in front of the right shin.
Now put the back of the left hand on the waist and the left elbow on the inside of the right knee and then twist the head towards or even over the left shoulder.
You might want to hold onto the knee or you might prefer to put the hand on the floor.
So the target area this time is still a twist,
But we're looking for it on the back of the left arm,
Shoulder and upper back.
In this pose the leg can actually be a bit active,
So kind of pushing against the arm.
Move the front foot where you like,
More to the left,
The right,
Perhaps closer to the body or further away.
Now if the hand,
The wrist isn't comfortable,
Then you can move it,
It doesn't necessarily have to be on the waist of the body.
You might want to move it more towards the back or if that doesn't work,
It can be on the front.
It could also be a bit further up,
More towards the rib cage or a bit further down.
And then again,
Close your eyes,
Notice where you feel the stretch,
Where you feel the twist.
Sense if you're holding any tension in the body as we did at the start.
And as you breathe out,
Imagine you're breathing into the area that's tense and see if you can soften it.
We do resolve to stay still in Yin Yoga and the reason for that is what we're actually stimulating here is the connective tissue of the body,
The muscles to a degree,
But not in the same way as more active forms of yoga and other types of exercise.
Yin is more passive,
We're not pushing,
We're relaxing into the poses as I said at the start.
It doesn't mean that we don't want to feel the body working,
We do.
But we're trying to get deep into the body,
Deeper into the connective tissue,
The joints,
The fascia,
The ligaments,
The tendons.
So on the next out breath,
Take the arm away gently and we're just going to lie down.
The left hand,
Wrist or arm could all be feeling quite fragile,
That's normal when you exercise connective tissue so don't worry about it.
Just lie down without moving yet.
Notice the areas that we just stimulated.
See if you can feel anything happening there,
Anything physical happening,
Maybe some heat,
Maybe it feels cool.
Just notice without moving yet.
And then bring the knees in,
Hold onto them for a moment,
You can rock from side to side to massage the lower spine,
The lower back.
And then roll onto your side,
Push up,
Shake that left arm out if you want to and then we move to the other side.
So this time you have the left leg in front,
Either at a right angle to the front of the mat or with the foot closer to the body or maybe even a bit further away,
Whatever is comfortable for you.
This leg doesn't matter so much in this pose.
The right leg goes back with the knee bent,
Bring it back as far as you can without pulling on the knee so you're feeling a stretch here.
And then we do the same thing as before,
Twisting from the bottom of the spine,
I'll explain why in a minute,
To the left.
Again,
Same thing,
You can stay on the fingers,
Go down on the hands,
Maybe go down on the elbows,
Perhaps resting them on something.
Adjust the feet,
Adjust the legs if you need to,
Especially if you're feeling anything going on in the pelvic region,
Front or back.
If that's not the case,
You might not want to twist quite so much.
Close the eyes.
So in seated twists,
We're working on twisting the whole of the spine,
Including the cervical spine,
The neck.
And when you do a twist like this,
Yoga teachers may first tell you to lengthen the spine,
Starting the twist from the bottom,
Going all the way up to the top.
The reason for that is basically because you have less and less mobility in the spine the further you go up.
There's a very low percentage of rotation in the lumbar,
In the lower part of the spine,
30 to 35 in the thoracic,
Approximately.
And then finally,
The cervical,
The neck,
Is 80-ish percent.
Don't quote me on the exact amounts.
But the main point is that there's a lot,
Lot more rotation in the neck.
So the reason that we twist from the bottom up is so that we can get the full range of motion in the spine and the neck doesn't do all the work.
Notice if you're holding any tension.
Breathe into it.
Try to soften that area.
Maybe you're tensing your bum.
Relax that area.
Relax your shoulders,
Hips,
And if you feel like you've lost the twist or the stretch here,
Then maybe twist a little bit more,
Or perhaps move the back leg back a little,
But just small movements,
No sudden movements.
Okay,
On the next out breath,
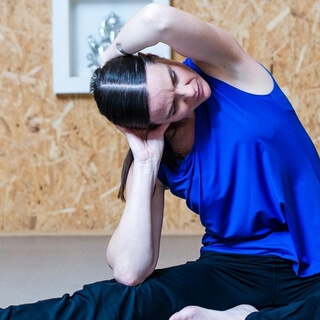
Come back to the front and again move directly into the next pose called flamingo.
Keeping the knee bent gently,
Place the right foot on the floor in front of the left leg.
Put the back of the right hand on the side of the right body.
Maybe further up,
Maybe further down,
Maybe more to the front,
Maybe more to the back.
And bring the back side of the elbow to the inside of the knee.
You may find that you need to move this leg much further out to the right here if the stretch on the back shoulder is too much for example,
And that's fine.
The front foot can also be out to the right or out to the left,
Or maybe straight in front of you.
As I mentioned before,
This leg can also be pushing against the arm a bit to give it a little weight so we can feel the stretch more if we need to.
And then the head goes over the shoulder again for the twist.
Now relax the body.
As I mentioned before,
You can also use that breath we practiced at the start to help you deepen into the pose.
Let's just try it and see if it works.
So breathe out.
And then breathe in for 4.
Holding for 4.
Breathing out for 4.
Holding for 4.
And you can continue to do this in your own time,
Perhaps feeling or imagining that you're holding the breath in the area that you're stimulating.
So in the back of the shoulder,
The back of the arm.
And when you're breathing out,
Just allow the body to relax deeper into the pose.
It can be quite hard to sit still,
We're not used to it.
But in yoga like meditation,
It can help build patience and just slow down.
And now I'll leave you in silence for around 1 minute.
So on the next out breath,
Release the arm from inside the front knee.
It could again be feeling fragile.
And this time,
Lie down on the back and without moving yet,
Notice how the body feels.
Notice any effects at all,
If there are any.
And if there aren't,
It doesn't matter,
Just notice.
And then again,
Bring the knees in.
And this time circle the knees to the right,
Circle the knees to the left,
And then shake the arms and legs as a counter pose.
And then bring the knees back into your chest and we'll move into a full recline twist.
Here,
Simply drop the knees to the right side.
It doesn't matter if they don't go all the way down.
You can put the arms out to the sides or even have them up on the floor above you,
Which tends to give a bit more of a stretch on the torso.
Then twist the upper body to the left side.
Again,
You can adjust this so that it suits you.
If you bring the knees up,
Then you've got more of a curve,
I.
E.
A stretch in the spine for example.
And if you bring them down a bit,
It's more of a back bend,
So you're compressing the tissues in the back,
Which can be also really useful for the spine as well.
It depends on what you want,
So play with the knees,
Put them where you want.
Twists are great for a number of reasons.
Really good for the digestive system.
The nervous system.
Circulation.
There are many reasons for this,
But in a general sense,
When you untwist the body after a pose,
Then fresh oxygenated blood floods in,
Invigorating all the different systems and helping them to work more efficiently.
Twists are also really good for the back.
Stretching the spinal muscles,
Of which there are many,
And creating space between the vertebrae.
You find a lot of twists in yoga,
As those of you who practice regularly know,
I'm sure.
Okay,
So on the next out breath,
Bring the arms down,
Bring the knees back to the centre,
And we're going to go directly to the other side.
So you can drop your knees to the left,
This time put the arms out to the sides or above the head again,
Palms facing up or down,
And twist the upper body to the right.
Play with the legs if you want to bring them further up or bring them further down,
You can even straighten them a bit if you like,
Or even just straighten one leg.
As long as we have the twist in the torso then I'm happy.
Use that breathing if you want to,
Holding the breath maybe where you feel the twist,
Where you feel the twist the strongest,
The front,
Back,
All sides,
And just relax deeper into that area without pushing,
Just letting gravity bring you down.
And now again,
I'll leave you in silence for around a minute and a half.
So on the next out breath,
Bring the arms down,
Bring the knees back to the centre,
And then stretch out the legs.
And now just let yourself relax into the ground,
This is the final pose,
Shavasana,
The resting pose.
And try not to rush off,
Just give yourself at least a few minutes here,
This is probably the most important pose that there is as we are allowing the body and the mind to take in the effects of the practice.
Let the legs and the arms flop out,
Maybe cover yourself with something or put on socks if you're not feeling well.
Close your eyes,
Just let the floor hold you.
I'm going to leave you here now,
And as I said please do stay for at least a couple of minutes,
And when you do decide to get up,
Then do it gradually,
Slowly,
And just take a couple of moments before you move on to the rest of your day to notice any effects,
Physical,
Energetic,
Or emotional.
Thank you for listening today,
Hope to see you again.
Namaste.