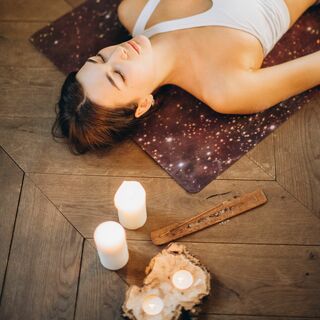
Welcome to your yin yoga practice.
Before we begin just take a moment to make sure that you have everything you need for your practice today.
You'll need a yoga mat and if you're in a cooler climate make sure you have a blanket to cover yourself with during the relaxation at the end.
You may also need to support your body with props in some of the postures.
If you have yoga blocks those are great but you can also use cushions or pillows or a folded blanket to support yourself.
So make sure that you have some of those with you in case you need them.
Yin yoga is a passive practice where postures are held for several minutes to stretch into the connective tissues.
These tissues are delicate and can be injured if they're stretched too forcefully or intensely.
It's good to be able to feel that something is happening but you should never be forcing a stretch or pushing yourself into a position and you never want to be feeling any physical pain as you practice.
Pain is a signal from your body that the position that you're in is not safe or beneficial for you so if you do feel any pain at any time come out of the pose.
You can come into a resting position until the next posture or you can move back into another posture from the class that you didn't experience any pain in.
If you have any injuries or health conditions make sure to consult with your doctor before starting a new practice.
Yin yoga can have many benefits for health and recovery but it's important that your body is suitably recovered that the stretches will benefit the tissues and won't potentially make the injury worse.
So do please check with your doctor first for your safety.
As this is an audio session I'll talk you in and out of the postures verbally but if at any time you're unsure of a posture and don't know if you're in the right position you can always pause the recording and do a quick internet search to bring up a picture.
I've included names for all of the postures so that you can easily do this if you need to.
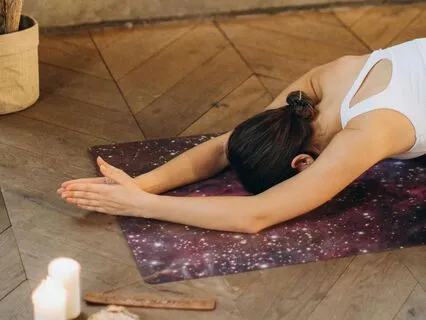
We're going to begin in child's pose so come to kneeling on your mat and bring your big toes together,
Opening your knees out towards the sides of the mat.
Sit back onto your heels and bring your chest forwards between your legs,
Taking your forehead to rest on the mat and bring your arms out in front of you.
If you would like to support yourself here you can take a block or a cushion onto your heels to sit back onto or you can support your head with a block or stack your arms and rest your forehead onto your forearms.
Relax into this position,
Bring your awareness to your breath and take some deep breaths to come into your body,
To arrive into your practice.
Notice how your breath is flowing for you today.
Watch the gentle expansion and contraction of the chest as you breathe in and out.
And as you breathe in notice where the breath wants to travel to.
Follow the breath as it flows into the parts of the body that it wants to flow into today.
Just watch.
And if there are any places that are feeling a bit more tight,
Like they're asking for some release today,
Any places that are feeling uncomfortable,
Send the breath into those places.
As you breathe in,
Send the inhalation to the tight or uncomfortable area and as you breathe out,
Allow your exhalation to carry some of that discomfort away.
And now slowly walk your hands in to come up to kneeling and make your way onto your hands and knees.
Bring your knees under your hips and your wrists under your shoulders.
From here we're going to come into half melting heart pose.
So now take your right arm and bring your right forearm parallel to the top of the mat.
Keeping your hips above your knees,
Bring your forehead down to rest on the right forearm and take the left forearm out to a diagonal angle.
Relax into the posture here.
Scan over your body to see if there are any areas that you can relax a little more.
Perhaps your thighs or your shoulders.
And if there are any areas that are feeling tighter or more uncomfortable,
Breathe into those places.
Allow the exhalation to assist with the release.
We'll just stay here for a few more breaths.
Bring your left hand under your left shoulder and press into the left hand to lift yourself up.
Bring the right hand under the right shoulder,
Coming back onto your hands and knees.
And let's just take some cat-cows here as a counter-stretch.
Inhale to drop the belly towards the mat.
Bring the chest through the armpits and look up.
Exhale to round the back.
Bring the chin into the chest.
Do a few more of these,
Inhaling to look up.
Exhaling to round inwards.
And let's come into half-melting heart pose on the opposite side.
This time bring your left forearm parallel to the top of the mat.
Bring your head to rest on the left forearm and take your right arm out towards the right corner of the mat.
Relax into the posture.
Observe the new sensations that arise for you on this side.
Keep breathing into any tension.
We'll just take a few more breaths here.
And bring the right hand under the shoulder to push yourself back up.
We'll do some more cat-cows here.
Inhaling the chest forwards,
Looking up.
Exhaling to bring the chin to the chest and round the back.
And now come to sitting on your mat for shoelace.
There are a few different options for this one,
Depending on how your body's feeling today.
If it feels better for you,
You can take a half-butterfly by straightening the left leg and taking the right foot to the inside of the left thigh.
You can support your right thigh here with a block or a cushion if that feels best for you.
The next option is to rest your right foot onto the left thigh.
If you do this,
Your right knee will be up in the air.
So place some support under the right thigh so that it can relax down.
For half shoelace,
Bring the right knee over the left knee,
Taking the right foot to the outside of the left hip.
And for full shoelace,
From here bring the left foot around to the outside of the right hip.
We're going to be here for a few minutes,
So choose the option that feels best for your legs,
That you'll be able to stay in and that you can always change position if it starts to feel too intense.
Wherever you are now,
Take a breath in to lift the spine up to straight and exhale to fold forwards,
Letting the head drop towards the legs.
As you fold,
A point will come when it suddenly starts to feel more intense,
As if your body is asking you to stop.
When you feel that place arrive,
Stop there.
This is your edge and it's exactly where you need to be to get the most benefit from the posture.
Scan over your body to see if there are any places that you can relax.
The thighs,
The hips,
The shoulders.
Yin yoga isn't meant to be comfortable.
When we're at our edge,
We're feeling just enough discomfort to allow us to get some results without causing us any injury or damage.
If we're too comfortable,
Nothing happens.
And if we go too far into discomfort,
We can get hurt.
So we want to always be at that place where we're feeling just enough discomfort to be able to benefit from it.
And as we practice,
We can learn to make friends with that uncomfortable feeling that is inevitably going to come up in our lives.
As the practice overflows into our daily lives,
We can become more comfortable with being just outside of our comfort zone so that we can evolve and grow gracefully.
Walk the hands in to bring your spine back up to straight.
And keeping your legs as they are,
We're going to move into a twist.
So bring your left hand to rest on your right knee and gently turn your upper body towards the right until you feel your edge again.
Remember this is a yin twist,
So we don't want to force anything too far.
Once you arrive at your edge,
Relax here.
Relax your shoulders.
Relax your hips.
Turn your head to look over the right shoulder and let your eyes drift towards the right.
Keep sending the breath into any tension or discomfort.
And slowly unwind.
Bring your upper body back to the centre.
Unwind your legs and bring your feet to the mat.
And just rock the knees from side to side here.
Take some breaths to observe any after effects from those postures.
And we'll go to the other side.
Sometimes our two sides can be very different,
So find how you want your legs to be on this side.
Either taking the right leg to straight and bringing the left foot to rest at the right thigh or taking the left foot to the top of the right thigh,
Supporting the left thigh with a block or a cushion.
Or bring the left leg over the right leg,
Stacking the knees and taking the left foot to the outside of the right hip.
Or for full shoelace,
From here bend the right knee and bring the right foot to the outside of the left hip,
Keeping the knees stacked.
When you're ready,
Inhale to lift the spine and exhale to fold forwards.
Make sure that your hips and thighs are relaxed,
That the shoulders are relaxed.
We'll just stay here for a few more breaths.
And slowly walk the hands in to come back up.
And keeping the legs as they are,
Let's move into our twist.
Bring the right hand to the left knee and take the left hand behind you.
Turn your upper body towards the left,
Taking your head to look over your left shoulder,
Pausing when you reach your edge.
Relax into the posture.
Keep sending the breath into any areas of discomfort.
And slowly unwind.
Bring the upper body back to the centre.
Release the legs,
Bring the feet to the mat and rock the knees from side to side,
Observing any after effects from those postures.
And now make your way down to lying on your back.
Bring your feet to the mat at hip distance apart,
So your knees are facing the ceiling.
Next we're going to come into reclining pigeon.
Bend your right knee and bring your right foot to rest on the left thigh.
If this is already giving you some intensity,
You can stay here with the left foot on the mat.
Or to go deeper,
Bring the right arm between the legs and clasp the hands behind the left thigh.
Gently draw the left thigh in towards you until you reach your edge.
And relax into the posture here.
Relax your thighs.
Relax your hips.
And observe the new sensations that come up in this new position.
Keep breathing into the discomfort.
We're going to stay here for another minute.
From here we'll move into a twist.
So now bring the right leg over the left leg,
Crossing at the thighs.
And you have the option to keep the legs like this or to hook the right foot behind the left ankle.
Take your left hand to the outside of the right thigh and bring the legs down to the mat on the left,
Using your hand to anchor the legs down.
Bring the right arm up and out to a diagonal angle.
You can keep your head looking straight up or turn to look over your right shoulder.
Relax into the posture.
Just taking a few more breaths here.
And slowly make your way out.
Bring your left hand to the outside of the legs to push the legs back up to the centre.
Unwind the legs.
Bring the feet to the mat at hip distance apart and let the knees rest together.
Take some breaths here to observe.
And we'll go to the other side.
So now bring your left foot to rest on your right thigh,
Either keeping the right foot on the mat or taking the left hand between the legs to clasp the hands behind the right thigh.
Gently draw the right leg in towards you until you reach that edge.
And relax here.
Continue to breathe into any discomfort.
And from here,
Moving into your twist,
Release the arms and bring the left leg over the right leg,
Hooking the left foot behind the right ankle,
If that feels best for you.
Bring your right hand to the outside of the left leg and bring the legs down to the mat,
Using the right hand as an anchor for the legs.
Take the left arm up to a diagonal angle and you can keep the head looking straight up or turn to look over the left shoulder.
This is your final posture before the relaxation.
Slowly make your way back out.
Bring your legs back to the centre and your arms back to your sides.
Unwind your legs and bring the feet back to the mat,
Letting the knees drop in together.
And take some breaths here to feel any effects from those postures.
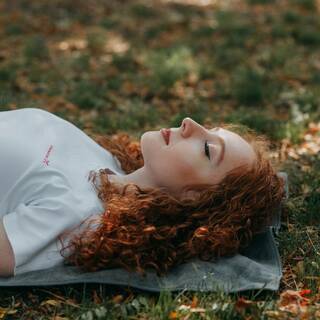
And it's time for your relaxation.
You're welcome to stay here with your knees together if that feels best for you today,
Or otherwise straighten your legs into Shavasana,
Taking the feet to a little wider than hip distance apart.
Bring your arms to your sides with the palms of your hands facing upwards.
Close your eyes and feel your body settling into the mat.
This is the most important part of your practice,
Where you integrate all of the work that you've done.
And for these next few minutes,
Nothing is required of you but to rest here and enjoy the effects of your practice.
Slowly begin to reawaken your body.
Make some small movements with your fingers and your toes,
With your ankles and your wrists.
And stretch your arms up over your head and for a long stretch down the sides from your hands to your feet.
Bend your knees,
Bring the knees into your chest and rock from side to side here,
Feeling the lower back massaging into the mat.
And when you feel ready,
Roll over to one side and make your way back up to sitting.
Come to sitting with your eyes closed and take a moment to feel into your body,
To notice any effects from your practice and to notice how you are feeling.
And when you are ready,
Slowly open your eyes.
This brings us to the end of the practice.
Thank you for joining me.